Export your products from your Magento website into csv, txt and xml data feeds for any shopping engine or market place! This extension includes all Google Shopping features and 19 sample templates.
Mass Order Export allows you to create xml, csv and txt order files from your Magento admin panel and export them to any CRM application or order management software/platform. Any kind of export file types can be easily customized.
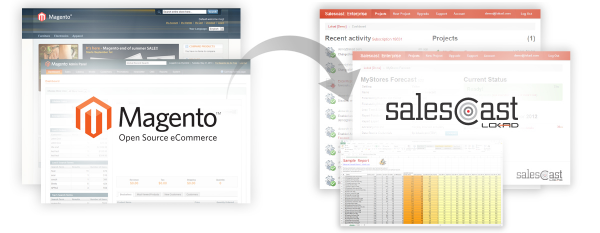
SalesCast Connector allows you to automate the data feed generation and the file upload into your Salescast account from your Magento back office. This Package includes Data Feed Manager and Orders Export Tool in a special edition.
The web application Salescast optimizes your inventory levels by using data on your business activity, current stock levels, and open orders. It is therefore important to send a daily.TSV file with this data to the Lokad service platform.
Salescast Connector completely automates the uploading of the data to the Lokad service platform. It works in conjunction with both the Data Feed Manager and the Orders Export Tool components.
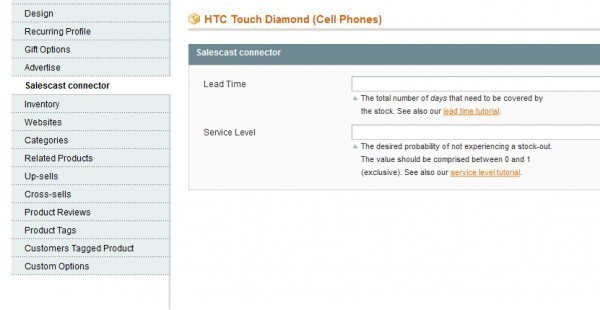
Salescast Connector also allows the Leadtime and Servicelevel variables to be defined and adjusted for an individual product or for the entire product catalog.
Discover Salescast
The web app Salescast delivers two key data for your inventory optimization:
to know when to order
to know how much to order
The quantities suggested by Salescast rely on advanced statistics as delivered by the Lokad forecasting technology. Salescast saves you money with fewer stocks and fewer stock-outs; but also Salescast saves you time when reordering to your suppliers.
Open a Salescast account
Salescast comes with an Express subscription free of any charge up to 10,000 products. The Salescast Connector lets you take advantage of this offer from your Magento back office.
Note that you will need your email/password to set up the "Salescast Connector".
How to use Salescast Connector on Magento
STEP 1: Install Salescast Connector
Following the purchase, you will receive a confirmation email with your log-in details and a password to access your Wyomind account and download Salescast Connector.
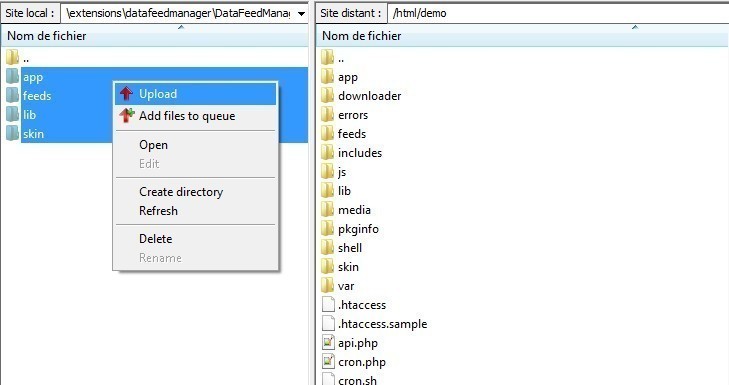
Download the zip file from your Wyomind account.
Unzip the file.
Copy all the files in the folder.
Paste all the files into the Magento web site root directory.
Log-out of the Magento admin account.
Re-log-in to the Magento admin account and empty the cache.
Follow the instructions on the screen to activate your license.
The installation is now complete.
Once Sales Connector is installed, two new tabs will appear in the Magento admin menu under:
CatalogData Feed Manager
SalesOrders Export Tool
STEP 2: Configure Salescast Connector
Salescast Connector allows two key variables, Leadtime and Servicelevel, to be defined and adjusted to maximize the efficiency of Salescast. These variables can be defined and adjusted for an individual product or for the entire product catalog.
For more information about the two variables, please have a look at the Lokad reference documents:
To configure all products using a default setting, from Magento go to: SystemConfigurationWyomindSalescast ConnectorSettings
Individual product settings
To configure an individual product with unique settings, from Magento go to: CatalogManage productsEditSalescast connector
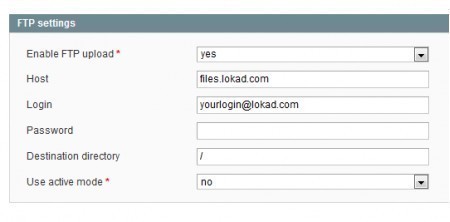
FTP upload setting
Before uploading any data files to Salescast, the FTP settings needs to be configured for product data. For this:
Go to: CatalogData Feed ManagerEdit Lokad_items.tsvFtp upload
Enter your account details: login and password
Change the destination directory if necessary.
Do the same for Orders Export Tool:
Go to: SalesOrders Export ToolEdit Lokad_orders.tsvFtp upload
Enter your account details: login and password
Change the destination directory if necessary.
STEP 3: Plan a scheduled task to update Salescast data
The two export components, Data Feed Manager and Orders Export Tool, are both configured to export data once a day by default (Lokad_Orders.tsv at 11:30PM and Lokad_Items at 3:00 AM).
The times for export can be simply changed by selecting the appropriate export profile in the Scheduled Tasks tab of Data Feed Manager and Orders Export Tool extensions.
Note that the main cron task targeting cron.php must be active on the server.
For more information about cron tasks, please have a look at the following reference articles:
A license is valid for an unlimited period of time on one single Magento installation.
If you use more than one Magento installation, you will have to buy a separate license for each one.
If you run several domains on the same Magento installation, you will need only one license for all of them.
Although your license doesn’t have a limited period of validity, your support period does. By purchasing an extension, you’ll be granted a 6-month support period for free. Passed this period, you will have to renew your Support plan (see FAQ: How to extend my support period?).
One license is valid for an unlimited period of time on one Magento installation only.
It is possible, however, to extend or transfer your license in 2 cases:
If you'd like to add your testing environments to your license. In this case, it is possible to extend your license to an unlimited number of domains for free. For example mywebsite-staging.com or mywebsite-dev.com
If you want to transfer your license to another live domain. In that case, the support period for your license must still be active.
To be able to use Salescast Connector on both your production and testing environments, follow the instructions below:
From your Magento admin panel, enter your current Activation Key in: syStemCONFIGurationWYOMINGYOUR EXTENSION
Save your configuration.
Now that you can use Salescast Connector on your production environment, repeat the same steps as above on your testing environments.
The only difference this time: a notification will appear in your Magento admin.
You will be given a choice between:
buy a new license now
add this domain to my license
Click on Add this domain to my license.
A transfer request will then be sent to our team within an hour.
Once the request is taken care of, you will receive a confirmation email.
If your transfer request is accepted, you can use Salescast Connector on both environments at the same time.
The order in which you activate your license on your domains does not matter. You can start with your staging/dev/local environment or with your live domain, the process will be the same.
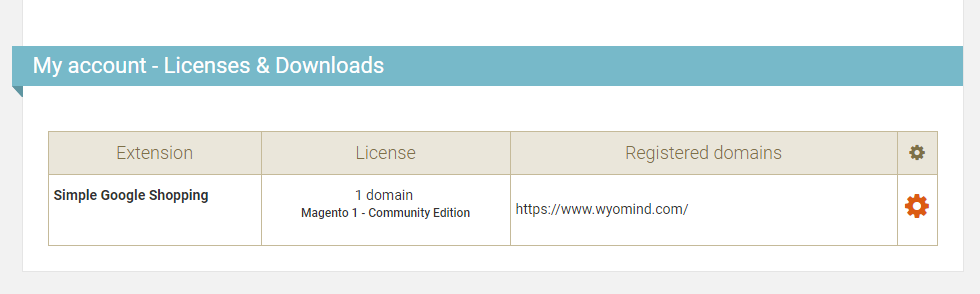
In order to download Salescast Connector, log into your Wyomind account:
Go to: my accountLicenses & downloads
Click on the icon next to Salescast Connector.
A new window opens.
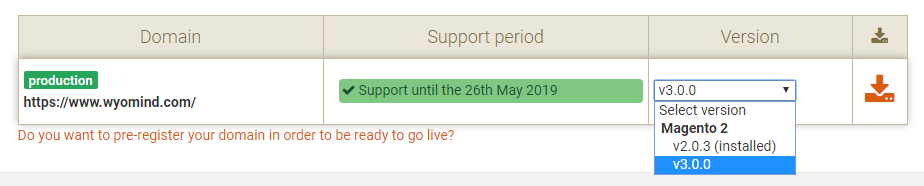
Choose the version of Salescast Connector. You will be able to choose the most recent version of Salescast Connector (for both Magento 1 and Magento 2).
When purchasing an extension from wyomind.com, you benefit from a lifetime upgrade. You can at any time download the latest version of the extension directly from your account.
To upgrade Salescast Connector, follow the steps below:
Go to: my accountLicenses & Downloads
Click on next to Salescast Connector.
Choose the latest version of Salescast Connector (for Magento 1 and Magento 2).
Click on download .
Install the new version of Salescast Connector to update your Magento admin.
Before installing Salescast Connector, you’ll have to:
Backup your Magento installation in: systemtoolsbackups
Disable the compiler in your Magento admin panel if it’s not already disabled: systemtoolsCOMPILATIONS
Refresh your cache in: systemselect cache typeactionsrefreshsubmit
Now you can install Salescast Connector:
Download Salescast Connector (zip file) from: my accountmy downloads Refer to FAQ here: Extensions download
Once Salescast Connector is downloaded, open the folder and unzip it.
Copy the content of the unzip folder and paste all files and directories in your Magento root directory (the folder content can vary according to the extension but it generally includes app, lib and skin folders).
Once your installation is complete, don't forget to enable the compiler back (if it was already enabled before the installation) and run compilation process.
Refresh your cache, logout from your admin panel and log back in right after.
Next step is to activate your license, to do so, click here: Extension activation
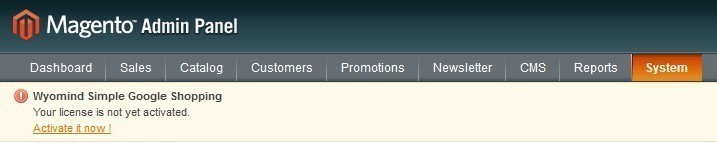
Once Salescast Connector is installed, you have to activate the license:
Go to your Magento admin panel. A message pops up at the top of the page.
If the message doesn't appear then you must check that:
Wyomind's License Manager has not been removed from your installation. Wyomind's License Manager is enabled in: app/etc/modules/Wyomind_Licensemanager.xml The HTML output for Wyomind_Licensemanager and/or Adminhtml_Notification are not disabled in your system under: system configurationadvancedadvanced
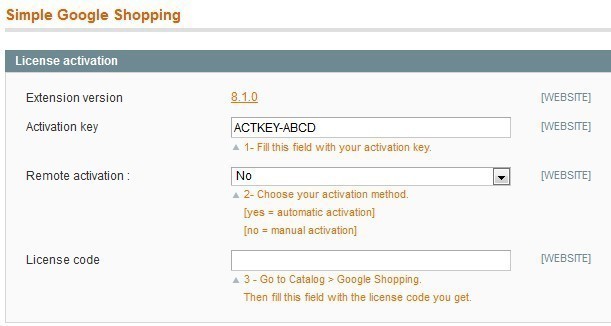
Copy your activation key.
You can find your activation key in 2 different places: - In the confirmation email that you received after purchasing Salescast Connector - In your Wyomind account:MY ACcount My downloads, select Salescast Connector and click on . A new page opens where you'll find your activation key (see below).
In your Magento admin go to: SysteMConfigurationWyomindYour extension
Paste the activation key in the Activation Key field and choose between the automatic (yes) or the manual (no) activation method: - By choosing Yes, the connection to Wyomind license server will be automatic. - By choosing No, you will have to log on to Wyomind license server yourself.
Save the configuration.
Clear your caches.
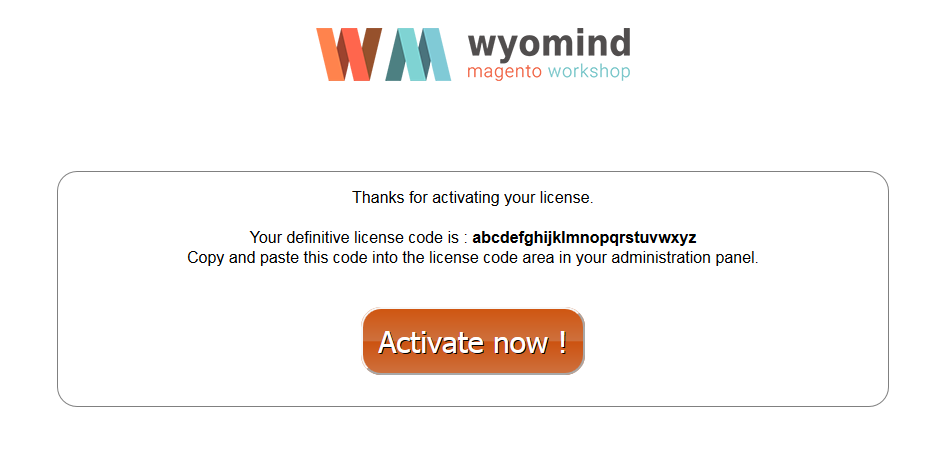
A message appears at the top of your admin panel: Activate it now! Click on that link.
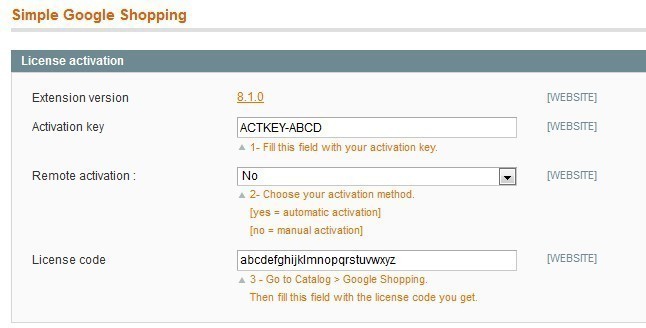
Copy and paste the license code in the License code field from your admin or simply click on Activate now!
Finally, refresh your cache, log out and log back in straight after, to complete the installation.
To activate the license of an extension that includes other modules, you’ll have to repeat the steps described above for each extension, using the corresponding activation keys (each module has its own activation key).
We use both modules included in salescast connector everyday, whilst we no longer use Lokad we have repurposed both modules to help us with our daily tasks, never been an issue and allowed use to customise our feed in house even with complex business logic, data feed module is the most flexable feed module available and even allows inline php functions. Great module bundle!
17th January 2018
Used on Magento 1
We have used this module on magento 1 and it proved useful, as we have upgraded to magneto 2 we have purchased again. Never really had a problem and hope the same this time.
14th December 2016
Very helpful tool
I use Datafeed manager with Salescast connector and Order Export tool to export data into Lokad salescast system over two years. This solution works for me other 2 years and really help to cast our sales for short term period and keep our stocks up to date. Thanks for great module

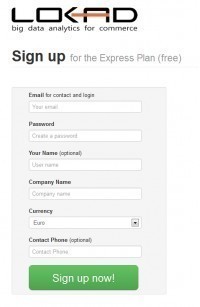 If you're not registered already, sign-up in 60s at https://hub.lokad.com/register.
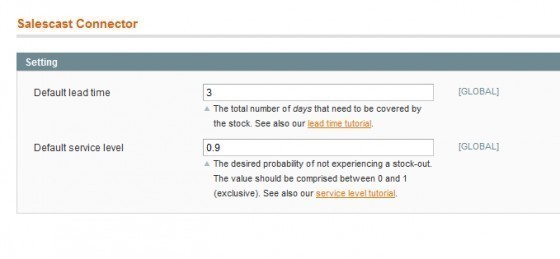


 We use both modules included in salescast connector everyday, whilst we no longer use Lokad we have repurposed both modules to help us with our daily tasks, never been an issue and allowed use to customise our feed in house even with complex business logic, data feed module is the most flexable feed module available and even allows inline php functions. Great module bundle!