Mass Stock Update allows you to update all your product stocks in Magento in no time thanks to CSV and XML files available from your website's server, from remote servers through FTP, HTTP or a Webservice.
How to configure Mass Stock Update
Configure Mass Stock Update in a general way
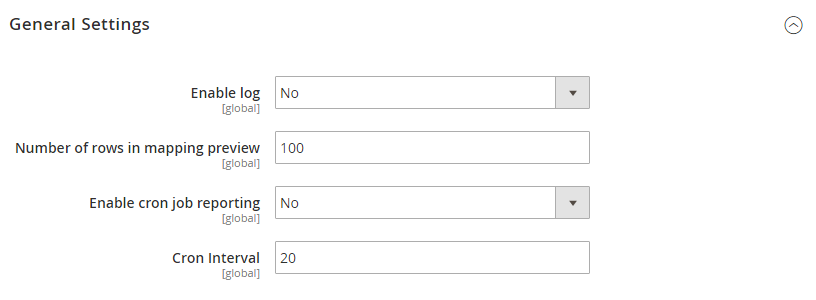
General settings
To configure Mass Stock Update in a general way, you have to go in:
StoresSETTINGSConfigurationWYOMINDMass STOCK UPDATE
Enable log
 The file is named Wyomind_MassStockUpdate.log.
Stores Configuration Advanced Developer Logs settings
M2E Pro update
If disabled, the module will only notify M2E Pro that there is an update if the price or the quantity changes.
Number of rows in the mapping preview

Cron job reporting
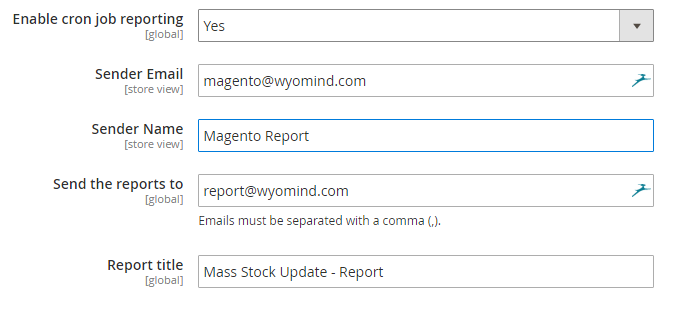
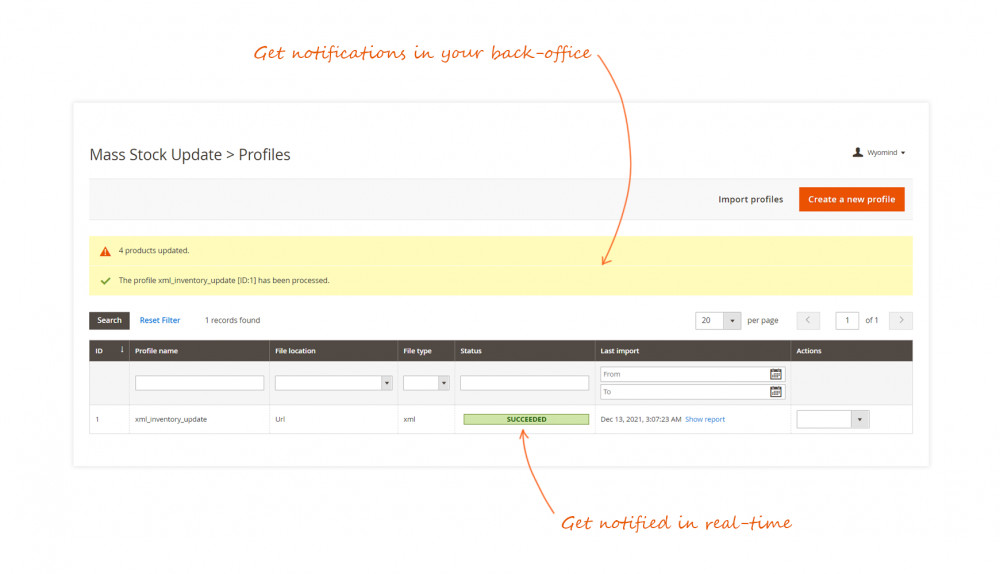
Mass Stock Update includes a reporting tool that notifies you each time a profile runs, and so if an error happens.
- Enable cron job reporting
Allows you to define whether you want to enable the reporting or not. - Sender Email
Type the email of the sender. - Sender Name
Define the name of the sender. - Send the reports to
Specify the email addresses to which the report must be sent. Emails must be separated with a comma (,). - Report title
Define your own title for the report.
Cron interval
By default, cron tasks can be scheduled for each period of 30 minutes.
If you need a more precise hour, you can change that interval in the Cron interval field.
Create an update profile in Mass Stock Update
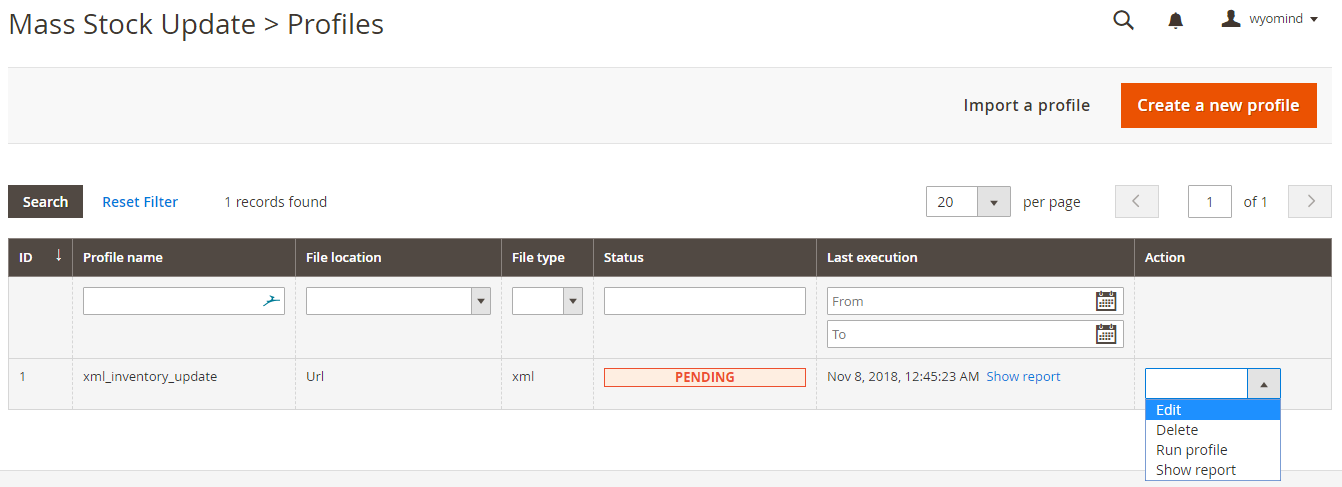
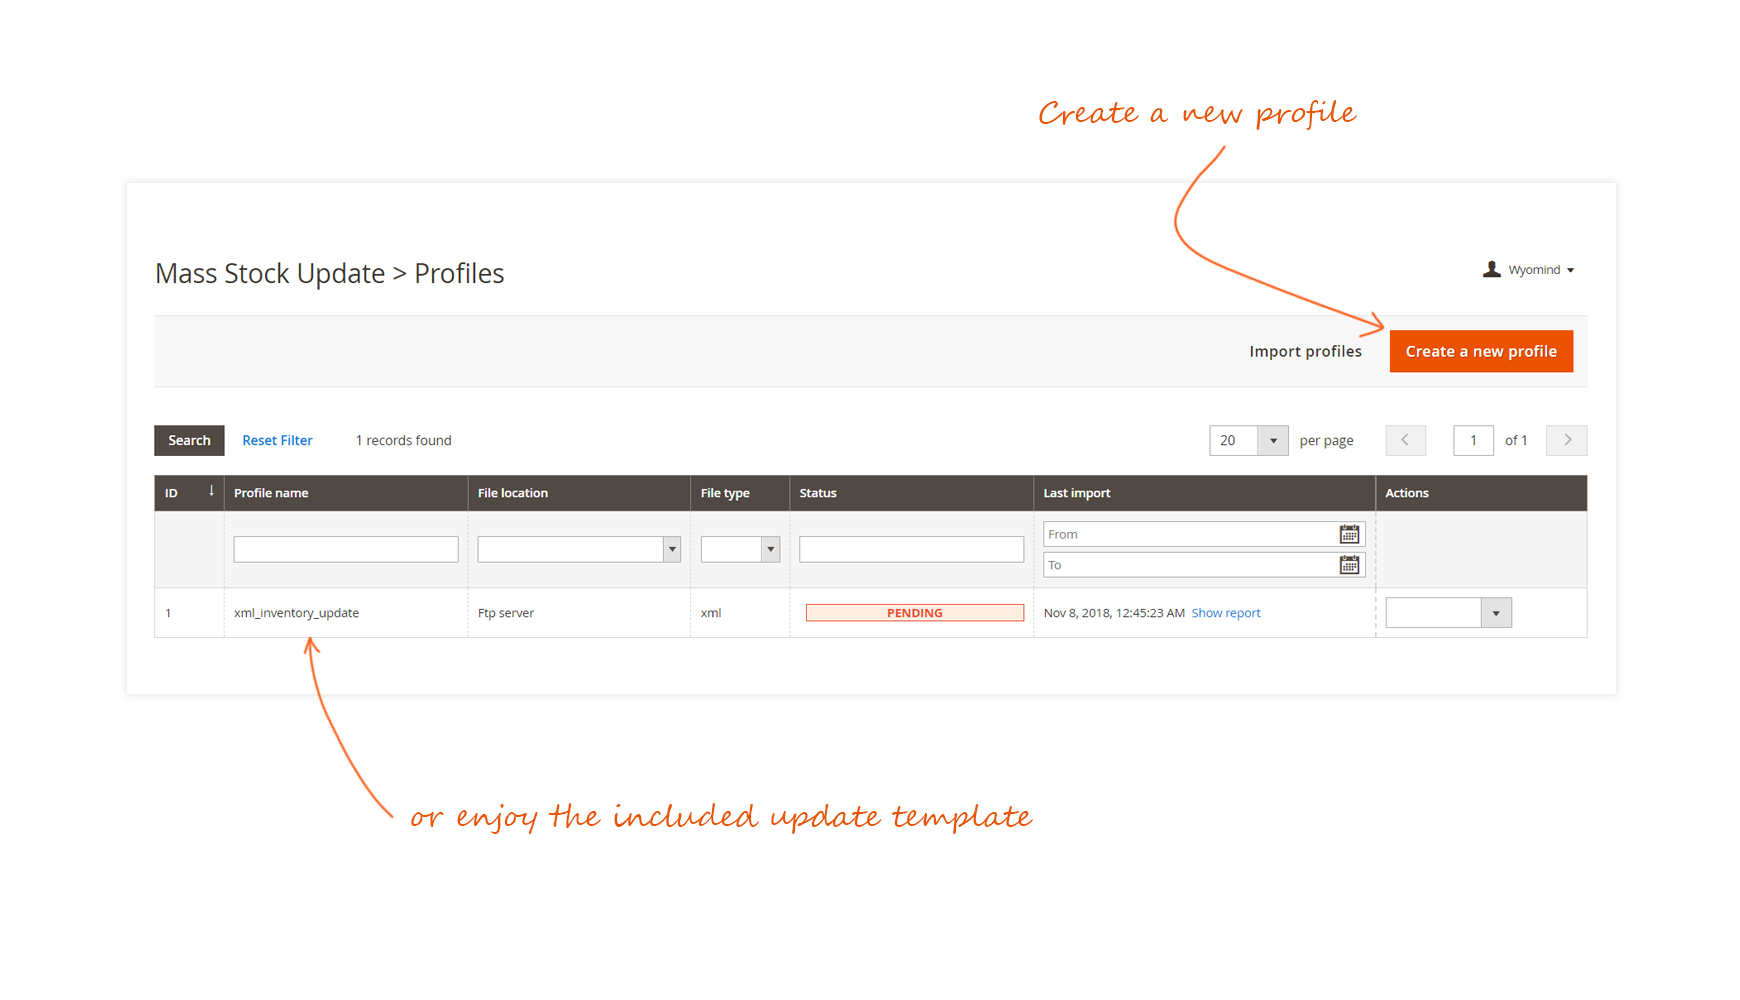
To update Magento stocks, you can edit a sample profile or create a new one by clicking on Create a new profile from:
SystemData TransferMass Stock Update
Black Box
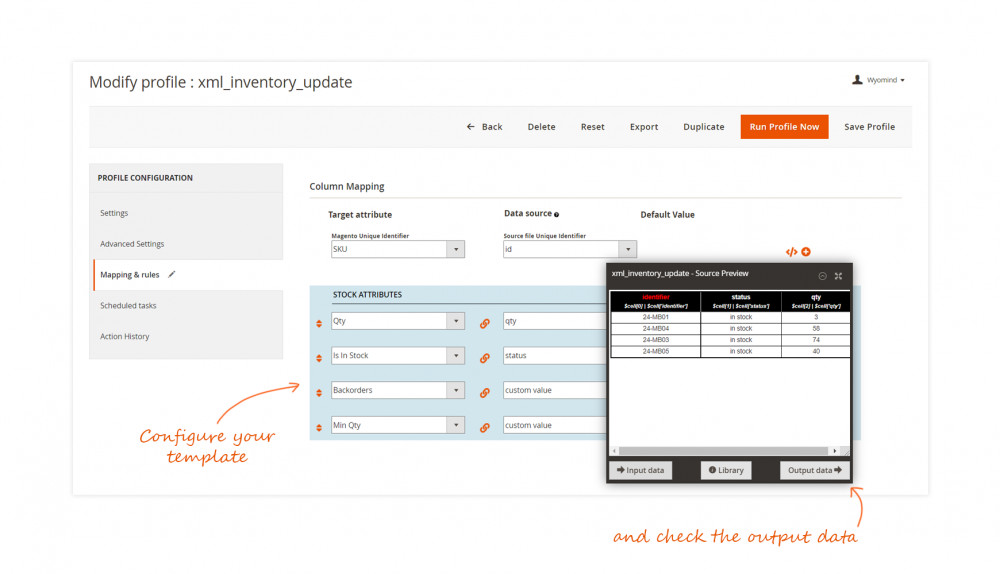
The black-box is a tool that will help you configure your mapping seamlessly. It is composed of 3 major features.
Input Data
Library
Output Data
Settings
In this section, you will be able to define the source of the data.
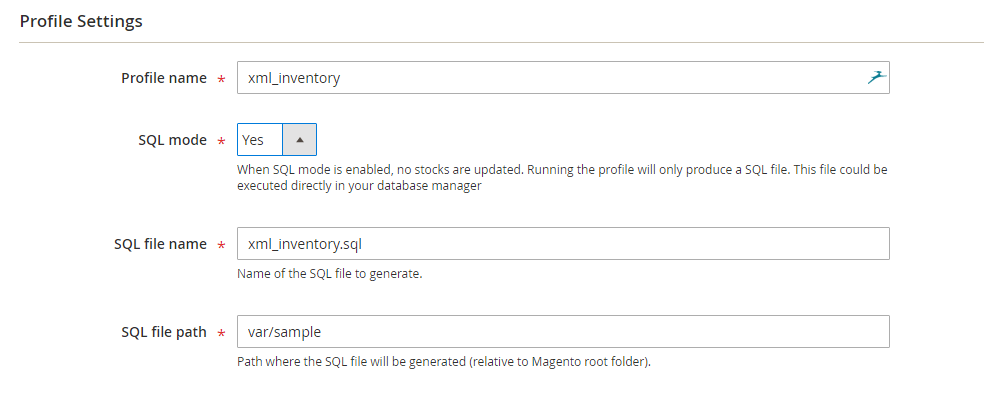
Profile settings
- Enabled
You can enable/disable the profile.
Note that the profile is disabled by default when it results from a duplication. - Profile Name
Only alphabetic and number are allowed + hyphens (-) and underscores (_).
Profile's name must be unique. - SQL mode
When SQL mode is enabled, no data are updated. Running the profile will only produce a SQL file. This file could be executed directly in your database manager.
If you activate SQL mode, you'll need to fill in several fields: - SQL file name
Name of the SQL file to generate.
XML_sample.sql - SQL file path
Is the path where the SQL file will be generated (relative to Magento root folder).
var/sample
- Filter lines
Leave empty to preview all lines.
Type the numbers of the lines you want to import, making sure to separate each line or range with a comma (,):
e.g: 2,4,6,8,10
means lines 2,4,6,8,10 will be imported
Use a dash (-) to denote a range of lines:
e.g: 8-10
means lines 8,9,10 will be imported
Use a plus (+) to import all lines from a line number:
e.g: 4+
means all lines from line 4 will be imported
Note that you can combine all those options. For example, to import lines 2,6,7,8,9,10,15,16,17,...:2,6-10,15+
File Location
This section allows you to specify where the source data file is stored and what is the file path. Note that you won't be able to save the source file path if the path is invalid.
You have several options:
- Magento File System
The file is stored in the Magento root directory or a subdirectory of the Magento root directory.
The file path is relative to Magento root folder.
/directory1/directory2/file.csv - FTP server
The file is stored on a remote server available from FTP orSFTP.
The file path is relative to the FTP user root folder.
You can also use FTPS (SSL over FTP) for downloading the import file. - URL
The file is stored on a remote server available from HTTP or HTTPS.
If you are using a specific port, you can use the below format:The file path is the URL of the file.
http://www.website.com/Inventory/AvailableInventory
If you are using HTTP authentication, you must add the login and the password before the URL in the below format:
http://login:[email protected]/Inventory/AvailableInventory
http://login:[email protected]:port/Inventory/AvailableInventory - Web service
The file is available on a remote server accessible as a web service.
The extension uses the CURL PHP library to connect the web service.The file path is the URL of the web service.
You can provide the web service with a login/password couple and any parameters formatted as URL parameters, as follows:
parameter1=value1¶meter2=value2¶meter3=value3 - Dropbox
You can generate your token from your Dropbox account https://www.dropbox.com/developers/apps
The file path is the URL of the dropbox service.
File Type
Allows you to specify the file type used for the update, XML, JSON, or CSV.
- File type
You have the choice between CSV, XML, and JSON files.
For CSV files, define:
- Column separator
Define the column separator. - Text delimiter
Select the text delimiter. - The first line is a header
Specify when the first line is a header. - Magento export file
Magento default export files are made of empty rows with values related to main rows, activating this option will merge the values into the main rows.
For XML and JSON files, define:
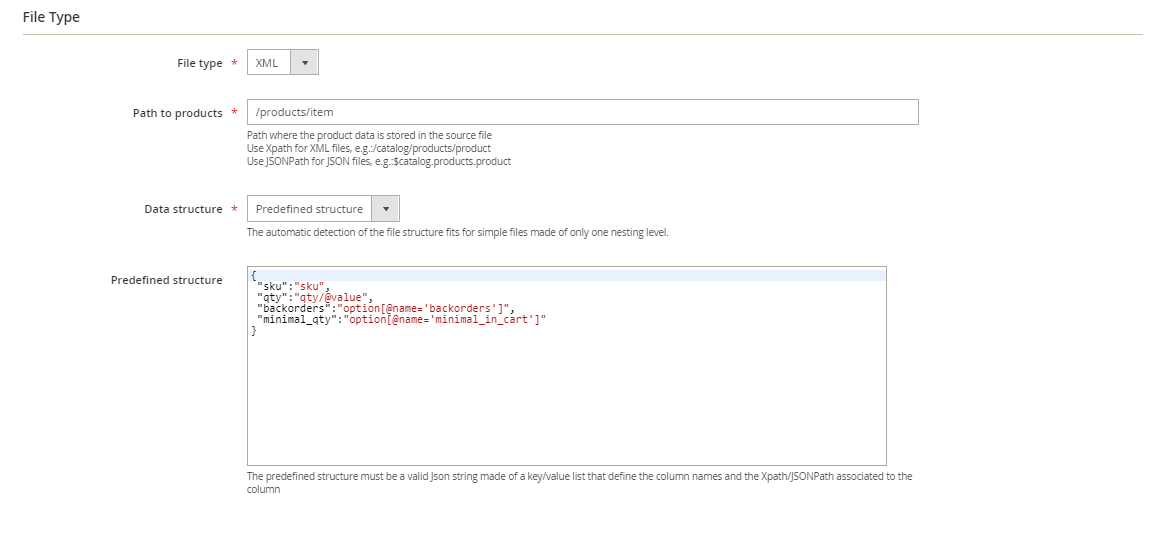
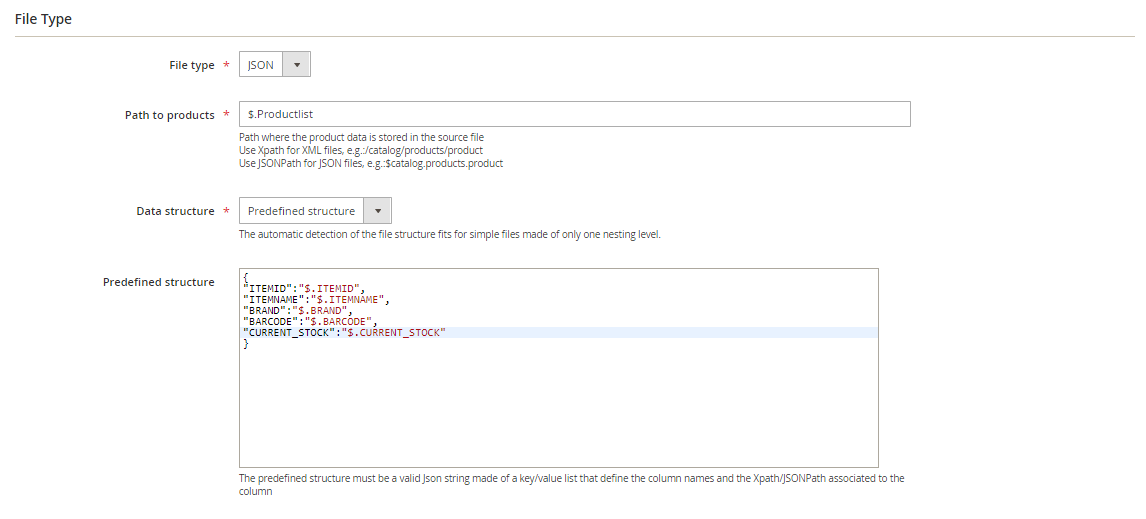
- Path to products
Fill in the path that targets the products. The path is case-sensitive.
See how to define the path to products for your XML or JSON files. - Data structure
You have two options: Automatic detection or Predefined structure
The automatic detection fits for simple files made of only one nesting level such as the above file sample.
If you've selected the Predefined structure, see how to define your own file structure for your XML or JSON files.
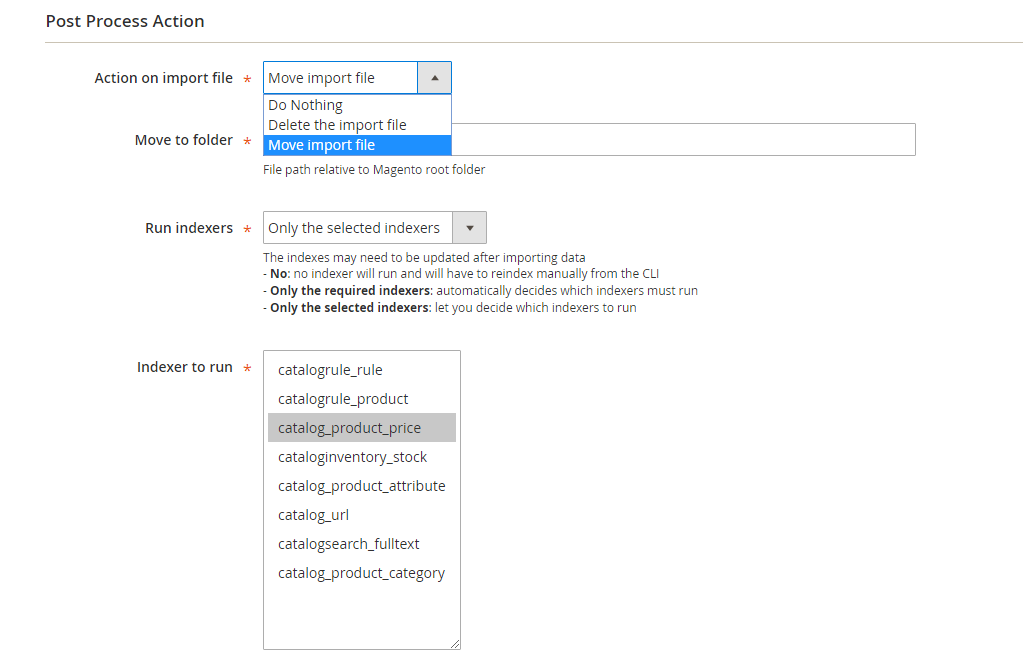
Post Process Action
- Action
Do Nothing
Delete the import file
Move import file - Move to folder
Define the file path where you want to move the import file, relative to your Magento root folder.
Note that the above option is only available for update files locally hosted in your Magento File System and in FTP server. - Run indexers
You can choose to run the indexers after the import.
You have the possibility to run only the required indexes or to select the ones you want to update. For example:
catalog_url
catalog_product_priceIf the profile takes too much time to load, you can disable the indexers.
Advanced Settings
Stock Settings
From the Stock Settings, you can define:
- Automatic stock status update
You can choose to automatically update the stock status (in stock / out of stock). - Use relative quantity update
Quantity will be added/subtracted to/from the current quantity.
Mapping & Rules
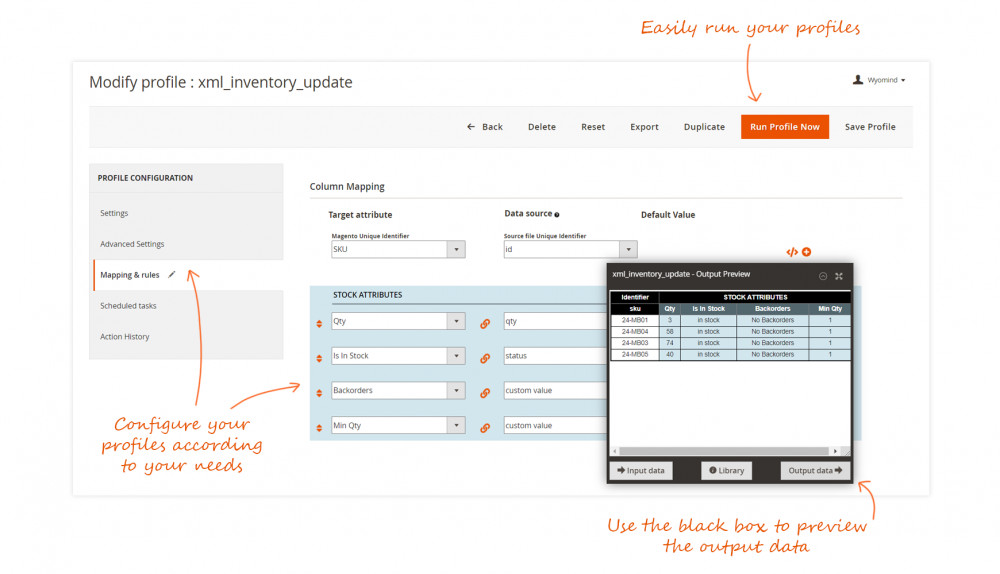
In this section, you can map each column of the file with one of the stock attributes.
Column Mapping
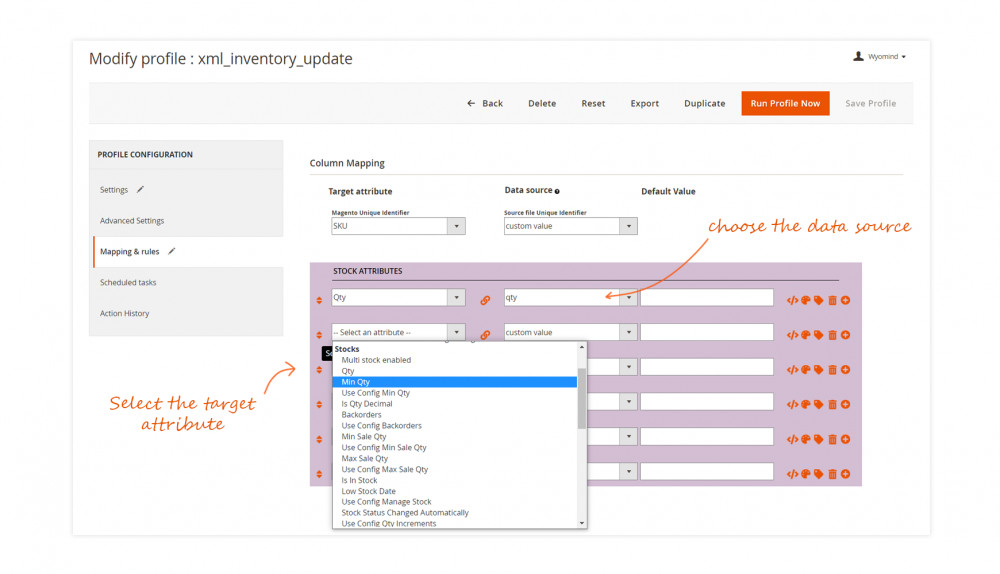
- Target Attribute
Select the target attribute from the ones available in your system.
You can find all the attributes grouped by type in our documentation.
The first line is where you define the identifier of your products. The identifier must be unique.
SKU - Data source
In the Data source, you can define the attribute source that matches with the target attribute from your source file.
id - Default value
Sometimes, some columns can be missing. For example, when updating all stocks, the file does not necessarily include all stock attributes (backorders, minimum quantity in the cart...). In that case, you can choose custom value in the Data source and apply a default value.
yes
QUICK OVERVIEW OF THE INTERFACE
- Add as many columns as you want by clicking on + Add a new row. In many cases, the update file may contain more columns than necessary; you don't need to add these columns and match them.
- DeletE a row easily.
- Change the order of each row using the drag and drop.
- Deactivate a line while conserving the settings by clicking on the link symbol.
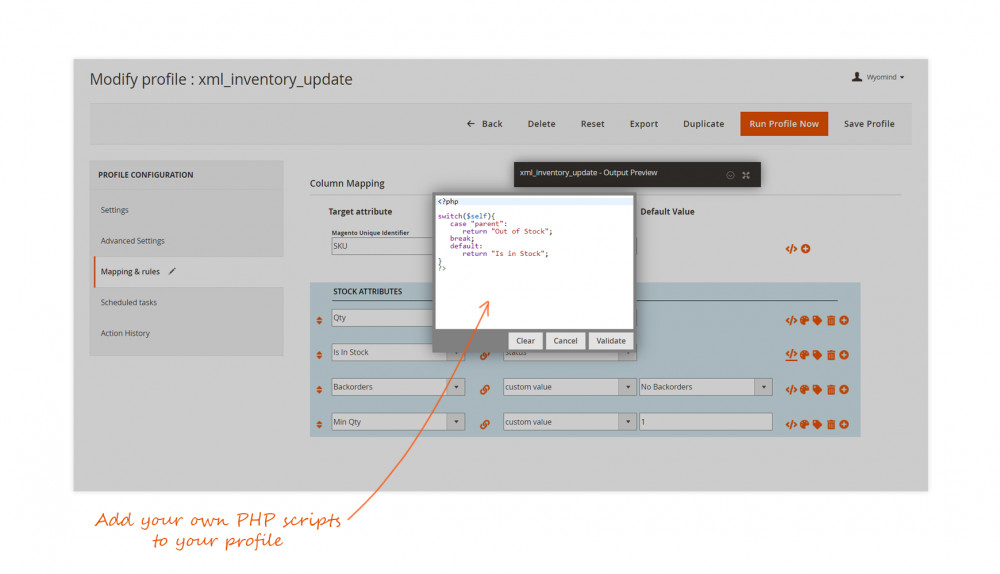
- Add your own custom script </>. These scripts can be previewed in the output. Note that when there is a script filled in, </> is underlined.
- Apply the color of your choice to the row.
- Apply a label to the row.
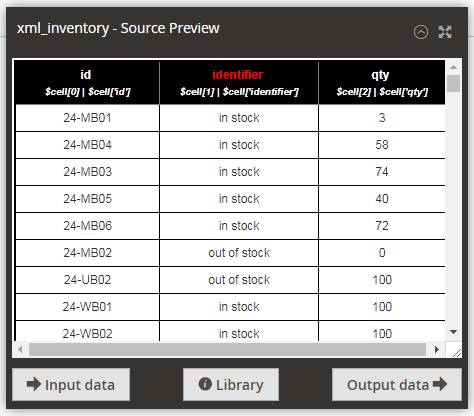
- Preview your file by clicking INPut Data.
- Find all the attributes grouped by type in the Library.
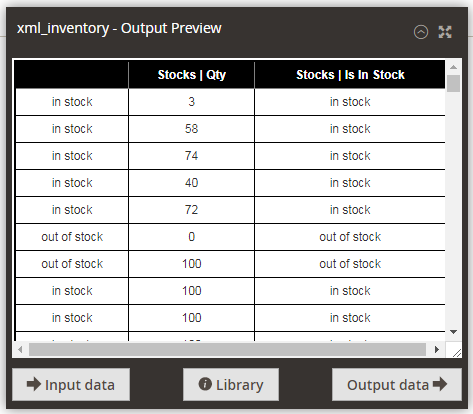
- Check the data as they'll be updated by clicking Output Data.
Scheduled tasks
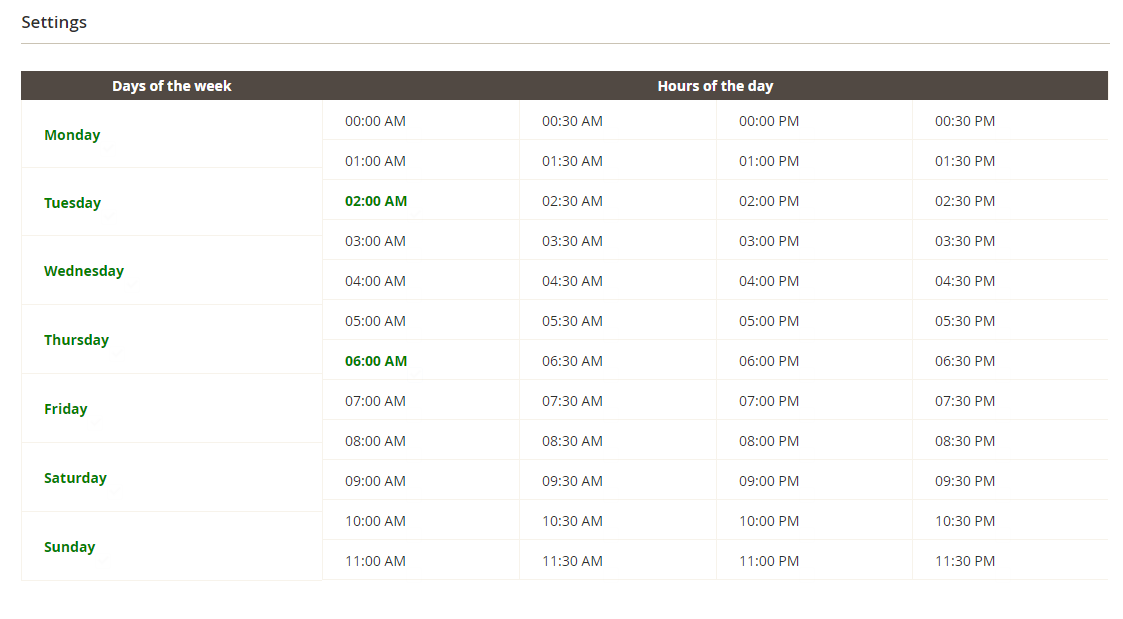
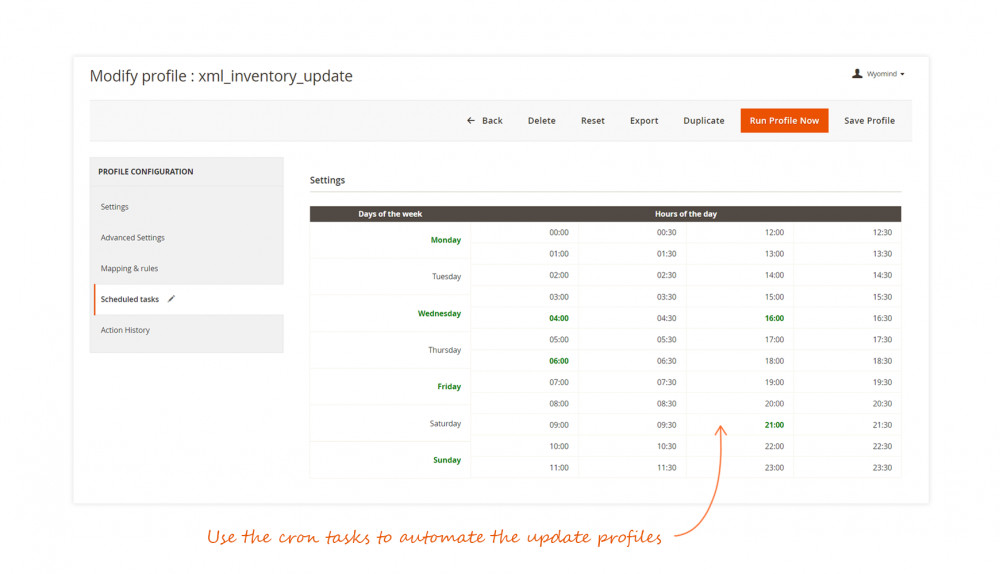
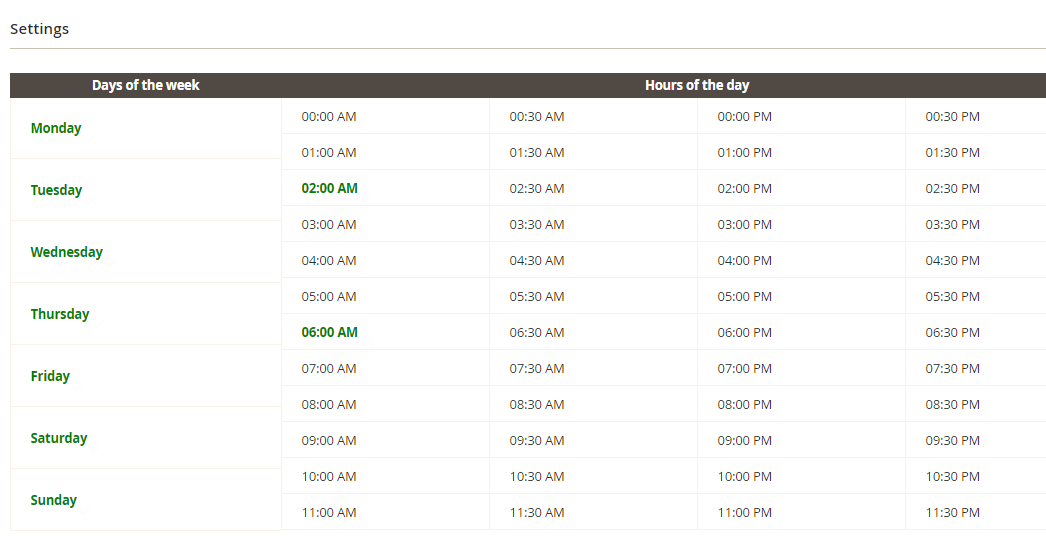
You can schedule the profile to be executed for all days of the week and with a minimum interval of 30 minutes between each execution.
You have the possibility to change the cron task interval from the General Settings tab.
Action History
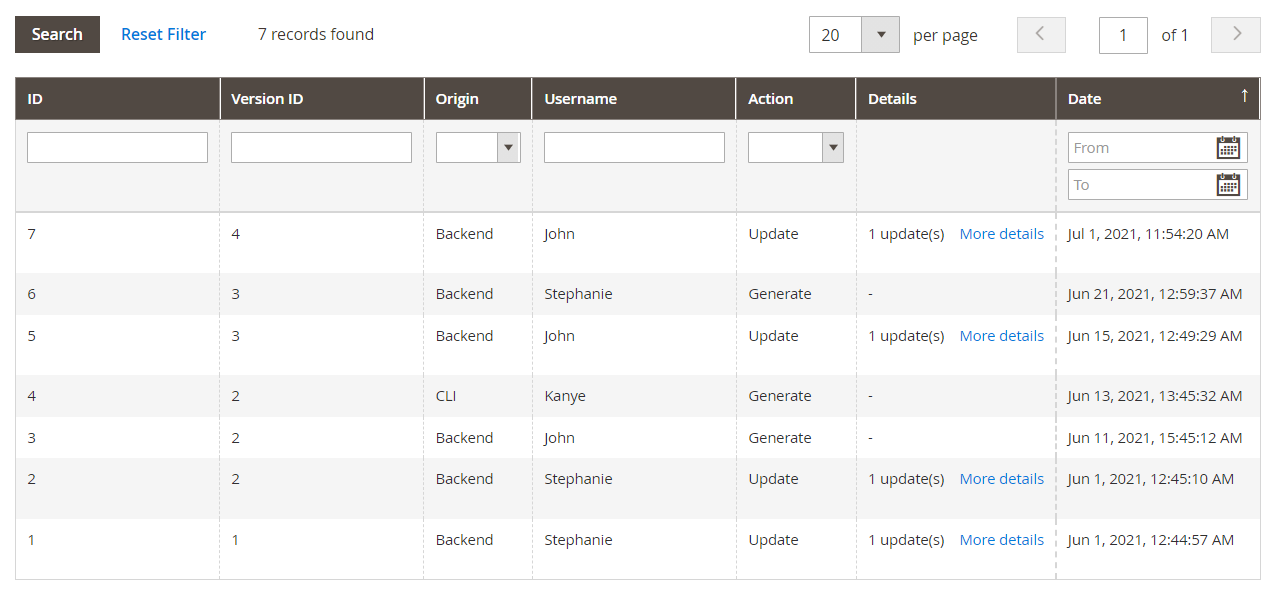
In the Action History tab, you can find a history of your previous generation and configurations.
- ID
It is the ID of the history line. - Version ID
It is the ID of the profile configuration version. - Origin
The origin of the action can be: Backend / Cron / CLI / API - Username
It is the name of the user behind the action. - Action
The available actions are: create / generate / update / delete - Details
If you click on More details, you can see the detail of the profile update from a grid.
If you click on a line of the above grid, you can check the differences of the updated field: red parts are the removed data and green parts are the inserted data.
- Date
It is the date of the modification.
Run a Mass Stock Update profile
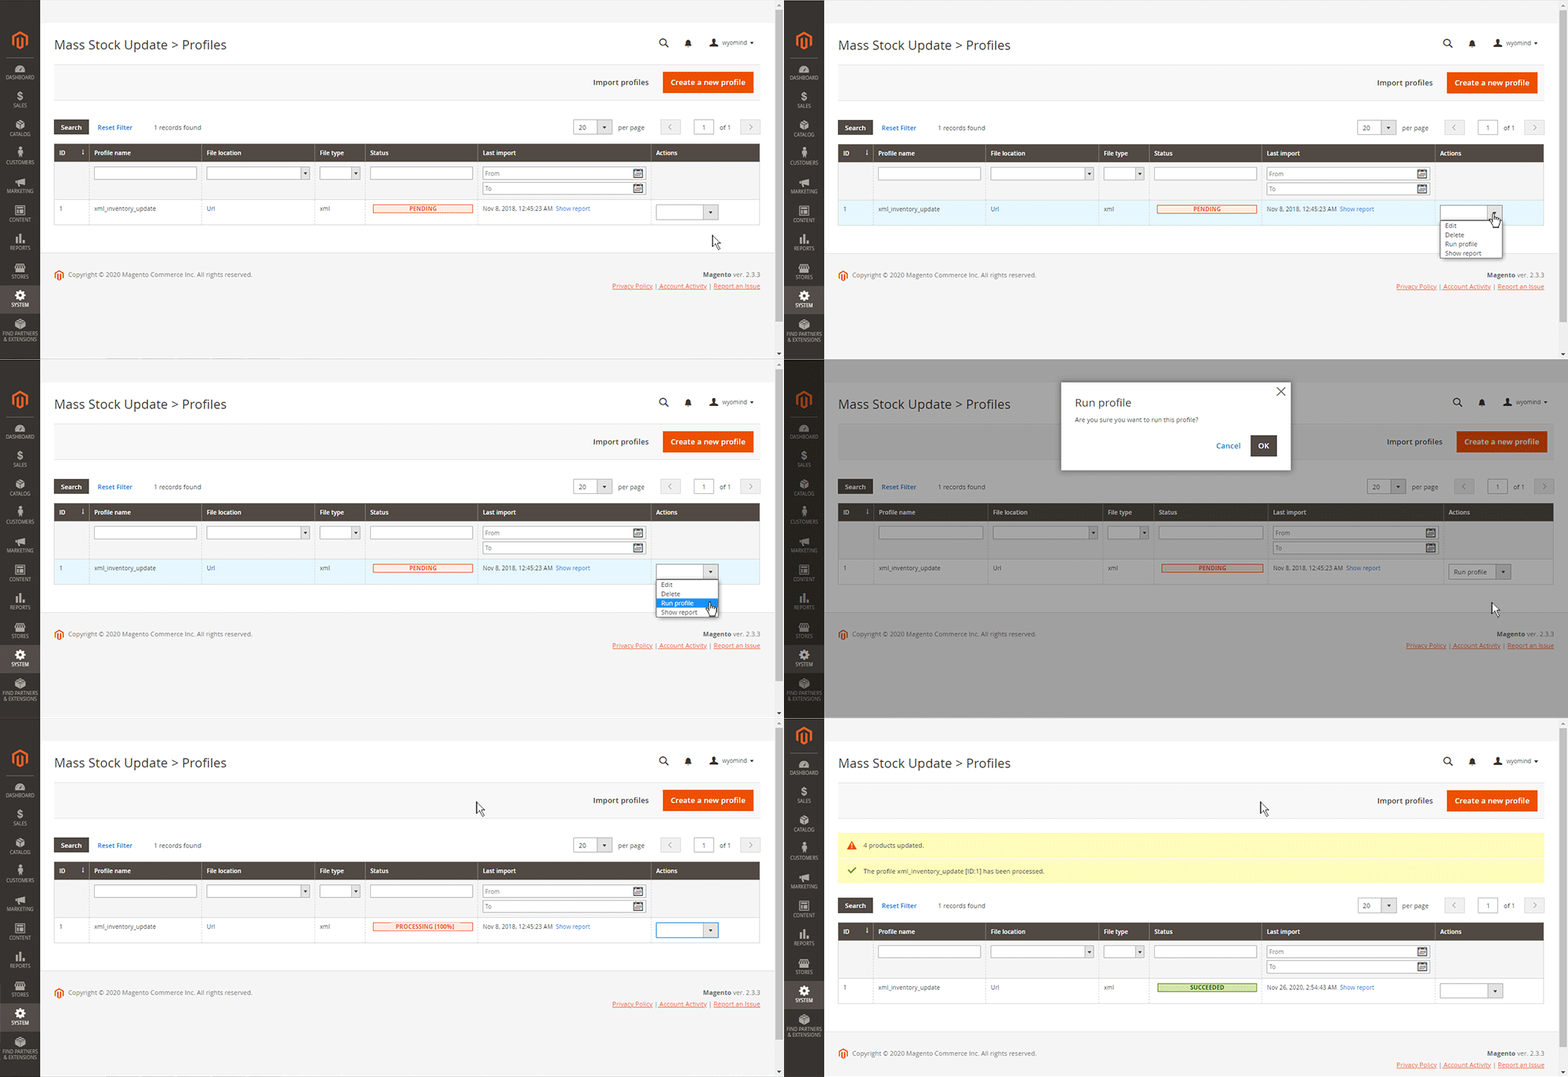
From the profiles grid
To run the profile from the grid, you just need to click on RUN PROFILE in the action menu on the right column. Then the status will be updated with a progress bar.
From the profile page
Open the profile and then click on RUN PROFILE NOW. Once the update process has ended, a message appears with details about how many products have been updated and how many products have been ignored.
![]()
With the cron tasks
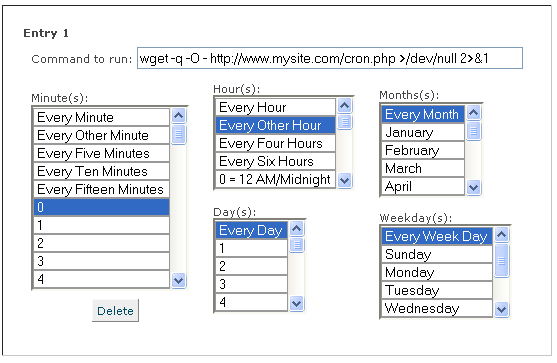
When the scheduled tasks are configured for the profile, then the profile will be automatically run at the day and the time selected.
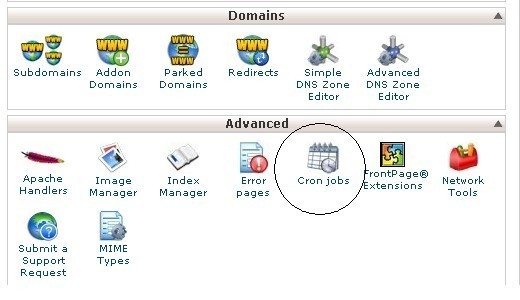
For a good working of the scheduled tasks in Mass Stock Update, the main cron task in Magento must be configured properly.
For more details about how to configure the cron tasks in Magento, look at the official Magento user guide: http://devdocs.magento.com/guides/v2.0/config-guide/cli/config-cli-subcommands-cron.html
You will receive an email each time the cron task is run if you have enabled the reporting in:
StoresSETTINGSconfigurationWYOMIND Mass Stock Update
Have a look at our documentation to configure the reporting.
With the Command Lines Interface
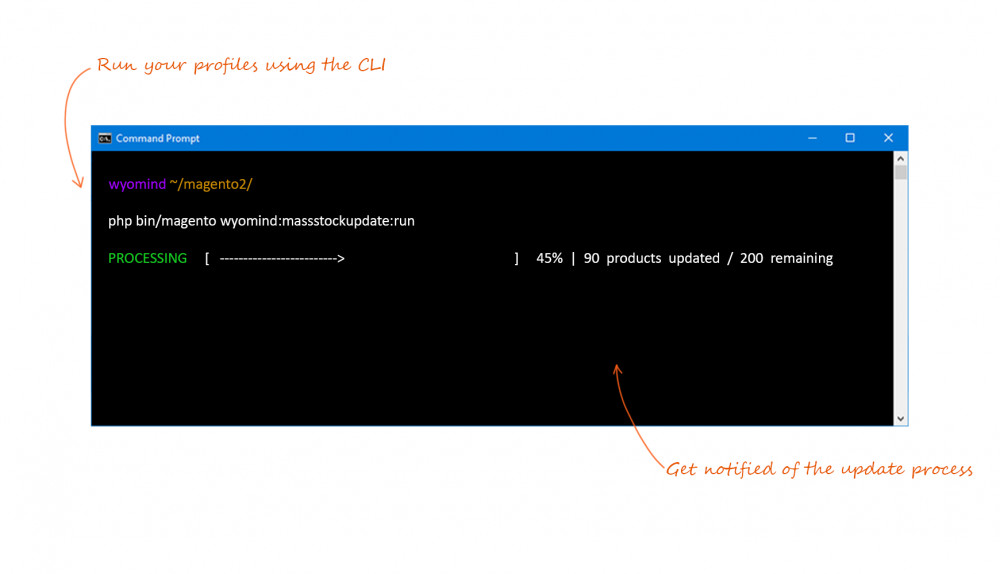
Mass Stock Update includes command lines available from any shell console.
To run the profile:
bin/magento wyomind:massstockupdate:run [-p|--profile_ids[="..."]]For example, for profile 2, run:
bin/magento wyomind:massstockupdate:run -p 2To execute the SQL requests that generate when the profile is set to use the SQL mode:
bin/magento wyomind:massstockupdate:sql [-p|--profile_ids[="..."]]For example,, for profile 4, run:
bin/magento wyomind:massstockupdate:sql --profile_ids=4Use SQL option
Updating stocks massively may keep your server busy
For better performances Mass Stock Update splits the process into two distinct steps:
- Source file analysis: the data is collected and the SQL queries for the update are built.
- The SQL file execution: the
database is updated with the new data. This step may be executed asynchronously when the shell option is enabled.
Generate the SQL file
If you prefer to generate a SQL file without executing it, you must enable the option in the profile settings.
SQL file name
By default: MassStockUpdate.sql
SQL file path
The directory path is relative to the Magento root directory and can't be located up of the Magento root directory.
By default: var/tmp/
The update file will be named with the profile's name:
Example: xml_sample.sql
Then run the profile by clicking on RUN PROFILE NOW.
Execute the SQL file
Once the file is generated in the working directory (see Settings), you only need to update the database with the generated file from the command line as follows:
mysql -h host -p DbPassword -u DbLogin DatabaseName < path/to/mysql/file.sqlAdvanced use
In Mass Stock Update, several events are triggered:
- massupdateimport_start
Triggered when the update process starts. - massupdateimport_success
Triggered when the profile is run and the data successfully updated. - massupdateimport_failure
Triggered when the profile is not run and the data are not updated.
The events can be used in your custom observers.
The argument passed is an instance of Wyomind/MassStockUpdate/Model/Profile.
Below are some examples of use in an observer:
- From etc/events.xml:
<config xmlns:xsi="http://www.w3.org/2001/XMLSchema-instance" xsi:noNamespaceSchemaLocation="../../../../../lib/internal/Magento/Framework/Event/etc/events.xsd"> <!-- Standard checkout --> <event name="massupdateimport_success"> <observer name="editor_module_massupdateimport_success" instance="Editor\Module\Observer\LassUpdateImportSuccess" /> </event> </config> - From app/code/Editor/Module/Observer/MassUpdateImportSuccess.php:
<?php namespace Editor\Module\Observer; class LassUpdateImportSuccess implements \Magento\Framework\Event\ObserverInterface { public function execute(\Magento\Framework\Event\Observer $observer){ $profile= $observer->getEvent()->getProfile(); // TODO: Implement your own logic. } }
Attribute specifications
Mass Stock Update allows you to update all your stock attributes as well as the Advanced Inventory or Advanced MSI attributes.
Stock attributes
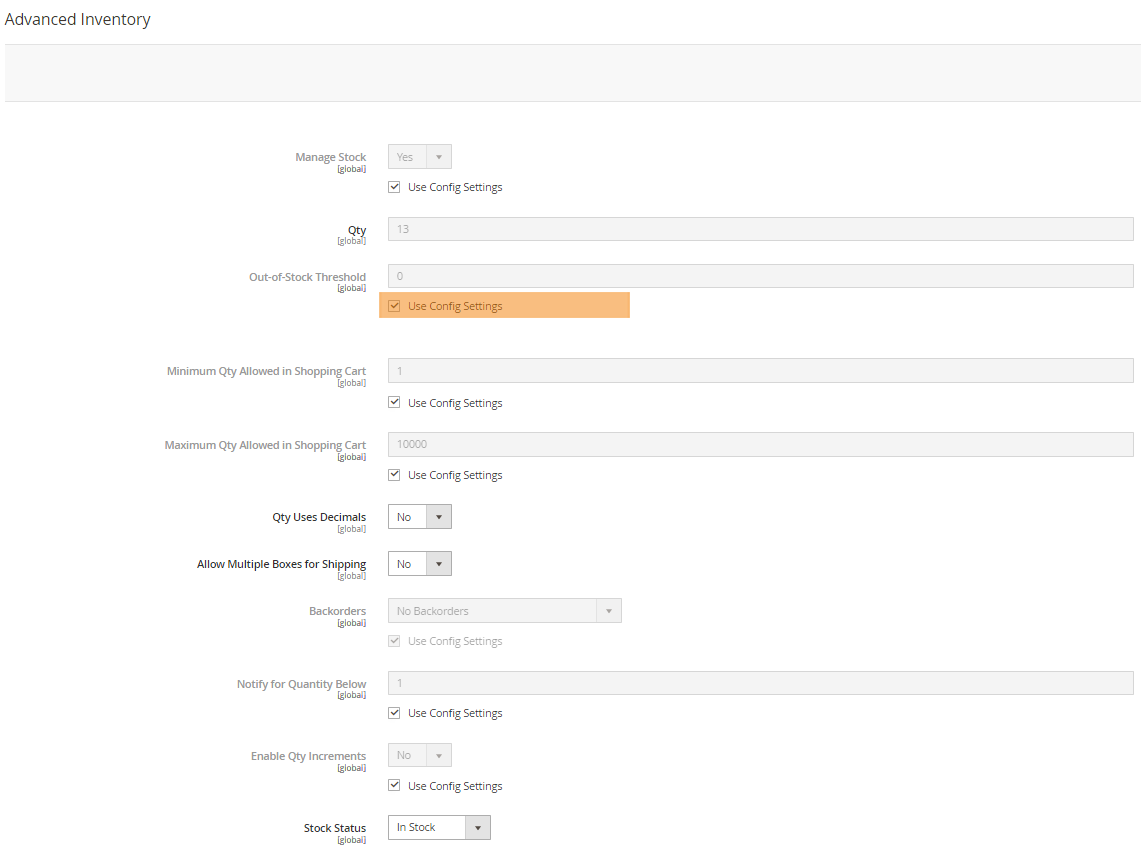
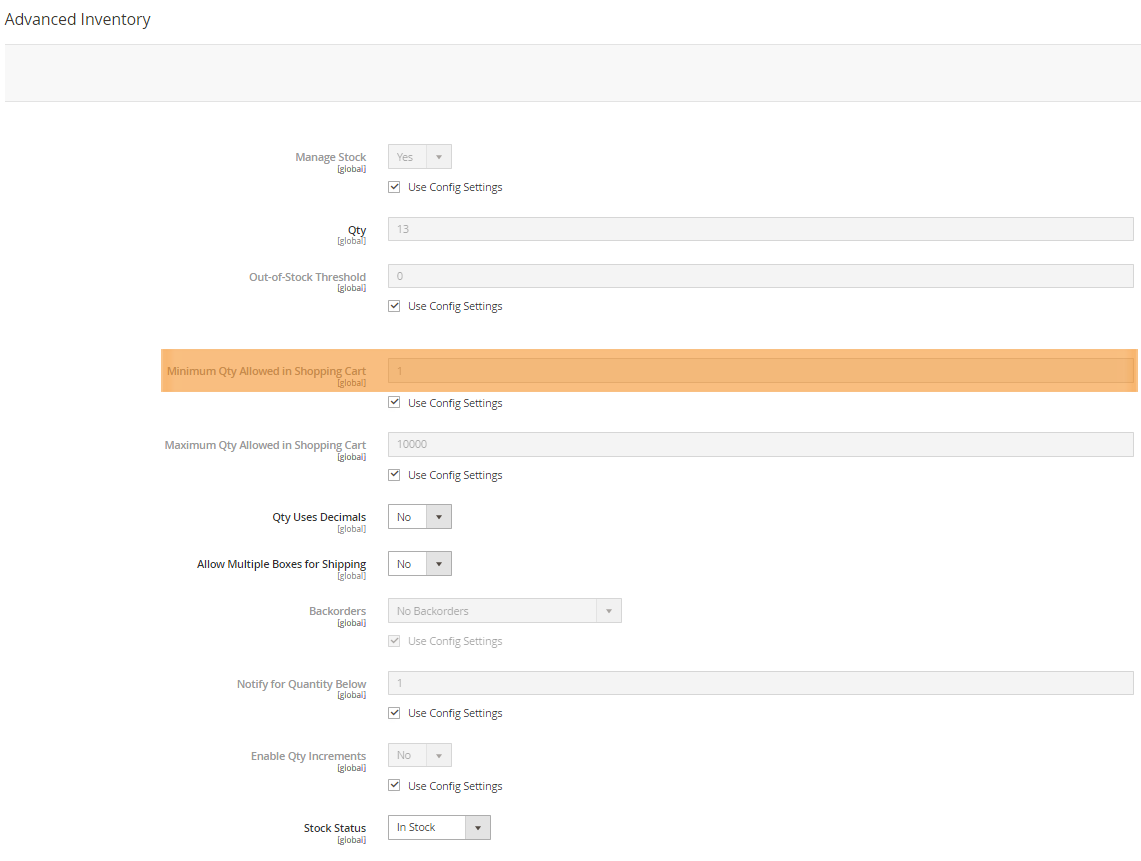
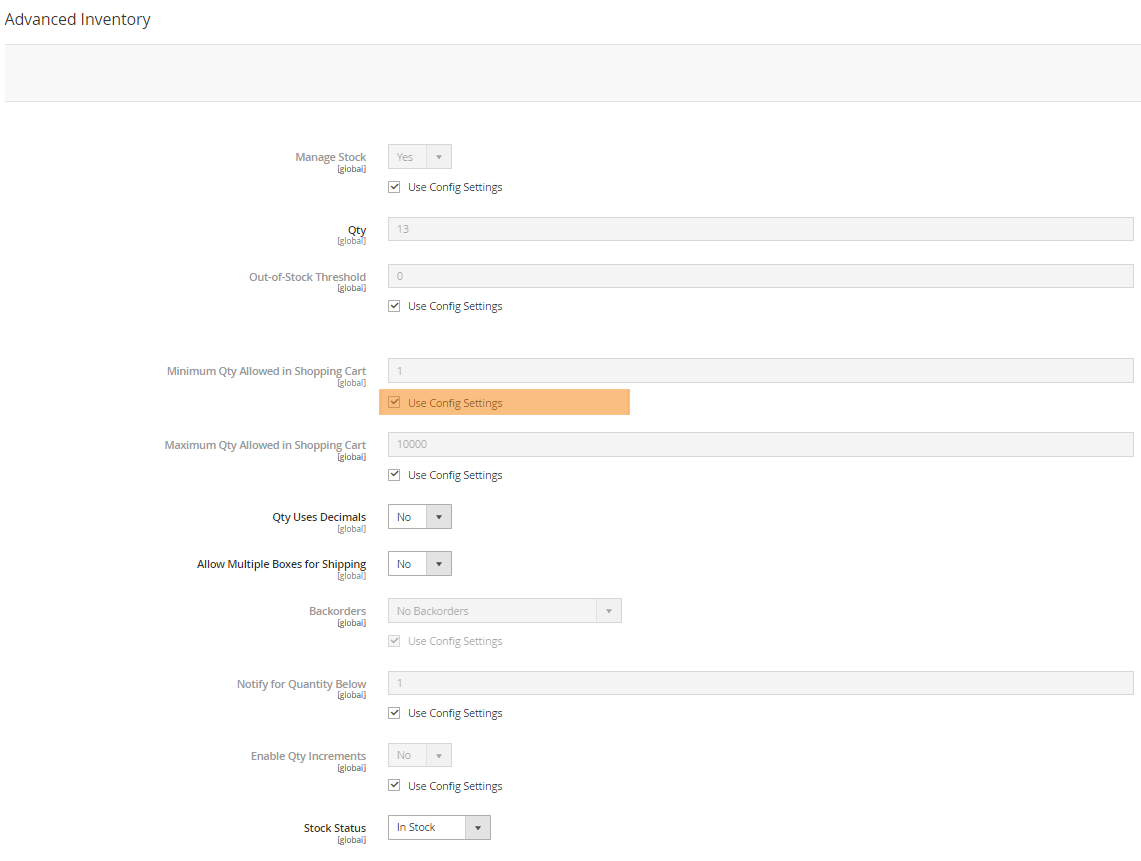
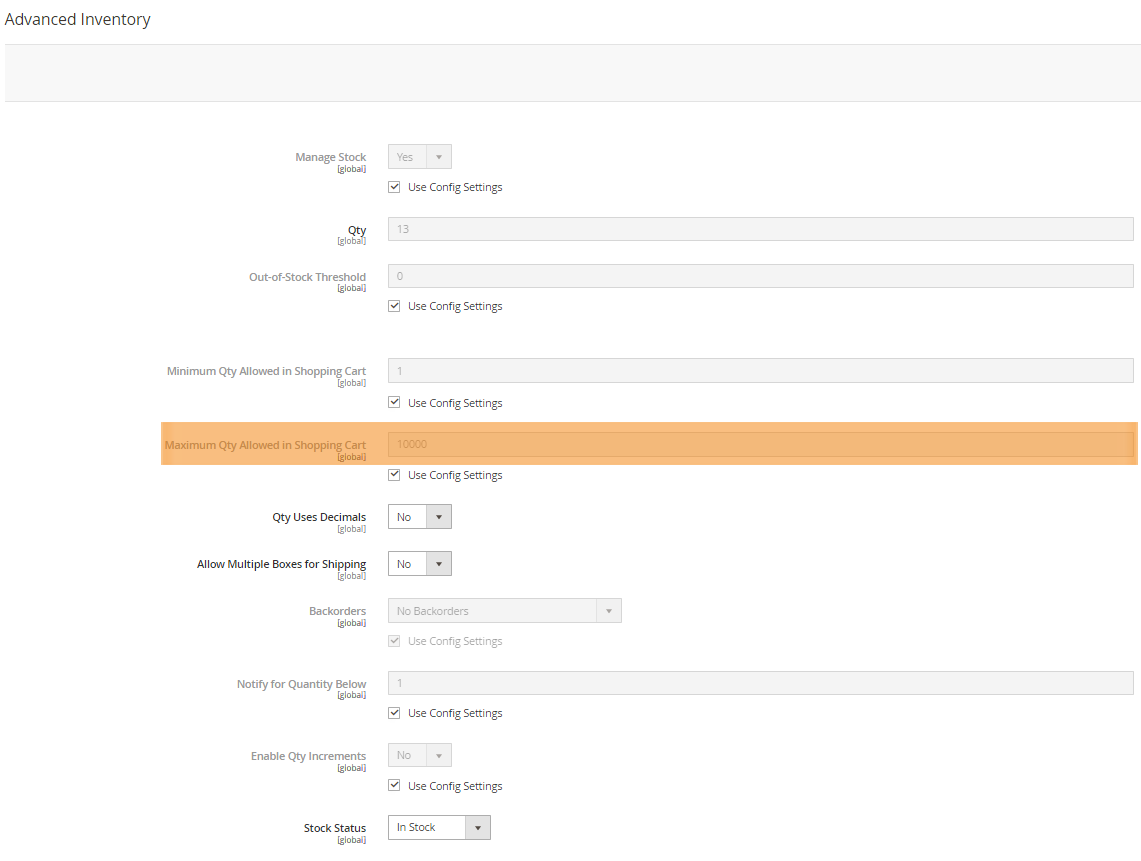
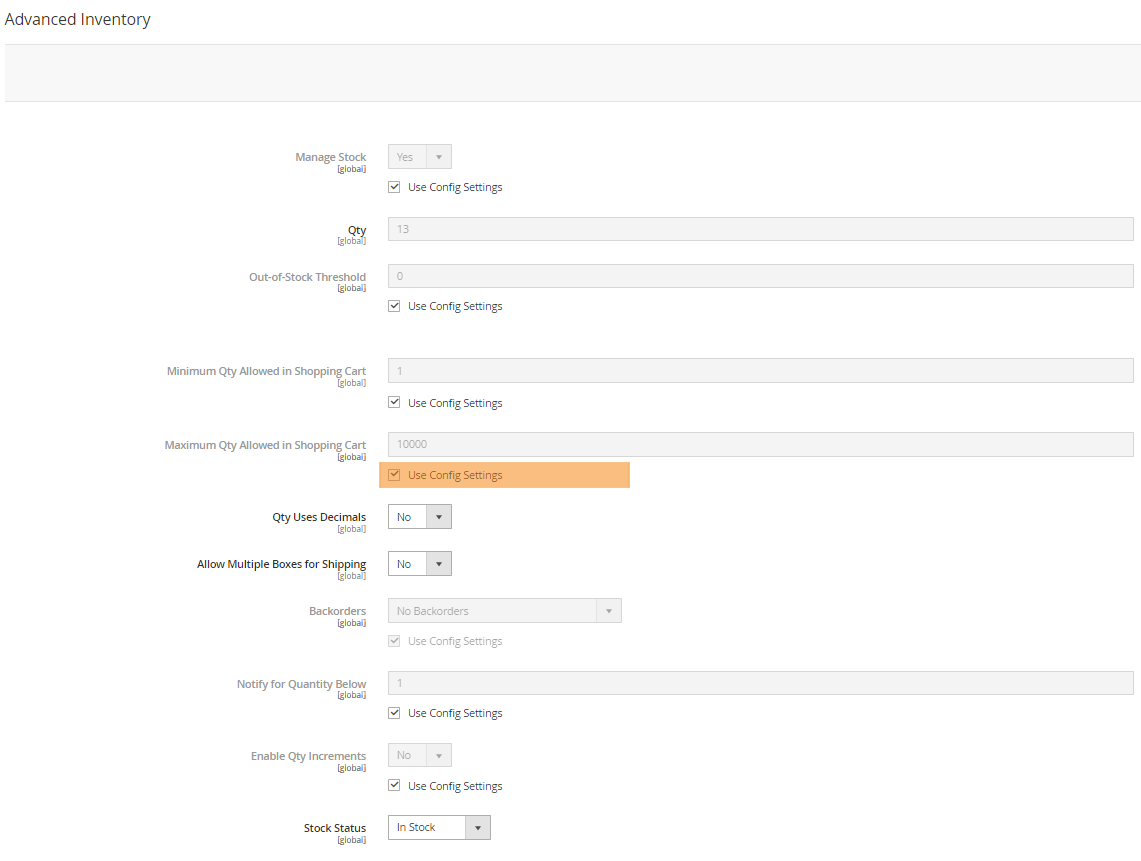
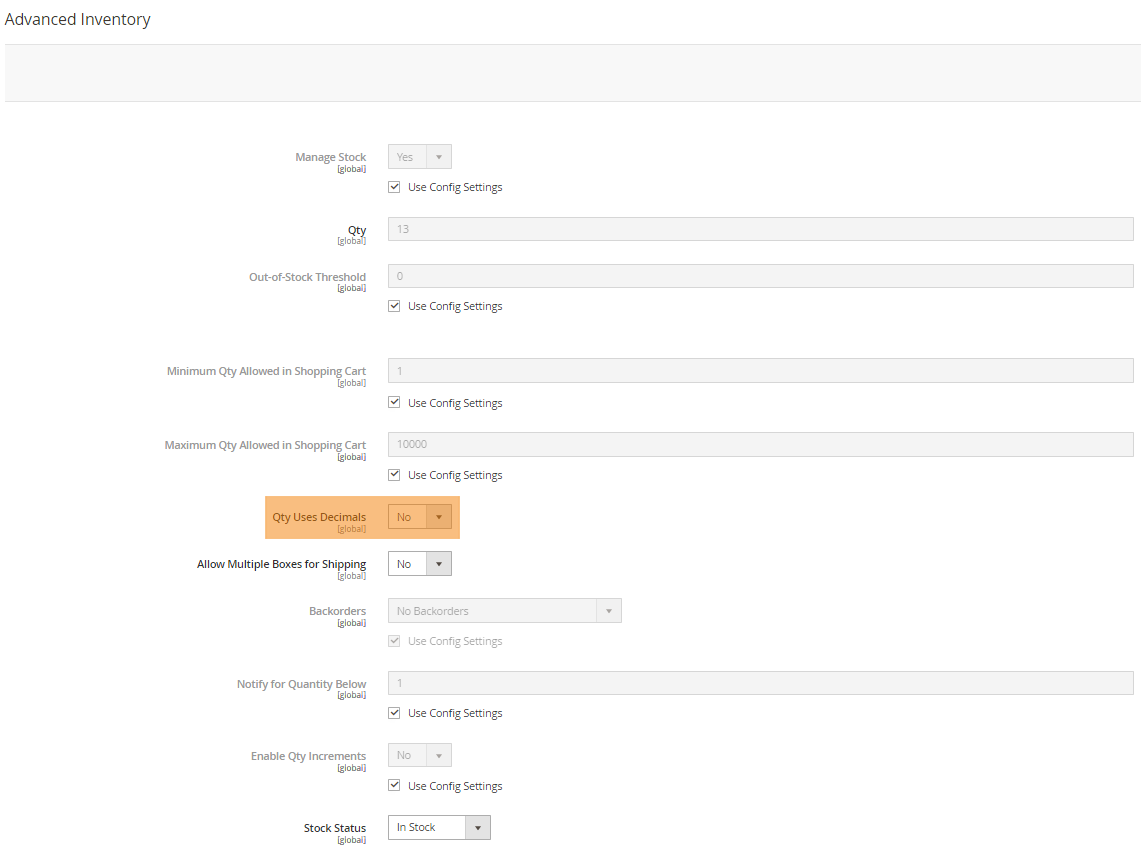
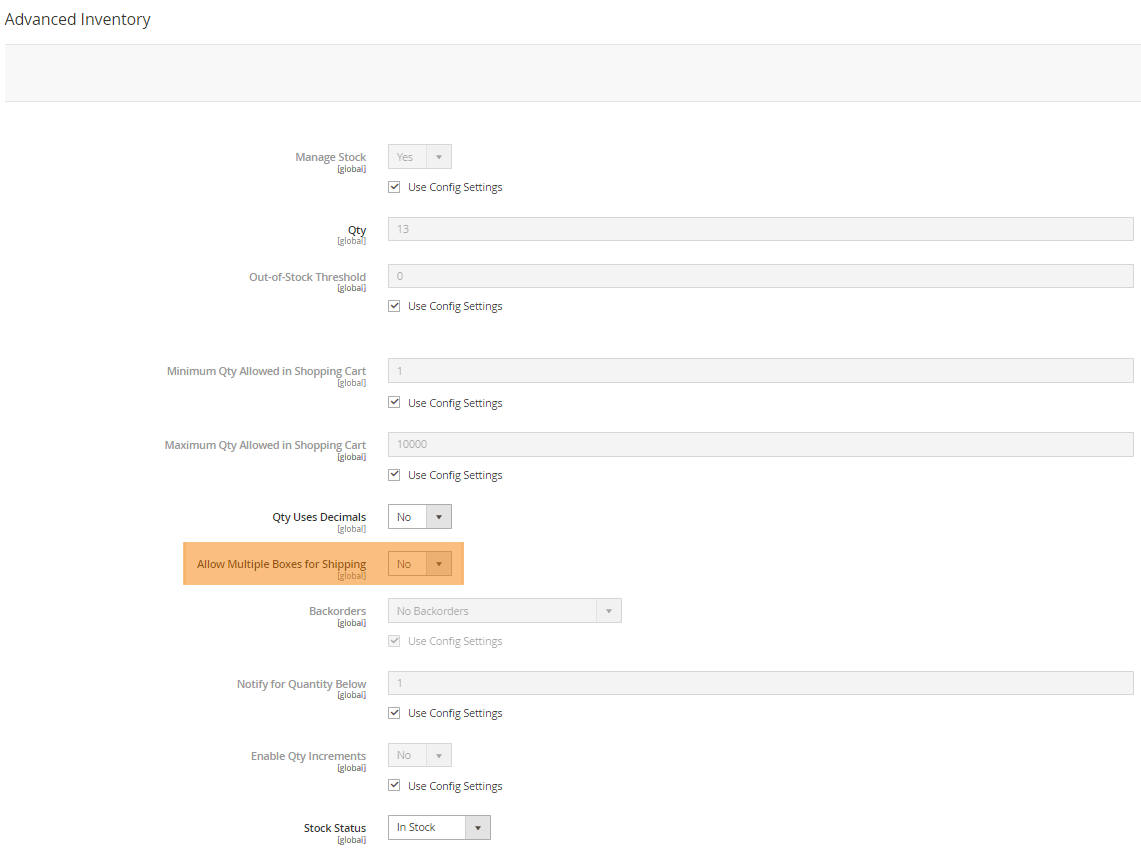
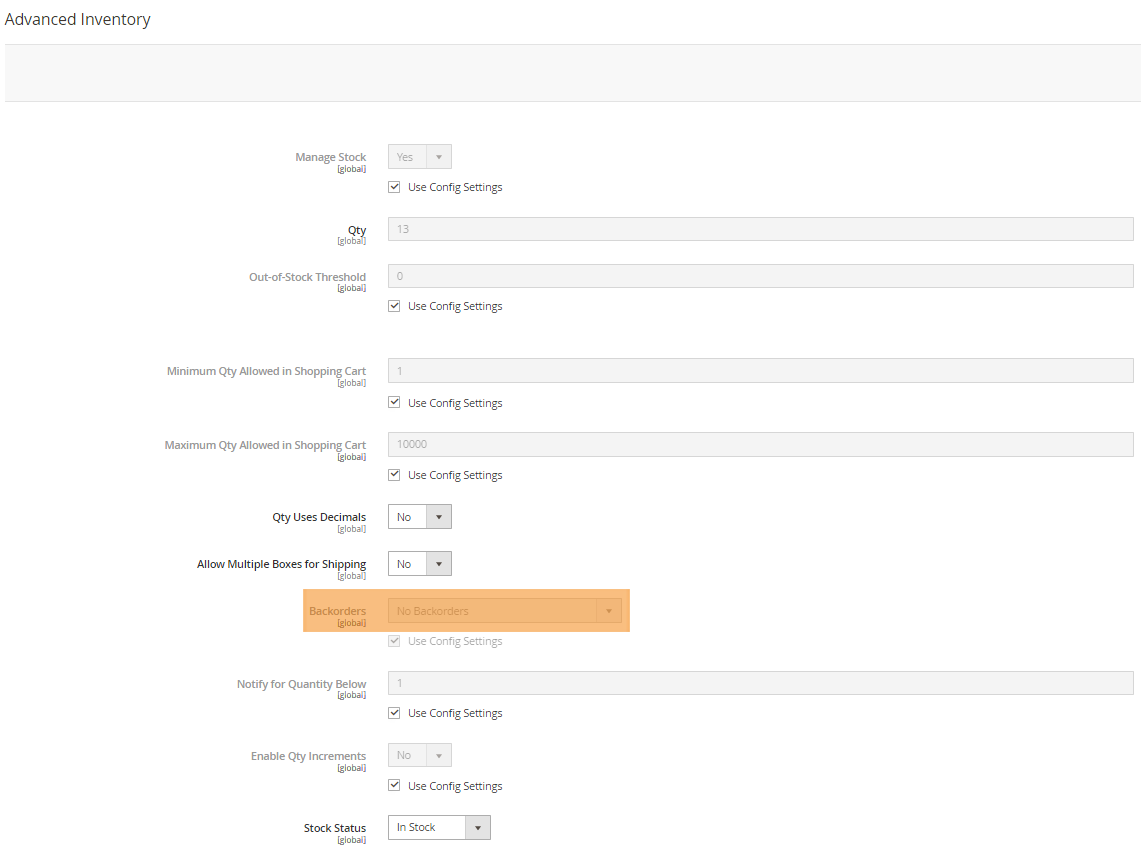
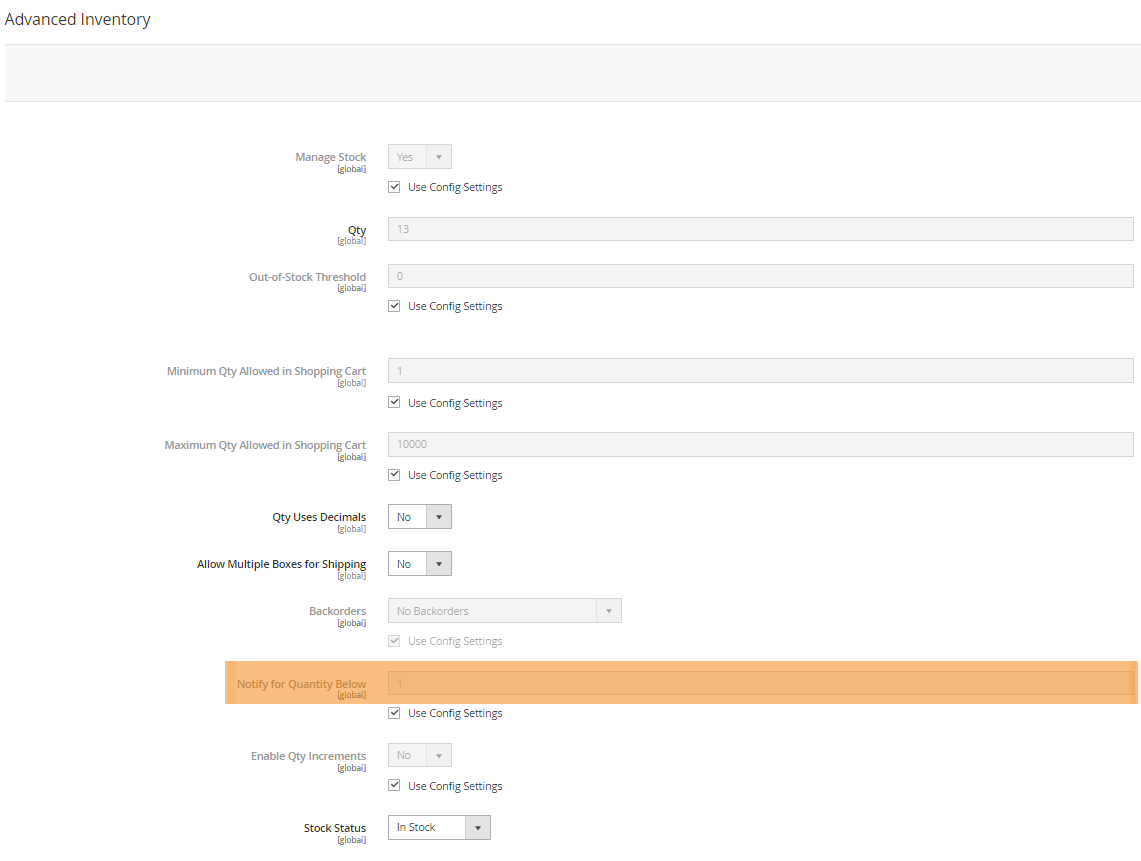
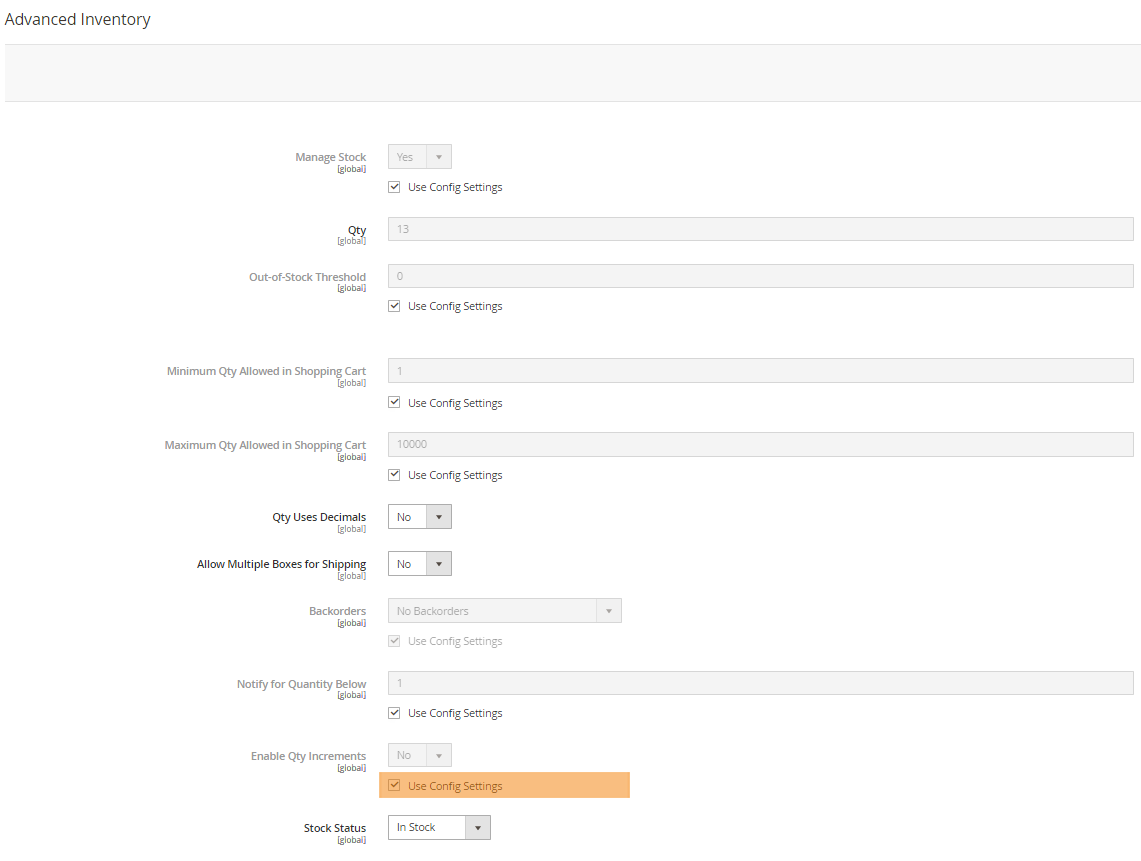
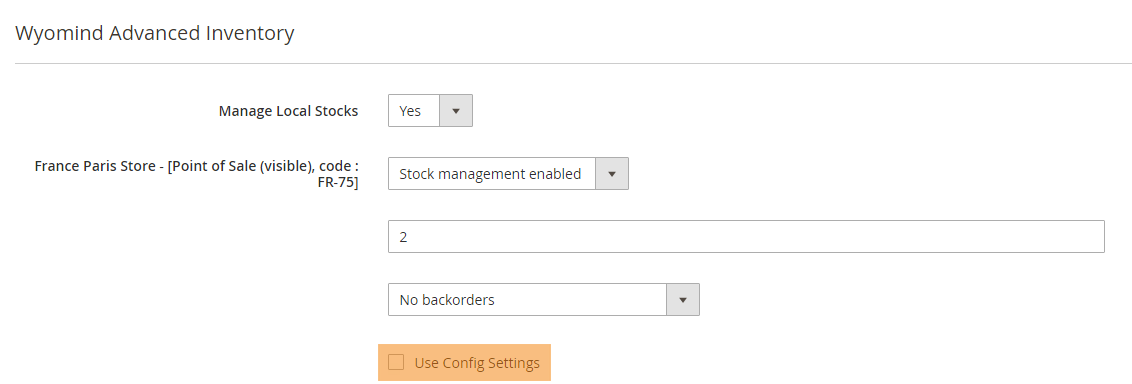
You can update all the stocks attributes that you can retrieve in the product page from the Advanced Inventory section in:
CatalogInventoryProducts
All these attributes must be updated with numeric values or boolean values.
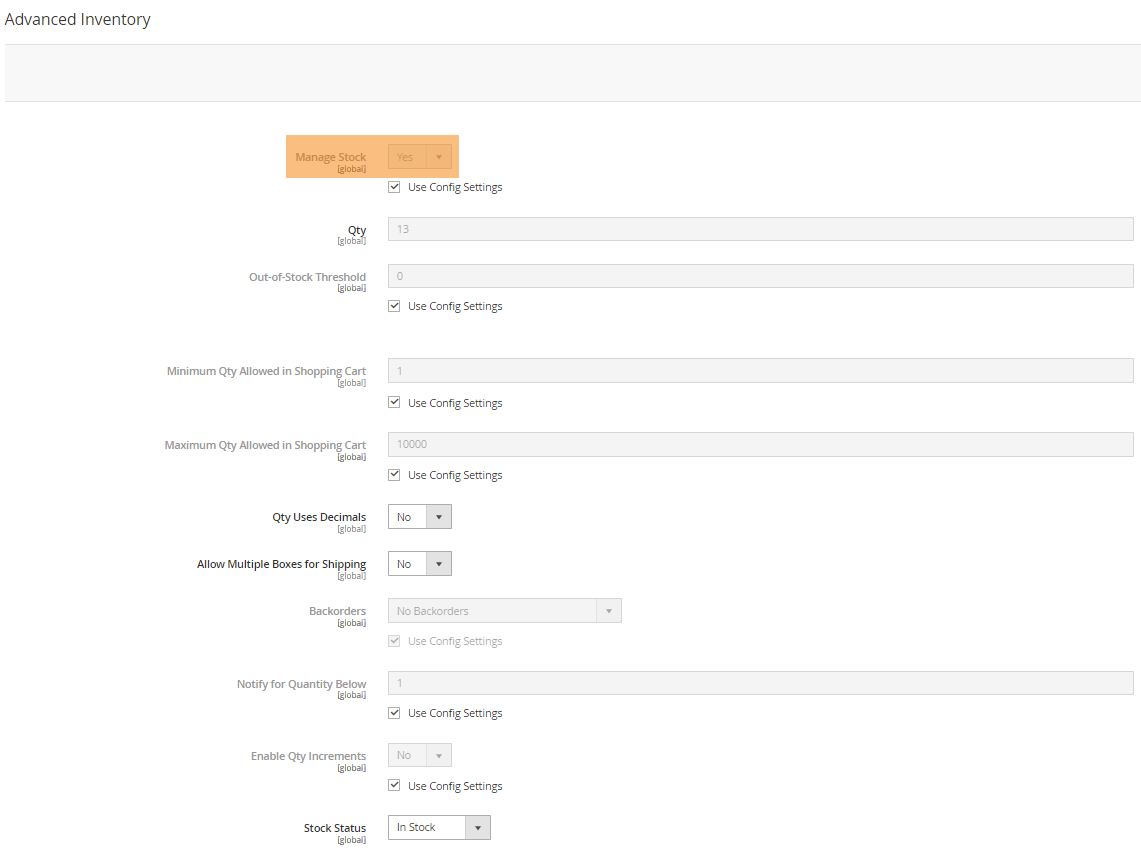
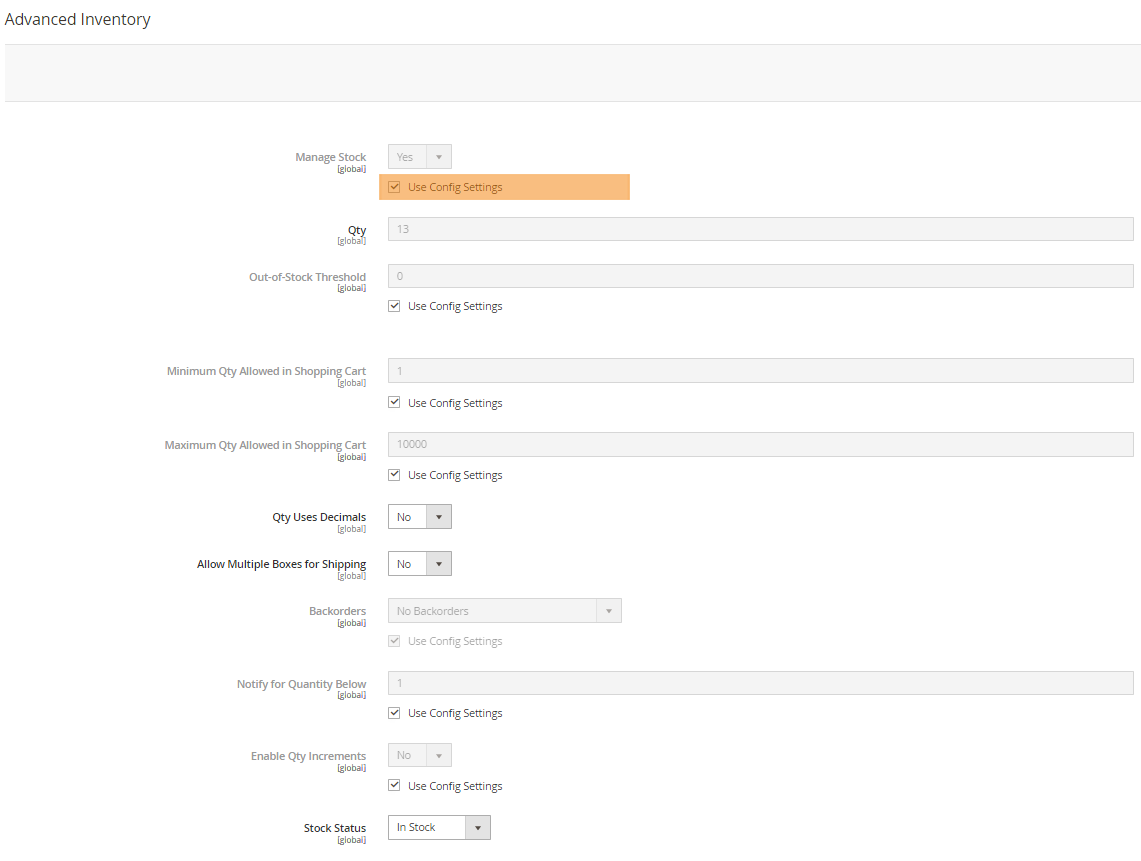
Manage Stock
Use Config Manage Stock
Stock Status Changed Automatically
Automatically change the stock status depending on the quantity.
yes
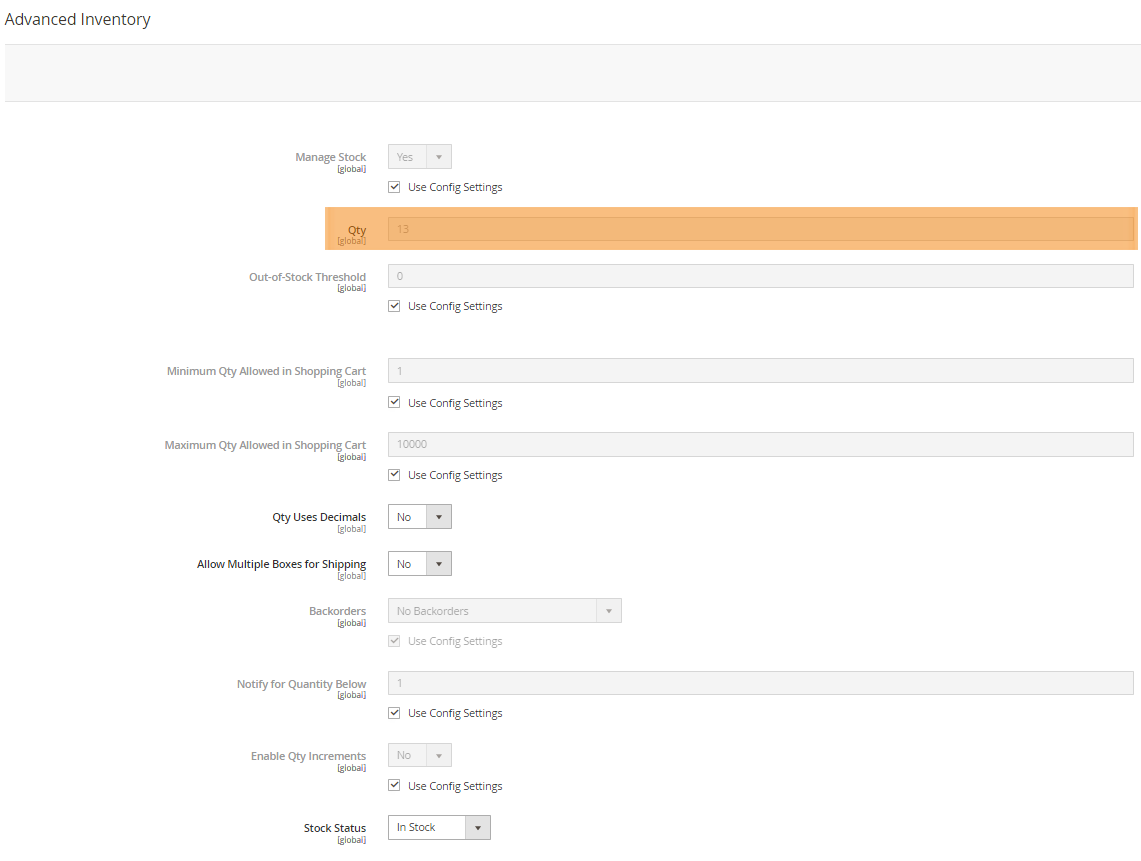
Qty
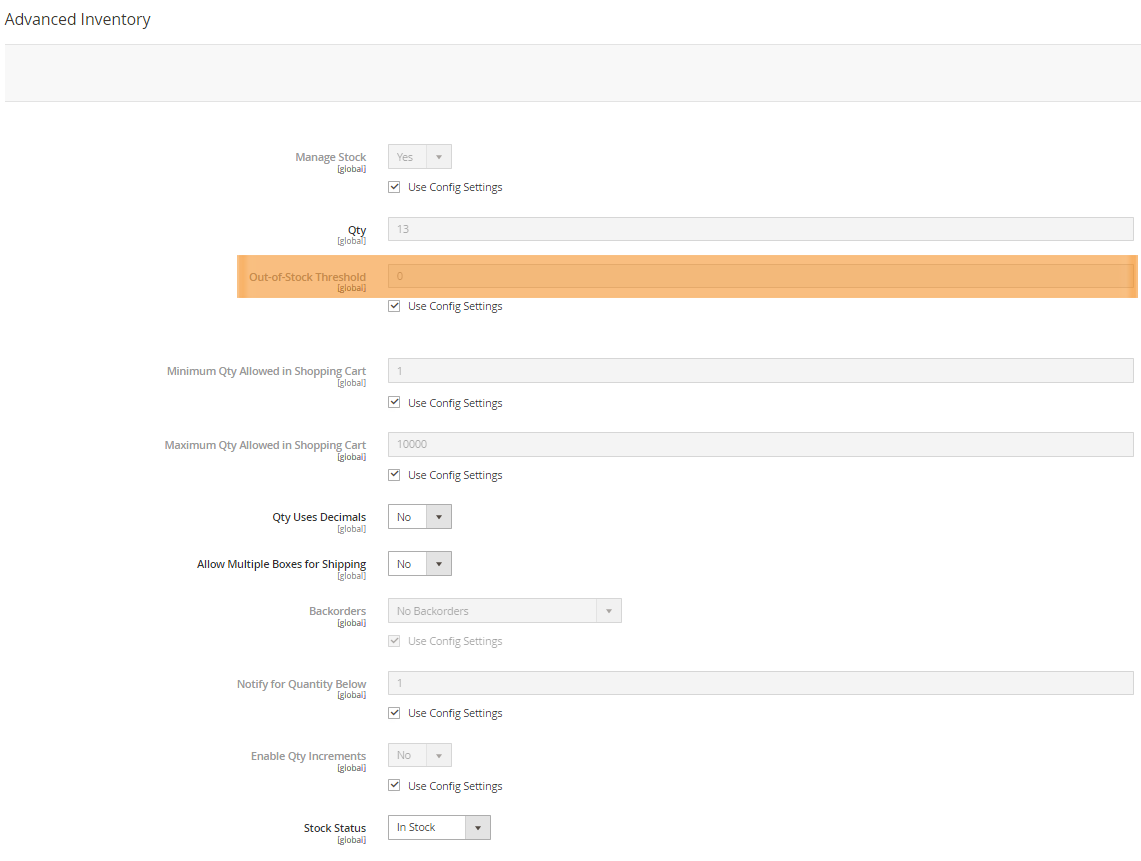
Min Qty
Use Config Min Qty
Min Sale Qty
Use Config Min Sale Qty
Max Sale Qty
Use Config Max Sale Qty
Is Qty Decimal
Is Divided into Multiple Boxes for Shipping
Backorders
Use Config Backorders
Notify Stock Qty
Use Config Notify Stock Qty
Enable Qty Increments
Use Config Enable Qty Increments
Qty Increments
Use Config Qty Increments
Is In Stock
Multi-stock enabled
Enable multi stock management with Advanced Inventory.
enabled
Advanced Inventory attributes
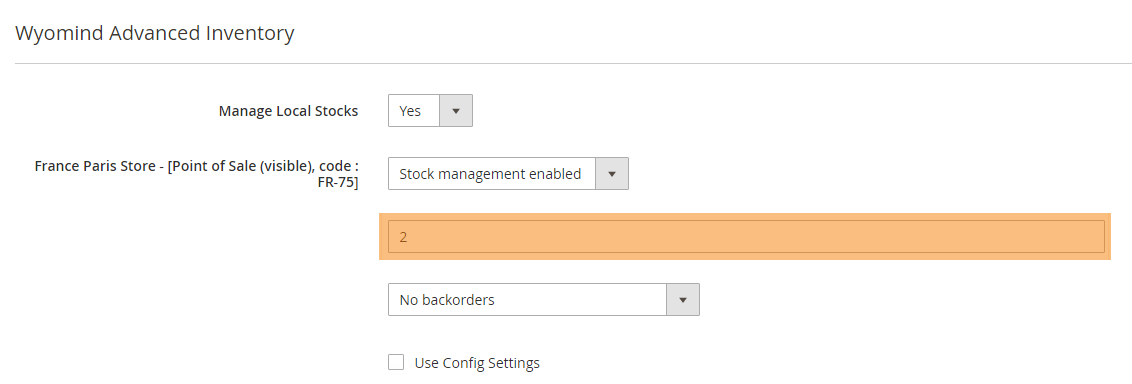
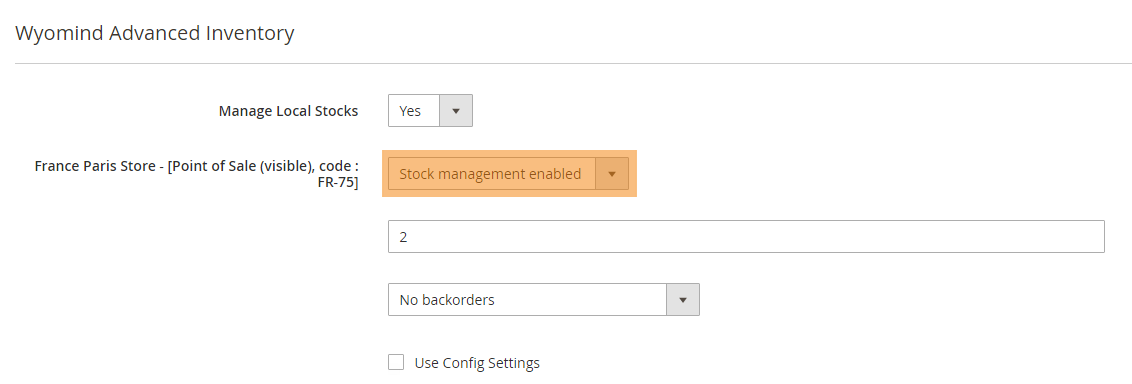
All attributes related to the stock management in Advanced Inventory are available in this section.
 All these attributes must be updated with numeric values or boolean values.
Qty
Manage stock
Backorders allowed
Use config settings for backorders
MSI attributes
Mass Stock Update allows you to update all attributes related to the Magento Multi-Source Inventory Management (MSI).
All these attributes must be updated with numeric or Boolean values and mapped as follow. 
Quantity
Notify Qty
Use default for notify Qty
Stock Status
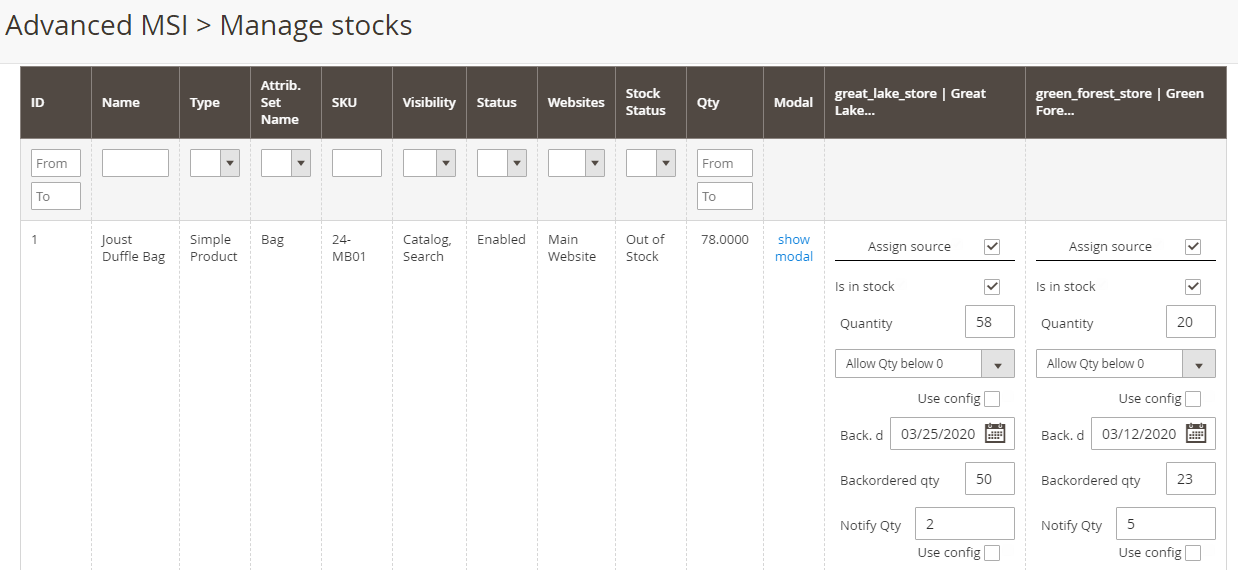
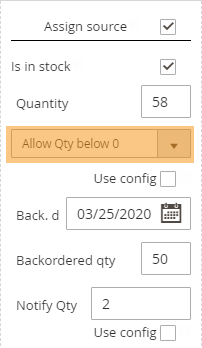
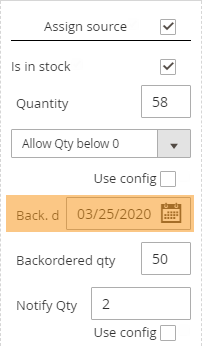
Advanced MSI attributes
Mass Stock Update also allows you to update all attributes coming with the Advanced MSI extension, that you can retrieve in the stocks grid from:
CatalogStocks
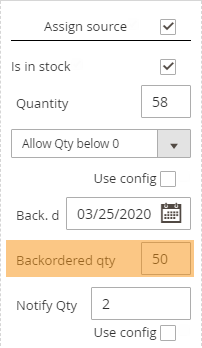
Backorders
Backorders date
Backordered qty
PHP API for Mass Stock Update
Mass Stock Update allows you to fully customize and control the data output by using PHP scripts in different ways.
API coding standards
For each line in the Mapping & Rules tab of your profile, you can add your own custom script based on a PHP syntax.
To add your custom script, click on </> at the end of the line you want to edit. You can then update on the file the value of each column.
Note that the </> button may be hidden by the black box.
Opening and closing tags
<?php
/* Your custom script */
return $self;
Outputting a value
return
Any value that you want to output in your profile, must be returned with the return instruction.
$this object
$this->skip() or return false (boolean false)
To ignore the pending line (all the columns of the line).
$this->skipRow() or $this->skip() or return false;
To ignore the pending cell as well as all the following cells.
$this->skipCell() or return true;
To ignore the pending cell.
Variable $cell
You can call any column of the source file using $cell. It is an array that indexes each column numerically (1,2,3,...) and with a key corresponding to the name of the column header ("name","description","price"...).
$cell["name of the column"] or $cell[INDEX]
For example:
return $cell["description"]. " ".$cell["name"]Variable $self
$self
to retrieve the current value of the column and manipulate the data:
<?php return $self;For example:
<?php return strtolower($self);Examples of use
Below are some examples of use with the PHP API.
Change the separator
Transform a number with a floating value separated with a dot instead of a comma.
For example:
<?php return ucwords(strtolower($self)); ?>Change a text to lowercase or capital letters
Change a text in lowercase and add a capital letter as the first letter of each word.
For example:
<?php return array_pop(explode(",",$self)); ?>
Retrieve images
Retrieve only one image from a list of images.
For example:
<?php return array_pop(explode(",",$self)); ?>Group several columns
Put together several columns to create a description.
For example:
<?php return $self." ".$cell["product_name"].", starting at $".$cell["price"]; ?>Define the visibility of a product
Define the visibility of a product depending on the type column.
For example:
<?php

switch($self){
   case "parent":
      return "Catalog, Search";
   break;
   default:
      return "Not visible individually";
}
?>
Map value to other ones
Map values to other ones.
For example:
<?php

if($self=="something"){
   return "something else";
}
else if($self=="foo"){
   return "bar";
}
else{
   return "default value";
}
?>

 Magento 2



























 Great extension and support from this company. We've been using a few of their extensions on a number of shops and we've never had any problems with any of them. The support is second to none and always happy to help. We feel like they are part of our team and very professional.
 Wyomind mass stock management extension for magento 2 looks to be what we are looking for we had a few issue that wyomind are quick to help us out and find the small bug which was stopping us from showing active stock level for our customers.
 We use this to sync our inventory from our Back-end sales system to magento. Works great and lets us focus on running our business instead of constantly updating our inventory manually. By setting up rules its a setup and forget type of deal. It just works .
 Advanced Inventory and Mass Stock update meets our requirements. It is working really well. Their support is really superb! Recommend.
 This is great module and it has helped sync our inventory between our retail locations and our e-commerce website. Hands down the best solution out there! Thank you Wyomind for an amazing module!
 This extension simply made our stock update a kids' game. It is allowing us to manage completely our stock on an automated basis, we barely touch the module code, all are made easily through the admin, and we can get the stock data from any source, from a DB, JSON to CSV. No other extension option was adjusting to our needs. It's an amazing option, simply the best.