solutions for e-commerce
13 years of business
2560 reviews
4.9 average rating
You don’t have to pay any additional cost after purchasing our products (except to mettre à jour votre période de Support & Upgrade).
However, professional installation/configuration or customization services have to be paid for.
We also offer discounts on bulk orders and reward our best customers with our Reseller program.
To know more about these two options, you can click on this link:
https://www.wyomind.com/partner-program.html
To get information regarding our products and services, you can send your request:
Keep in mind that these services are in no case technical support.
If for any reason buyers are dissatisfied with their purchase, we offer a full refund on ALL their products (request must be made within 60 days from the date of purchase).
Any refund request received after this period will be declined.
Also, to be accepted, refund requests must be sent by email and include the license "Activation Key”.
Please note that Support & Upgrade, professional installation/configuration or customization services cannot be refunded.
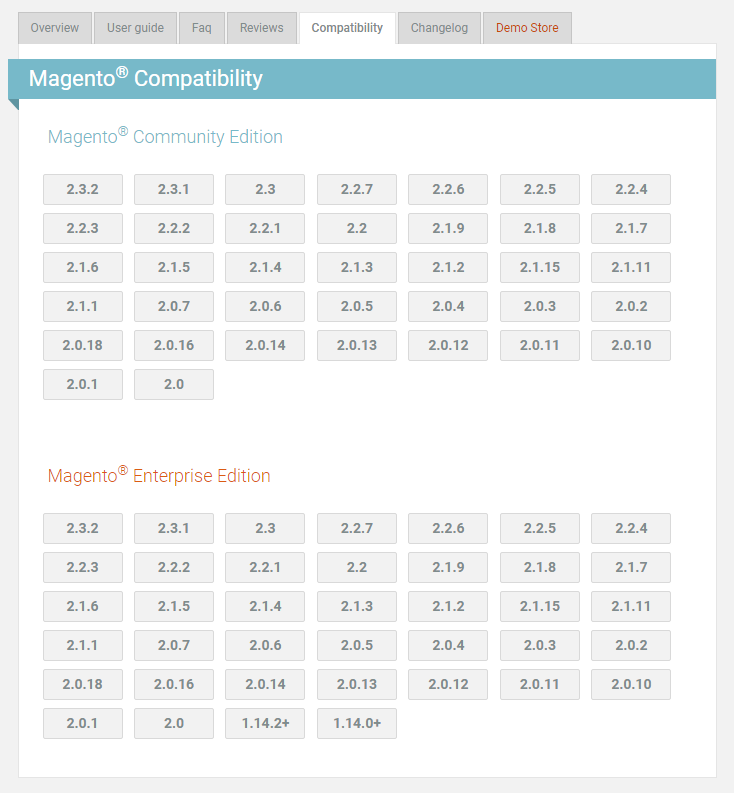
When a new version of Magento is released, we do our best to update our products as shortly as possible in order to be compatible with it.
On all our product pages are listed the versions compatible with both Magento® Enterprise Edition and Magento® Community Edition from the Compatibility tab.
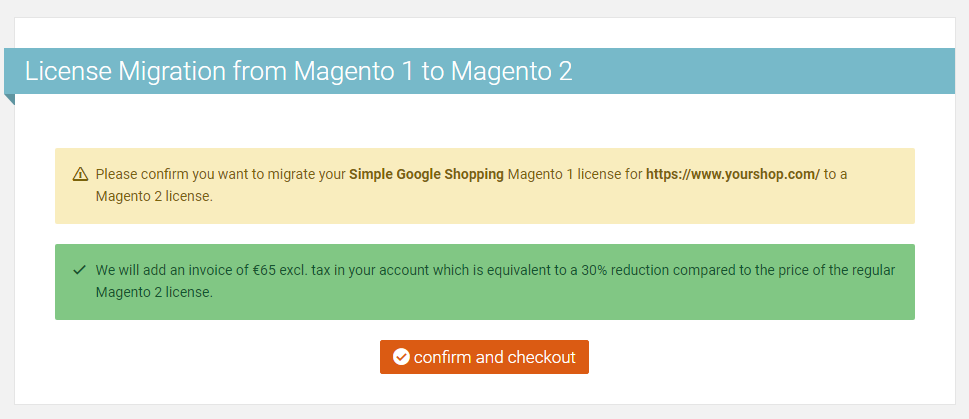
We offer our customers who want to migrate their Magento 1 license to a Magento 2 license, the transfer at a reduced price.
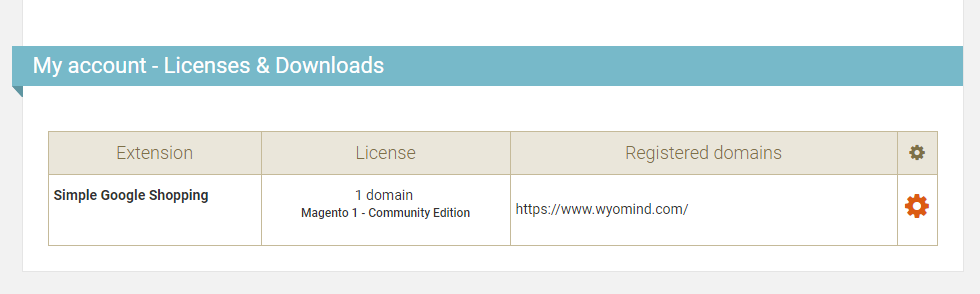
You have the possibility to migrate your license directly from your Wyomind account in:
My accountLicenses & Downloads
Click on migrate to magento 2 in front of the extension and the domain you want to transfer.
 Confirm you want to migrate your license to a Magento 2 license by clicking on Confirm and checkout .
An invoice will be automatically added to your account from:
My accountInvoices
The price of the transfer is equivalent to a 30% reduction compared to the price of the regular Magento 2 license.
You can proceed to the payment by clicking on PP .
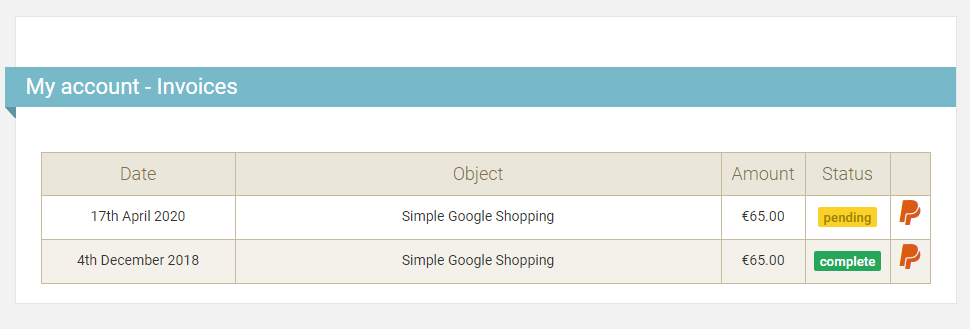
Once the payment is done, you can go back to:
My accountLicenses & Downloads
There you will be able to download and install your license for Magento 2.
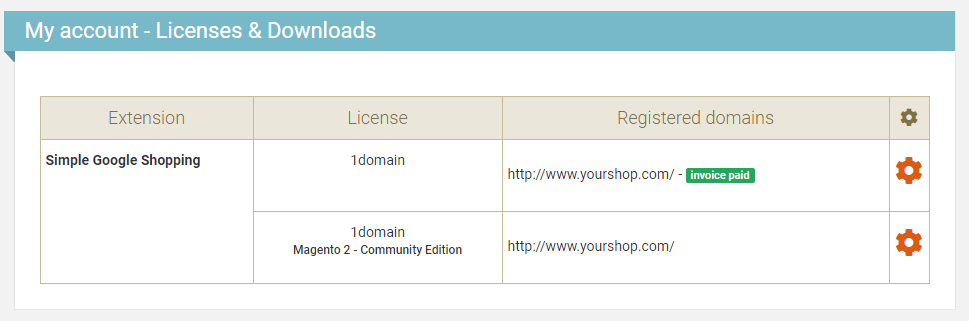
A license is valid for an unlimited period of time on one single Magento installation.
If you use more than one Magento installation, you will have to buy a separate license for each one.
If you run several domains on the same Magento installation, you will need only one license for all of them.
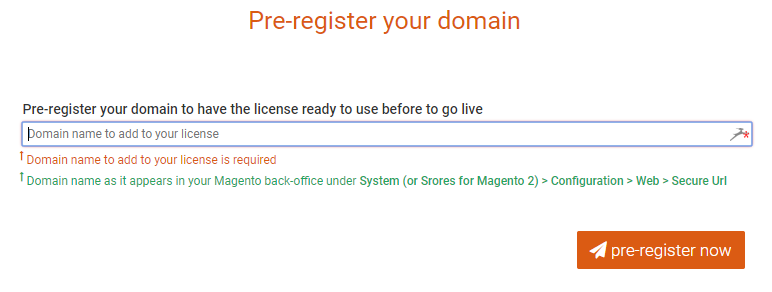
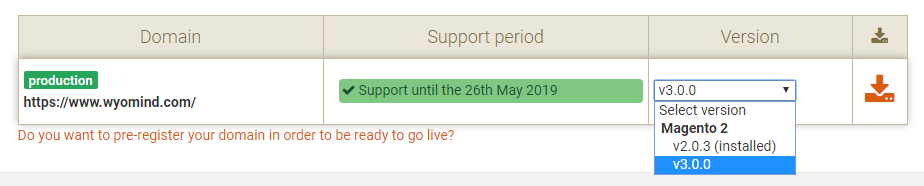
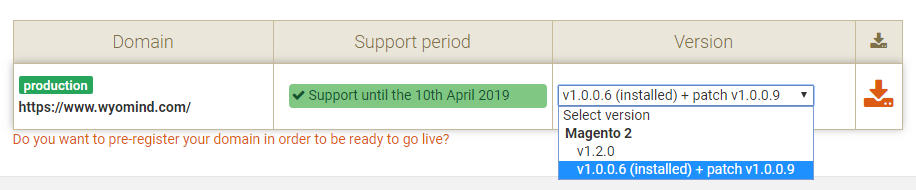
Although your license doesn’t have a limited period of validity, your support period does. By purchasing an extension, you’ll be granted a 6-month support period for free. Passed this period, you will have to renew your Support plan (see FAQ: How to extend my support period?).You can pre-register your live domain to your license in advance.
Thanks to this option, you'll be able to get the extension ready to use on your domain before it goes live.
To pre-register your production domain:

One license is valid for an unlimited period of time on one Magento installation only.
It is possible, however, to extend or transfer your license in 2 cases:
To be able to use the extension on both your production and testing environments, follow the instructions below:
Now that you can use the extension on your production environment, repeat the same steps as above on your testing environments.
The only difference this time: a notification will appear in your Magento admin.
You will be given a choice between:
![]()
Click on Add this domain to my license.
A transfer request will then be sent to our team within an hour.
Once the request is taken care of, you will receive a confirmation email.
If your transfer request is accepted, you can use the extension on both environments at the same time.
The order in which you activate your license on your domains does not matter.When having a lot of registered domains, it can be complicated to have a good visibility in your Wyomind account.
You have the possibility to assign and group all the staging/test/development environments under one production domain.
For example, below https://staging.myshop.com should be under https://www.myshop.com.

For that, move your mouse over the staging url. An orange button should display. Click on it.
You'll have the choice between:
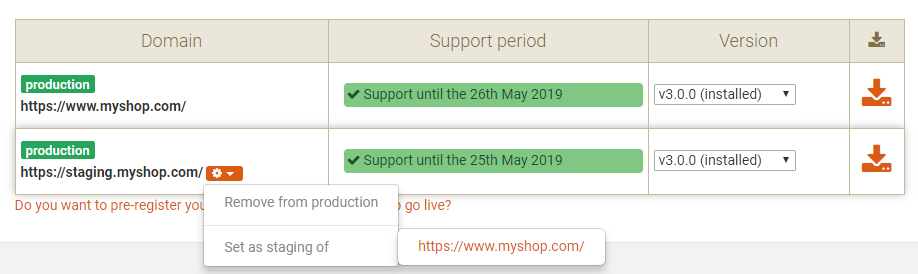
You can simply choose the production domain for that url.
Once it's done, a notification is displayed to confirm the change has been taken into account.


At Wyomind, support is part of the extension you are buying from our website. Our team, composed of Magento certified developers and specialists, offers outstanding support and answers to all your questions in record time. This is why support can't be provided without any cost.
Anybody who purchases at least one of our extensions automatically receives 12 months of technical support to successfully complete a project.
Once the 6-month period is over, no support for extensions usage and configuration can be offered. However, if you're still having questions, you can subscribe to a new Support & Upgrade plan and extend your Support period directly from your Wyomind account.
Prices for Support vary from €95 to €185 for 12 months (from €7,90 to €15,40/month).
Anybody who purchased at least one of our extensions receives a 12-months technical support.
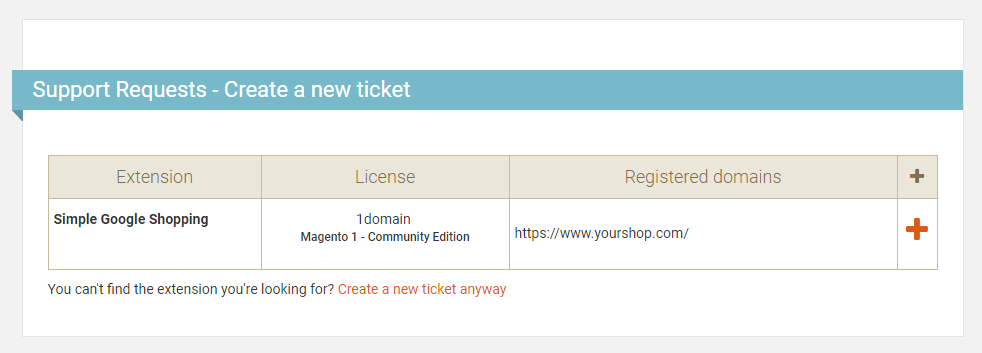
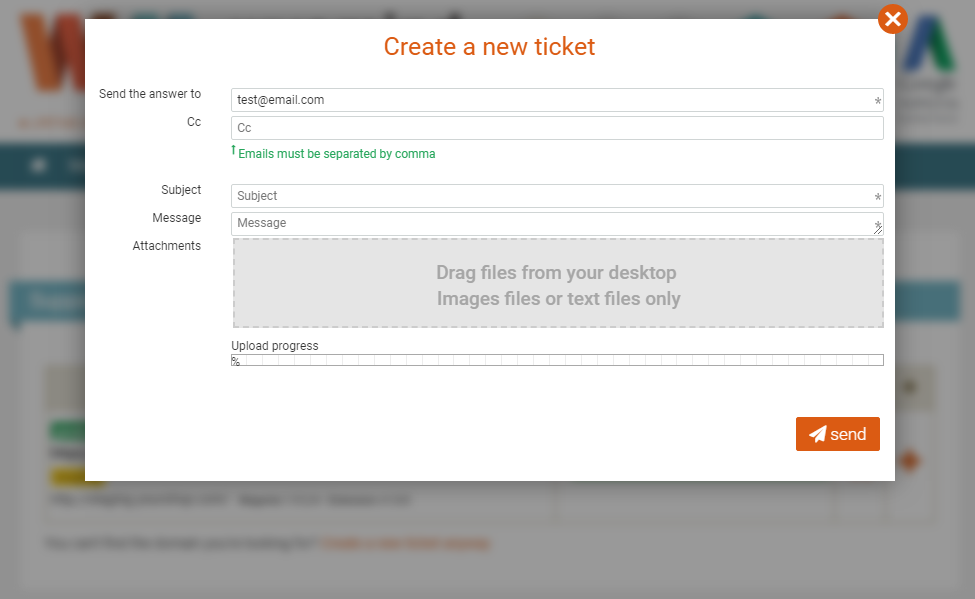
To submit a support request, you can fill in a ticket by clicking on Create a new ticket from:
mY ACCOUNTsupport
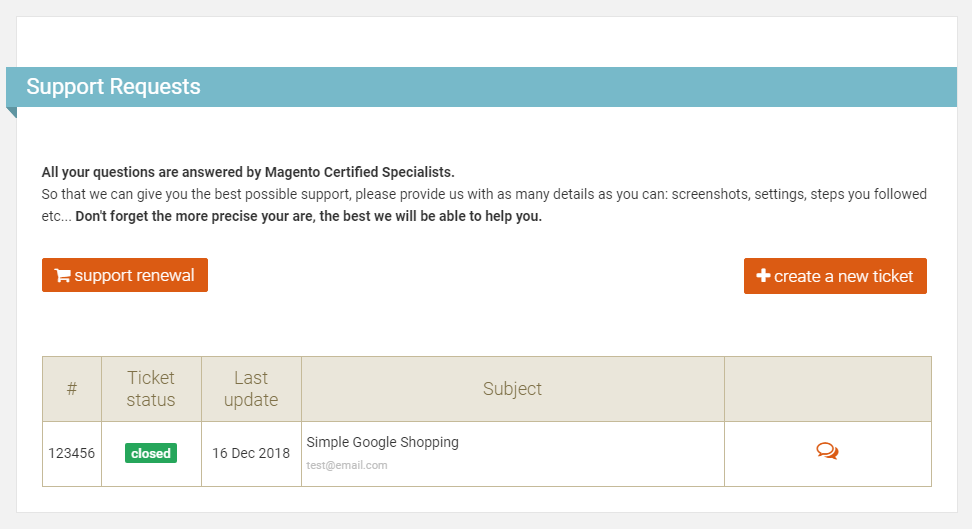
There, you will also be able to find all the tickets you've sent to our team and check if your new ticket has been replied to.
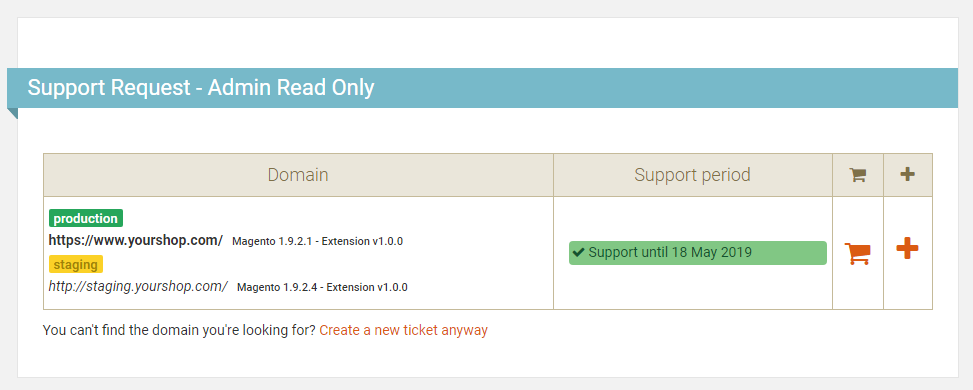
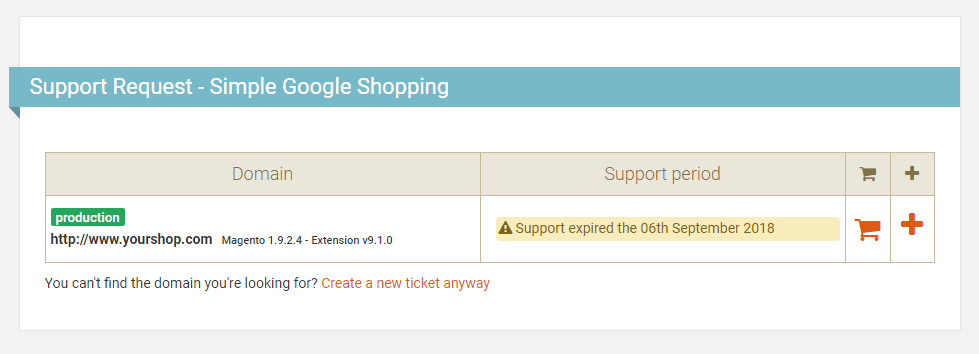
In the case where your Support period expired but you still need our team to help you with your project, you can easily renew your Support plan from your Wyomind account.
To renew your Support period, go in:
My accountSupport


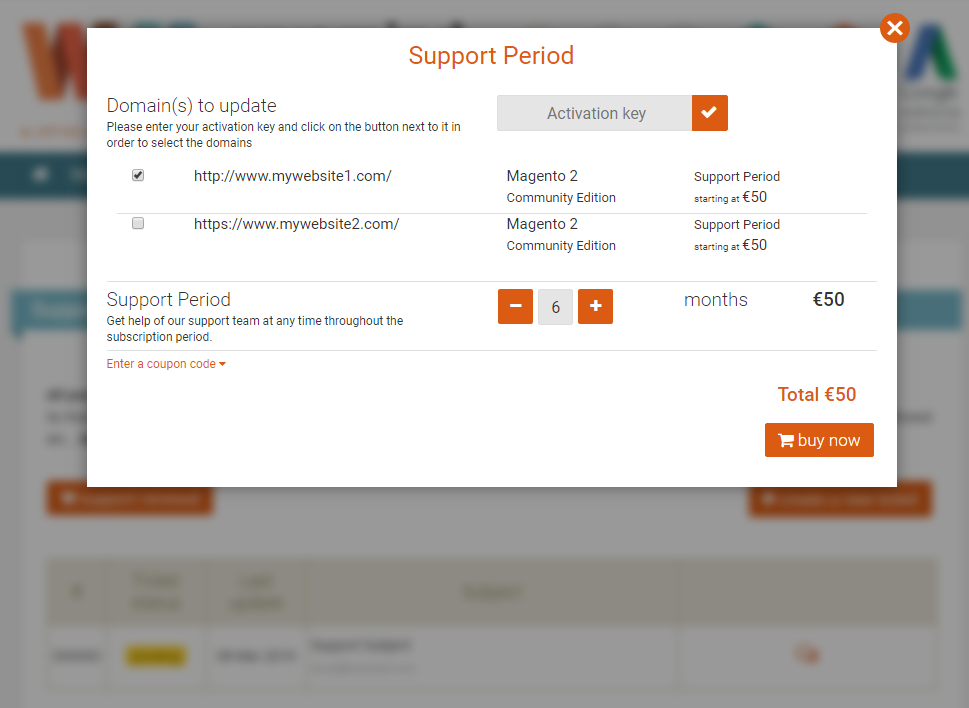
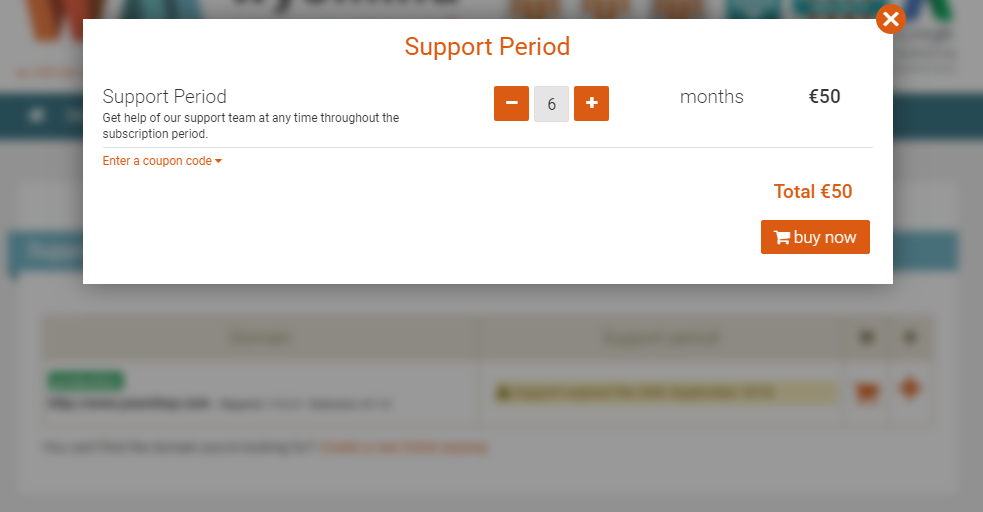
You can now click on Buy Now to extend your Support period.
You can also renew your Support period when creating a ticket from:
My accountSupport
In order to download the extension, log into your Wyomind account:
A new window opens.

Your download can start.
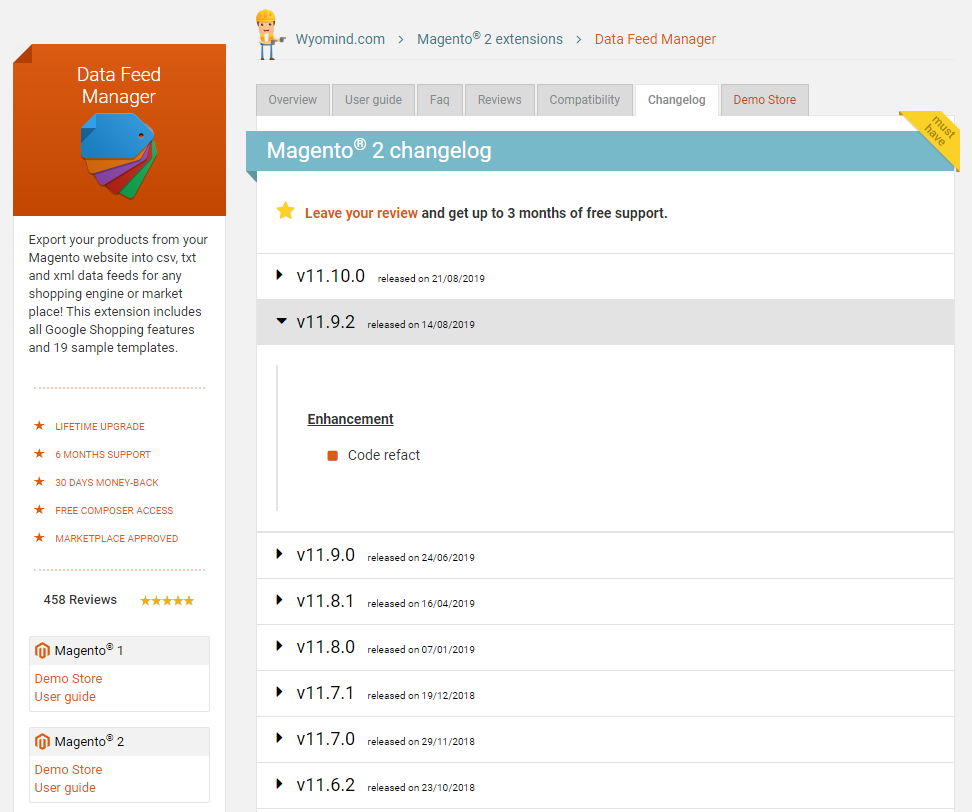
Our versioning system allows you to easily check if a new version of your extension is available to download and also keep a record of its evolution.
The versions are numbered according to the changes made on the extensions:
You can find all new versions of the extension in the Changelog tab.
When purchasing an extension from wyomind.com, you benefit from a lifetime upgrade. You can at any time download the latest version of the extension directly from your account.
To upgrade the extension, follow the steps below:
Wyomind provides patch versions to download (for both Magento 1 and Magento 2), to fix bugs that occurred on your previous installed versions.
You will be able to download the patch from your Wyomind account.
You can download the patch, the same way as you would a regular version by selecting it and clicking on the download button.
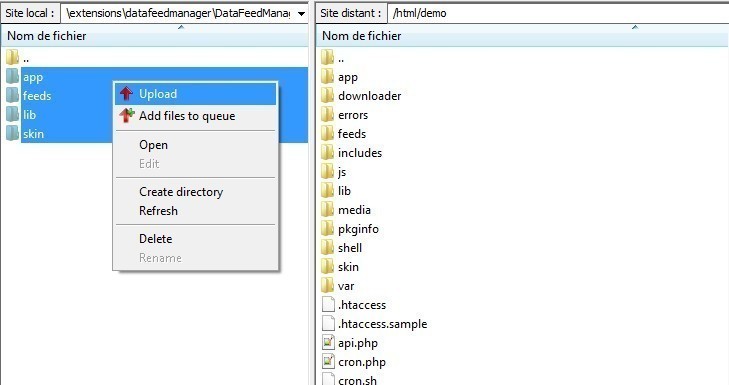
To uninstall the extension, go on its zip folder and open it.
You will find a shell file (such
Once the uninstallation is over, refresh your cache and enable the compiler back again (if you use it).
Before installing the extension, you’ll have to:
Now you can install the extension:
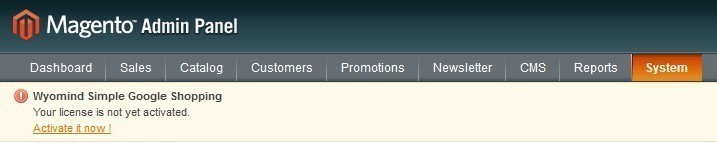
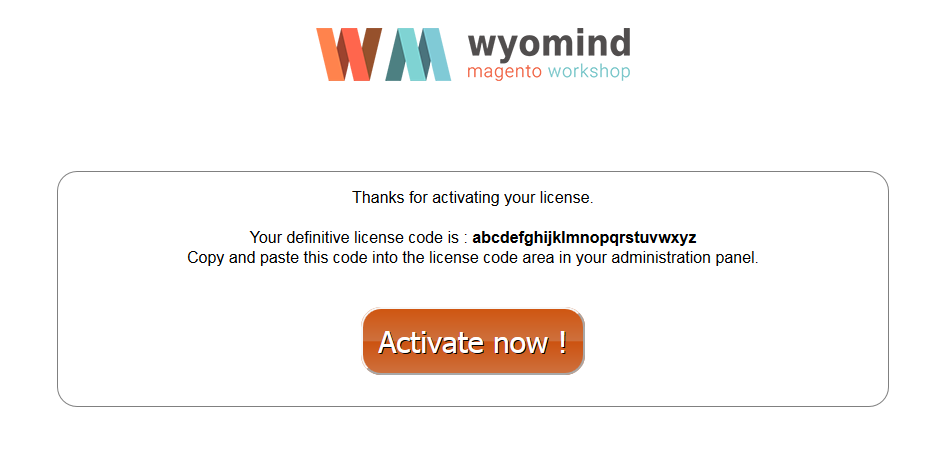
Next step is to activate your license, to do so, click here: Extension activation
Once the extension is installed, you have to activate the license:

Wyomind's License Manager has not been removed from your installation.
Wyomind's License Manager is enabled in: app/etc/modules/Wyomind_Licensemanager.xml
The HTML output for Wyomind_Licensemanager and/or Adminhtml_Notification are not disabled in your system under: system configuration advanced advanced

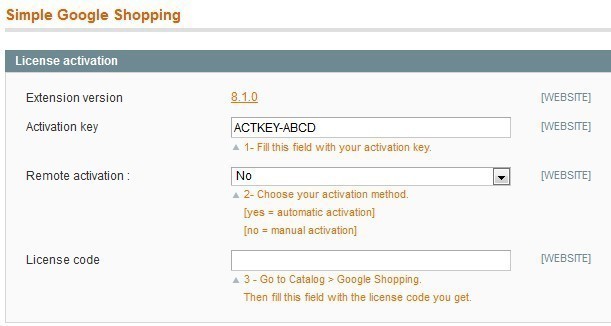
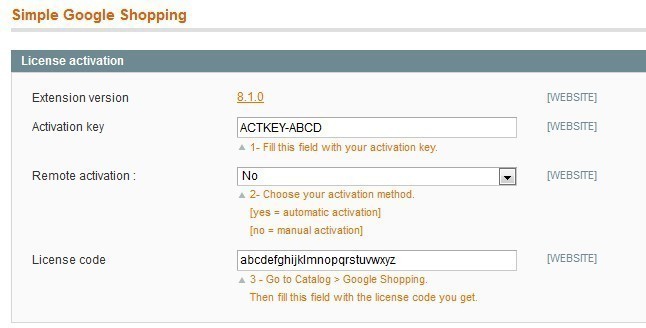
To activate the license of an extension that includes other modules, you’ll have to repeat the steps described above for each extension, using the corresponding activation keys (each module has its own activation key).
If "Request an IP unlock" appears in your Magento admin panel, it probably means that you have entered the wrong activation key too many times in your system. 
To solve this issue, follow the steps below:
Then, you should be able to activate your license.
If you keep getting the same "Request an IP unlock" message in your Magento admin panel, reactivate your license from:
System Configuration WyomindYour extension
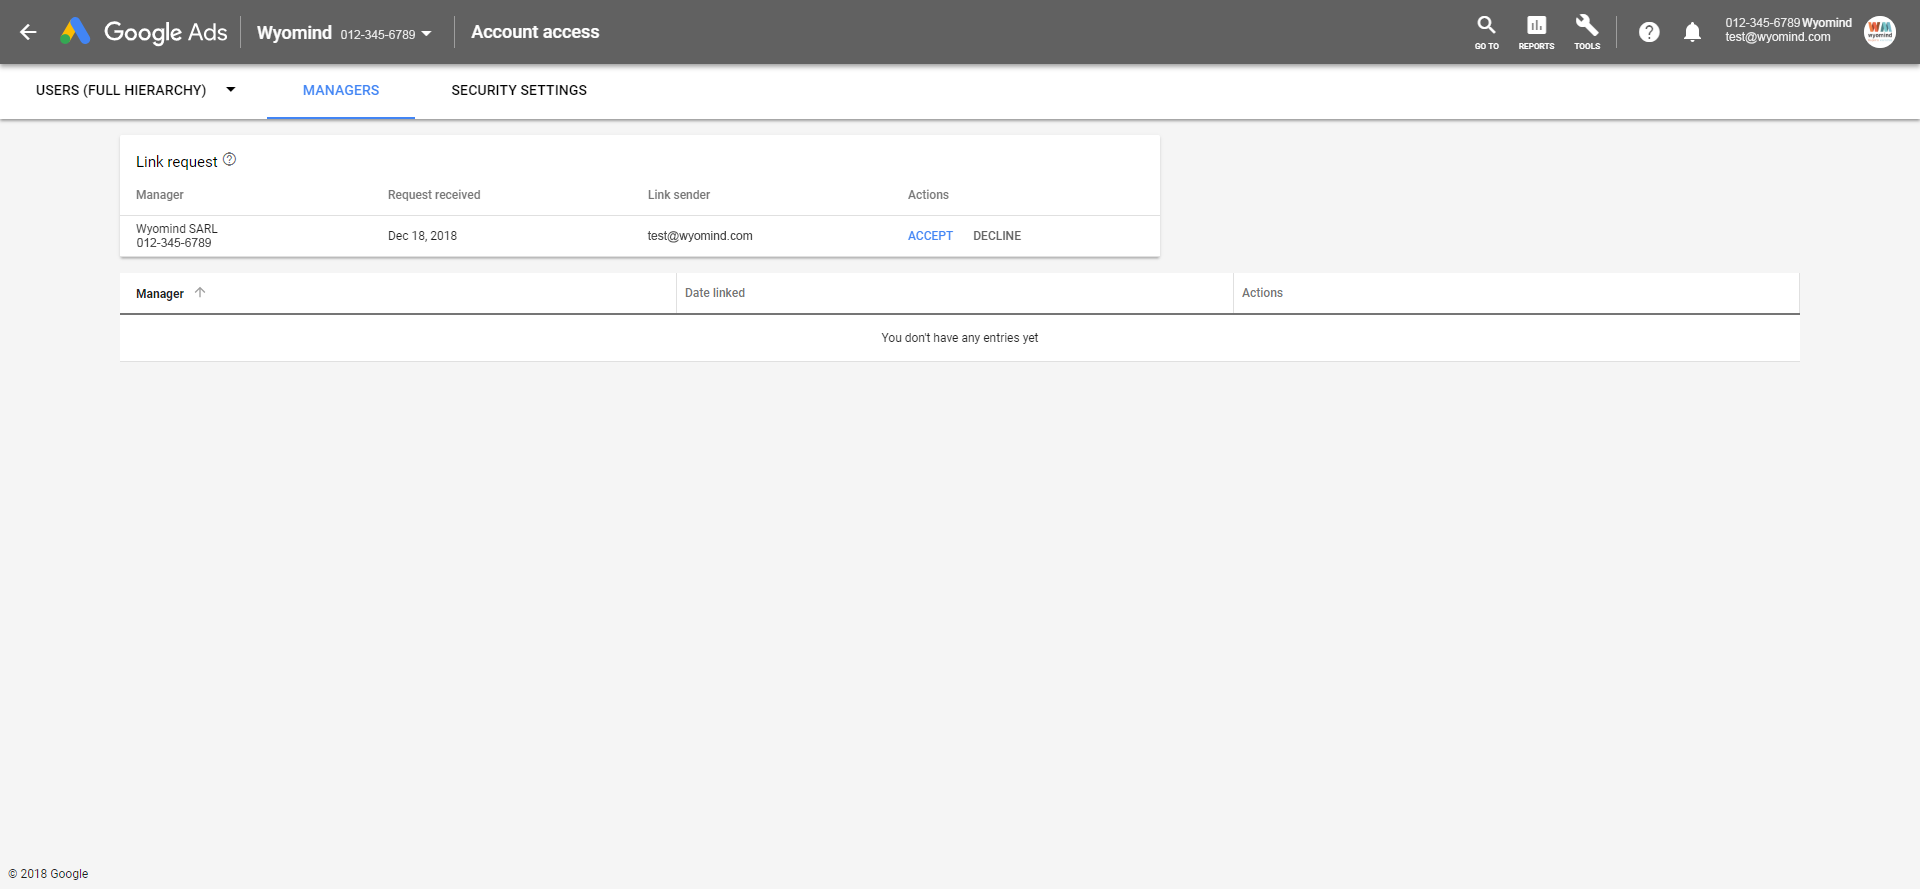
If your transfer request has not been accepted by our team, it might be because of the following reasons:
In the case where you've purchased the professional installation service, our team will need the below information in order to proceed with the installation of the extension:
Feel free to create a ticket including the above info from your Wyomind account in Support, or contact us via the following form.
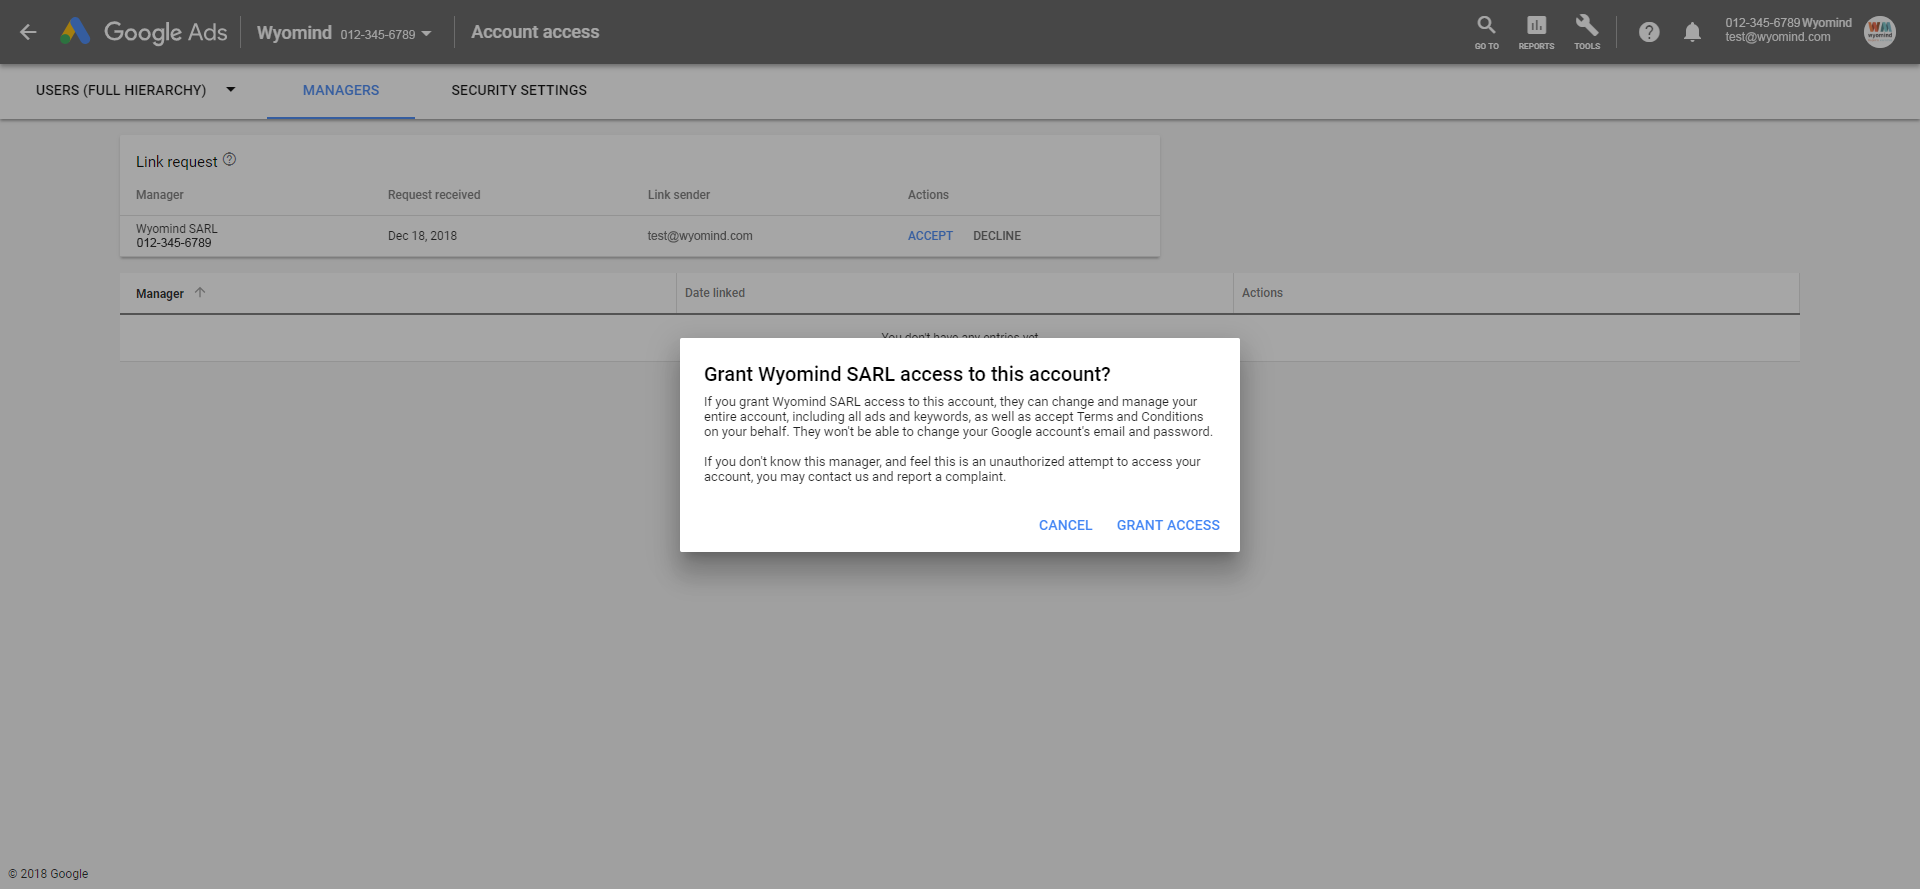
So that our team can proceed with the configuration of your data feed, we need you to share the access to your Google Merchant account with us.
As Google Partner, we offer many possibilities to manage your products on Google. Feel free to check our Google Shopping services for more information about the data feed configuration.
To share your access, go to your Google Merchant account.
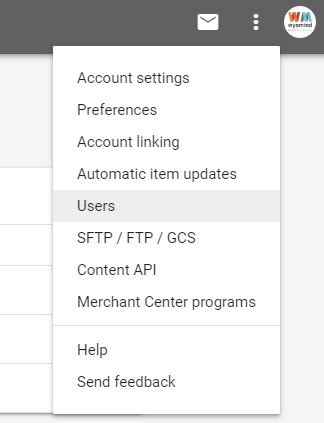

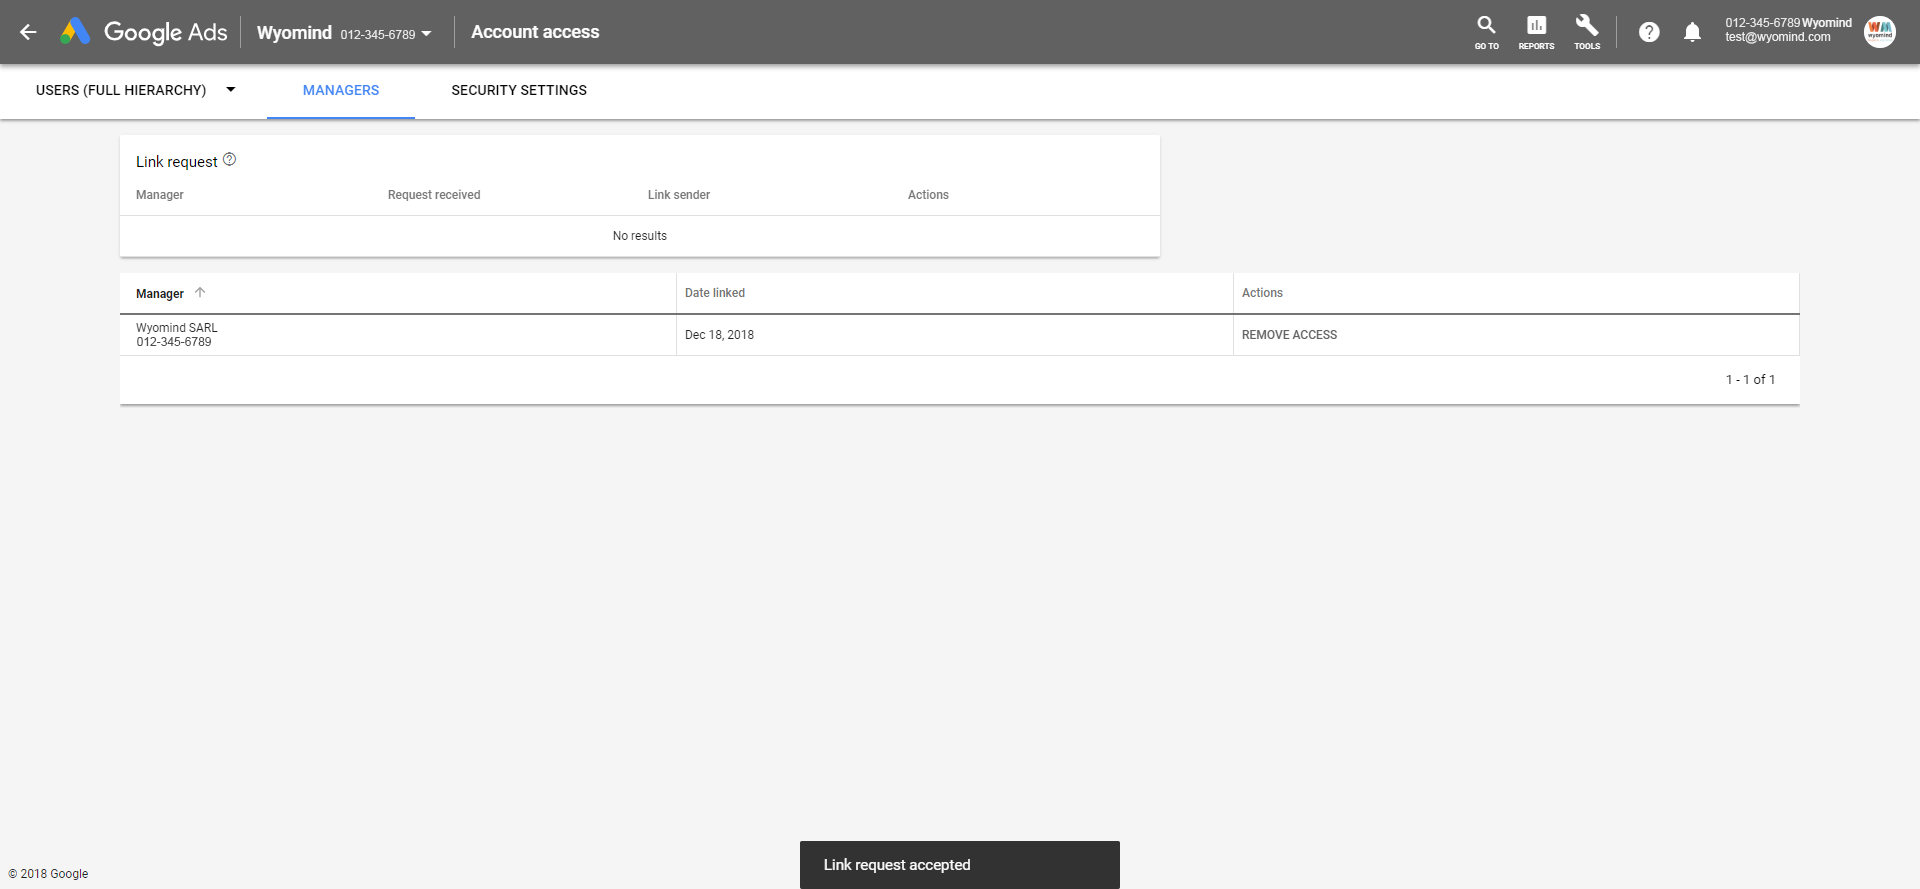
So that our team can proceed with the configuration of your data feed, we need you to share the access to your Google Ads account with us.
As Google Partner, we offer many possibilities to manage your products on Google. Feel free to check our Google Shopping services for more information about the data feed configuration.
To share your access, go to your Google Ads account.
If your site crashes and gives this error message after uploading all files to the correct folders:
Fatal error: Class 'Wyomind_Notificationmanager_Model_Resource_Setup' not found in includes/src/Mage_Core_Model_Resource_Setup.php on line 234It probably comes from installing an extension while the compiler is still enabled.
Important note:
Here is how to disable the Magento compiler:
define('COMPILER_INCLUDE_PATH', dirname(__FILE__).DIRECTORY_SEPARATOR.'src');define('COMPILER_COLLECT_PATH', dirname(__FILE__).DIRECTORY_SEPARATOR.'stat');to get:
#define('COMPILER_INCLUDE_PATH', dirname(__FILE__).DIRECTORY_SEPARATOR.'src');#define('COMPILER_COLLECT_PATH', dirname(__FILE__).DIRECTORY_SEPARATOR.'stat');If you're getting a white page using the extension, you should enable the error reporting in order to display the error. You can do that from index.php.
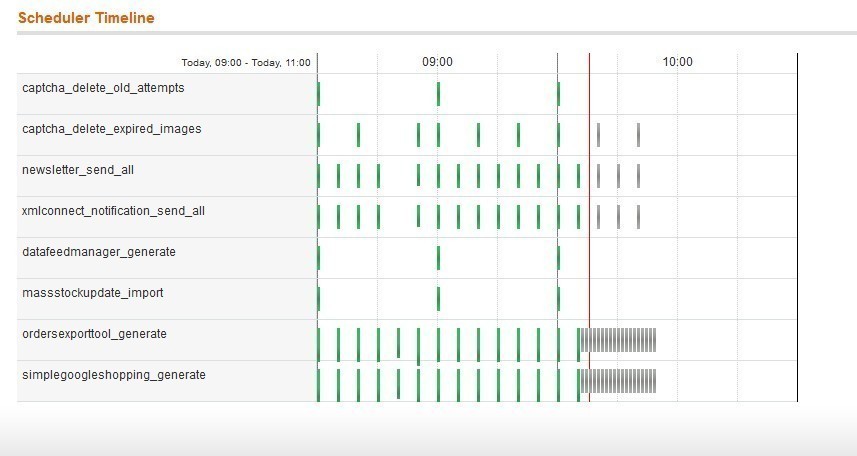
How do cron tasks work:
Be sure that you have correctly configured a scheduled task from the server side (cpanel) targeting the cron.php file in your Magento installation.

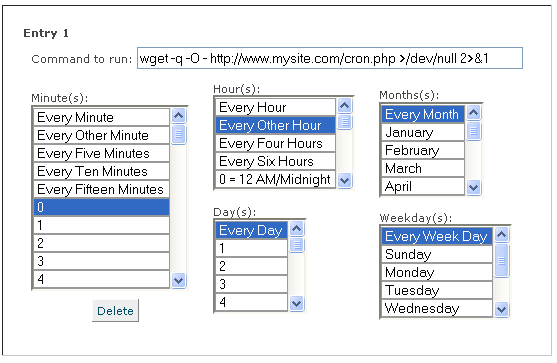
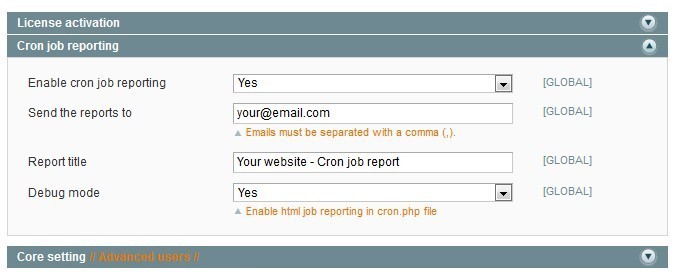
The extension includes reporting and debug tools for the scheduled tasks in:
systemconfigurationWyomindthe extension
We also strongly advice to install the AOE Scheduler that will help you to monitor the Magento cron tasks.
This issue may be due to a problem during the installation process.
You can fix it by following these steps:
If when saving your data feed configuration, you get:
Forbidden, You don't have permission to access /.../ on this server.
This is probably something regarding the hosting company that doesn't allow to post XML in the form.
The mod_security (security module) includes rules that stop all post/get requests including code.
In order to fix that issue, you should get in touch with your hosting company so that they can add some exceptions to the security rules.