Install the Elasticsearch server
Elasticsearch is a real-time distributed search and analytics engine that allows you to explore your data very quickly. It is used for full-text search, structured search, analytics, and all three in combination.
And it packages up all this functionality into a standalone server that your application can talk to via a simple RESTful API, using a web client from your favorite programming language, or even from the command line.
The Improved Search extension will allow you to make the link between the search and analytics engine and Magento 2.
You can find more information on the product here:
Install and run Elasticsearch server
As Elastic advises, "the easiest way to understand what Elasticsearch can do for you is to play with it".
To be able to use the Improved Search extension and reach the server, you first need to have a recent version of Java. You can easily install the latest version of Java from www.java.com.
Then you can install and run the Elasticsearch engine following the below steps.
Install Elasticsearch
You can download the latest version of Elasticsearch from elastic.co/downloads/elasticsearch.
Run Elasticsearch
To run Elasticsearch, open a console, and run the following command:
cd elasticsearch-<version>
./bin/elasticsearch
If you’re running Elasticsearch on Windows, simply run:
bin\elasticsearch.batTest Elasticsearch
You can easily test if the Elasticsearch engine is reached by trying to access http://localhost:9200/?pretty or by opening a new terminal window and running the following:
curl 'http://localhost:9200/?pretty'You should then get:

You now have an Elasticsearch node up and running.
Configure the Elasticsearch Core
You can configure the Elasticsearch Core according to your needs in the Magento configuration from:
StoreSWyomindElasticsearch Core
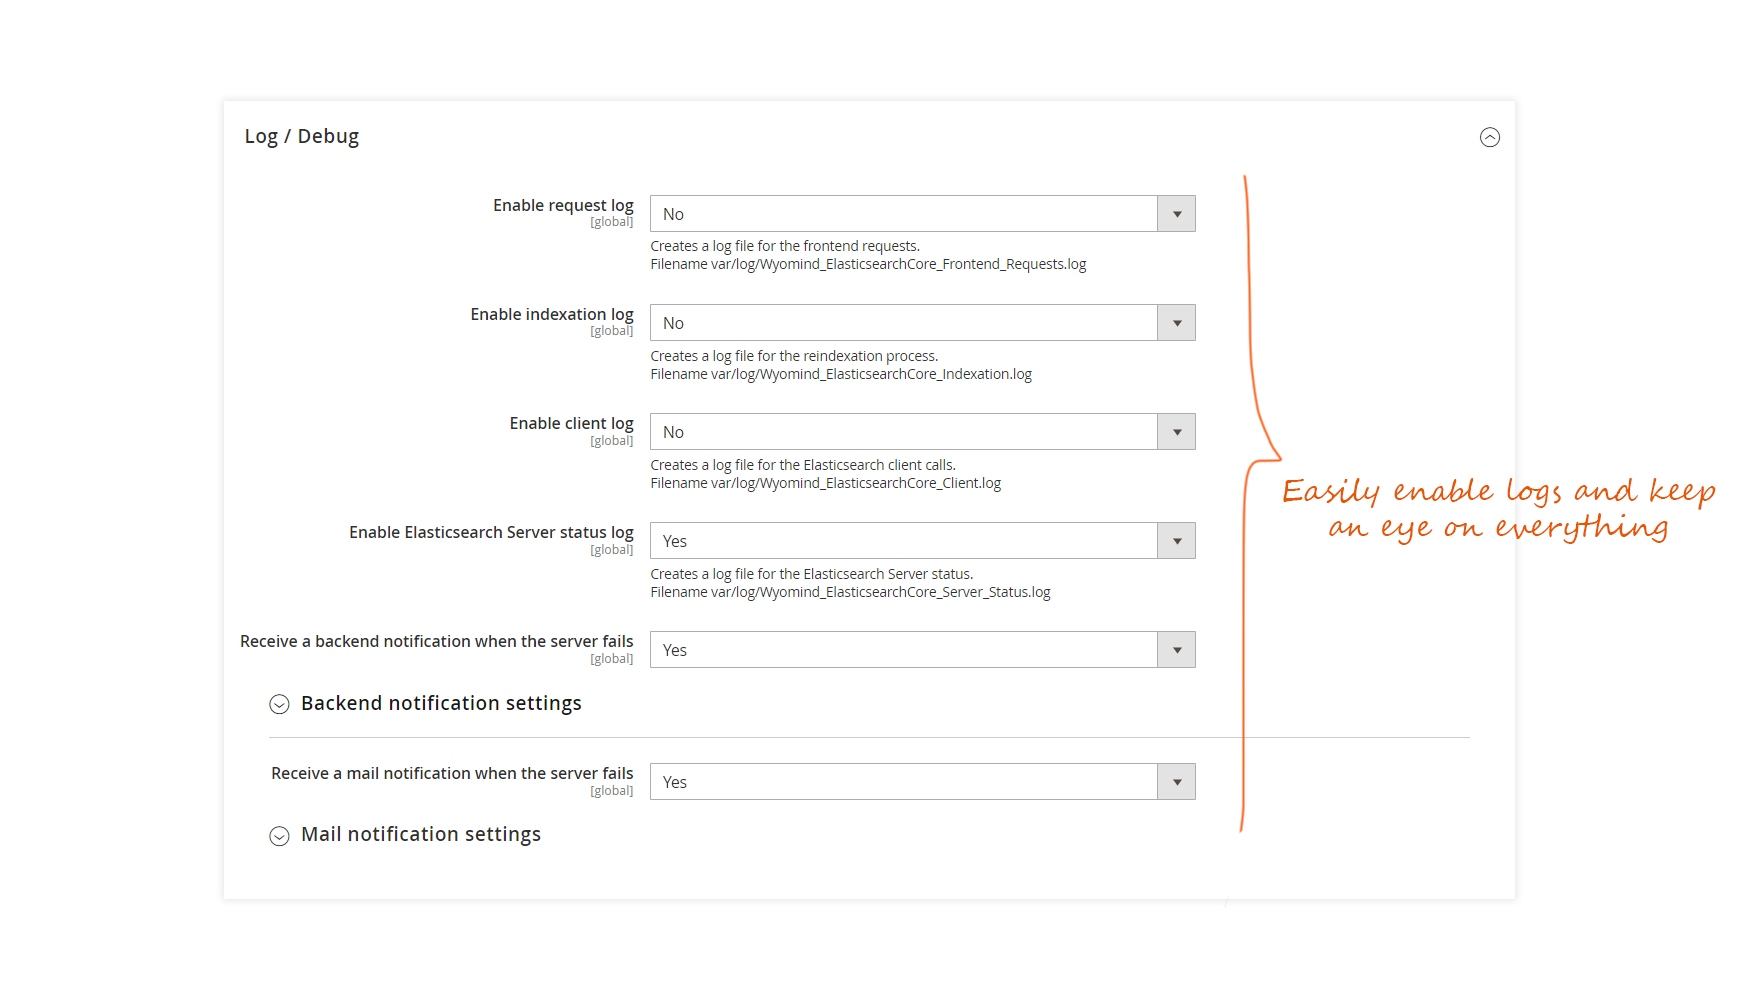
Enable the logs / debug
The extension comes with logs in order to help you to check the frontend requests, the indexation, and the Elasticsearch server status.
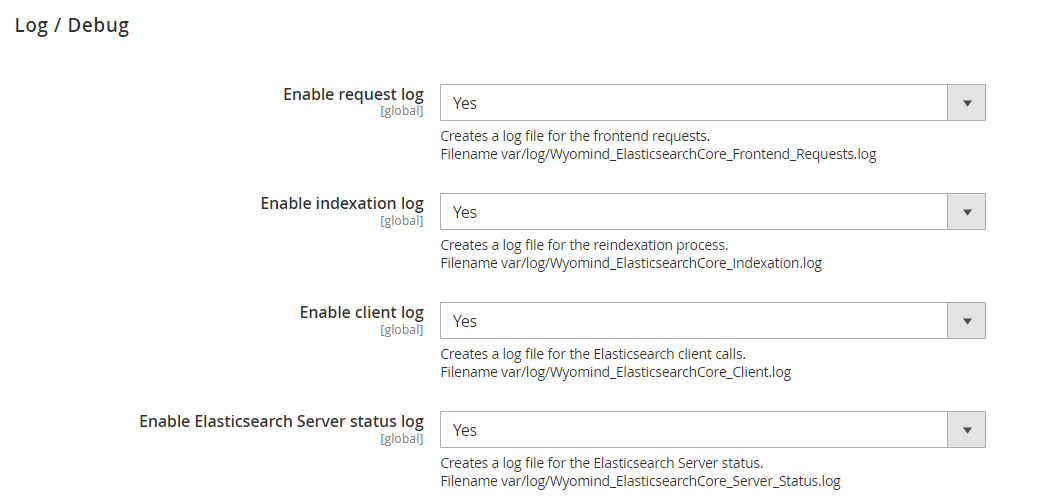
Enable request log
A log file is created for the frontend requests:
var/log/Wyomind_ElasticsearchCore_Frontend_Requests.log
Enable indexation log
A log file is created for the reindexation process:
var/log/Wyomind_ElasticsearchCore_Indexation.log
Enable client log
A log file is created for the Elasticsearch client calls:
var/log/Wyomind_ElasticsearchCore_Client.log
Enable Elasticsearch Server status log
A log file is created for the Elasticsearch Server status:
var/log/Wyomind_ElasticsearchCore_Server_Status.log
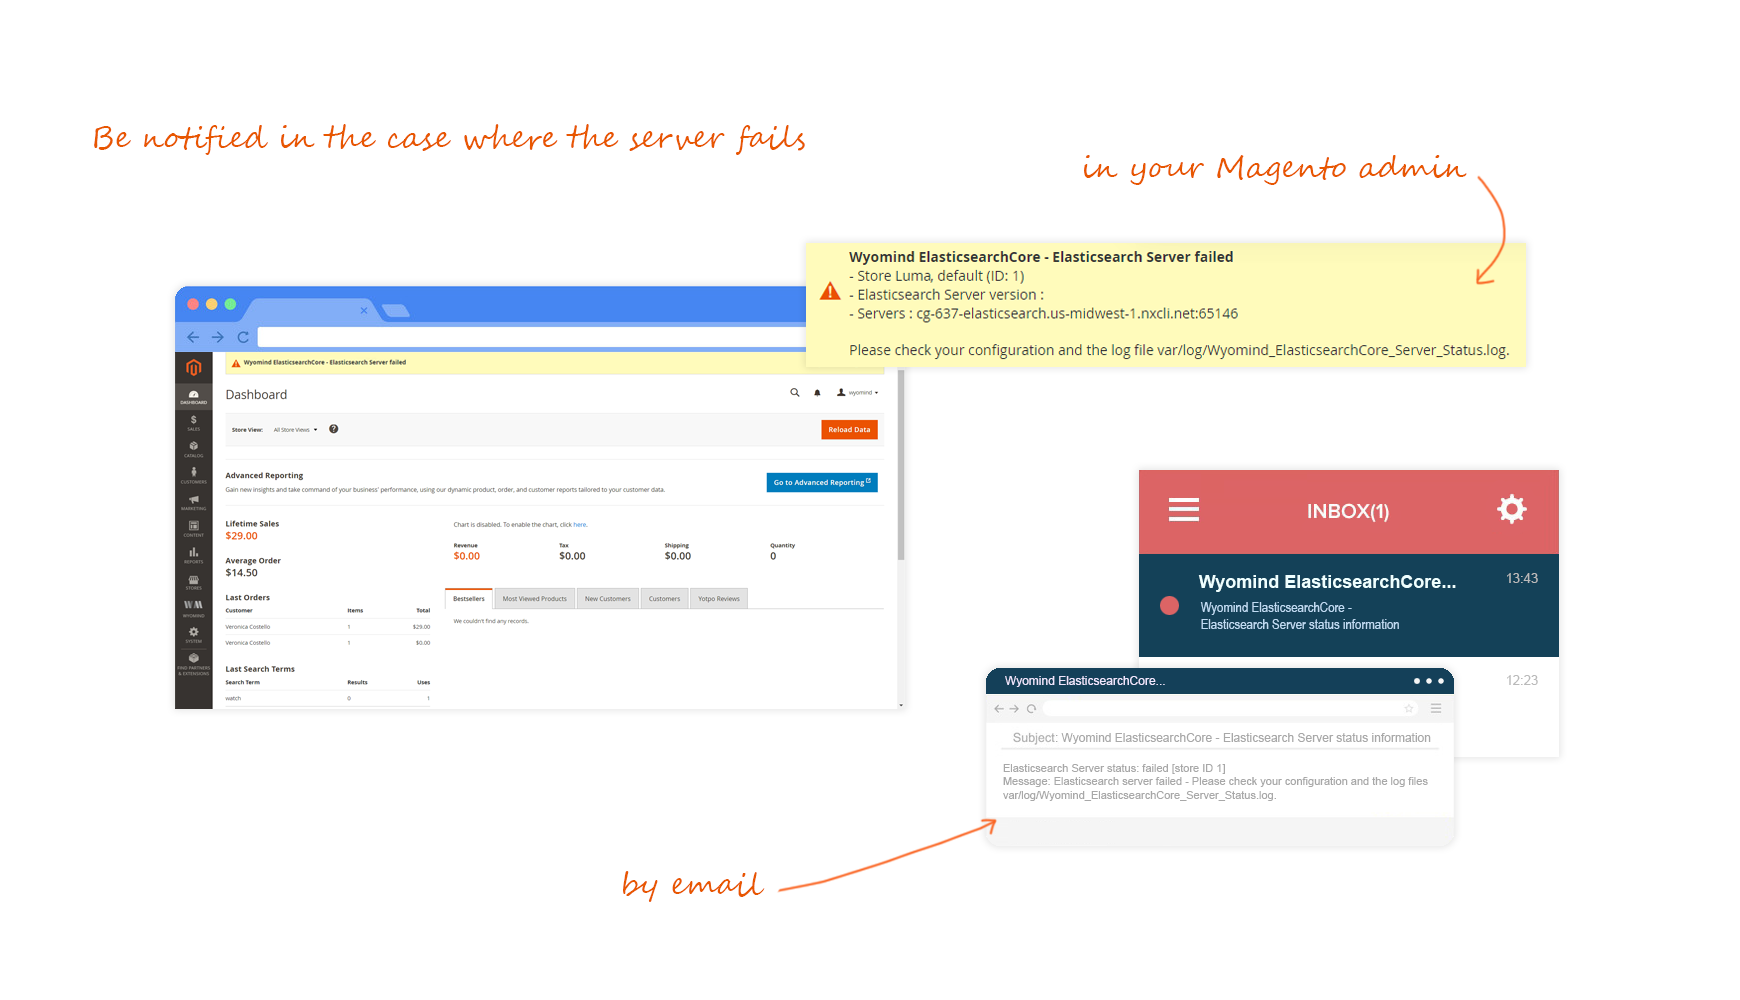
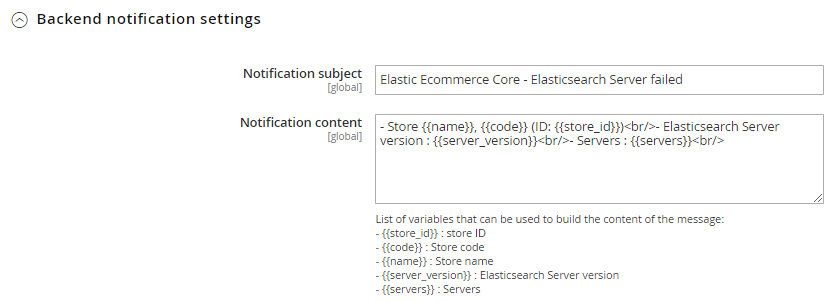
Receive a backend notification when the server fails
When the Elasticsearch Server status log is enabled, you can enable and define your own configuration for the backend notification subject and content.
Note that you have the possibility to use variables in the notification content:
- {{store_id}}
Store ID - {{code}}
Store code - {{name}}
Store name - {{server_version}}
Elasticsearch Server version - {{servers}}
Servers
Receive a mail notification when the server fails
When the Elasticsearch Server status log is enabled, you can enable and define your own configuration for the email notification.
Note that you have the possibility to use variables in the email content:
- {{store_id}}
Store ID - {{message}}
Returned message - {{server_status}}
Elasticsearch Server status - {{server_version}}
Elasticsearch Server version

Configure the server settings
You can configure the general Elasticsearch settings.
Elasticsearch Server version
Here will be displayed the version of the Elasticsearch server that you have installed.
6.3.2

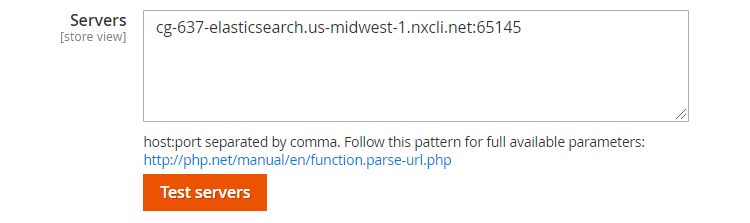
Servers
The servers must be written as host:port and separated with a comma.
Follow this pattern for full available parameters.
Check that your servers are correctly configured by clicking on TEST servers.
Verify Host
This is only used for https connection. You can set that option to No if you don't have a valid SSL certificate.

Connect Timeout
Number of seconds after a timeout occurs for every request.
5 seconds
![]()
Configure the indexing settings
Index Prefix
This is used to prefix index names in order to avoid potential collisions.
demo_m2_
![]()
Index Settings
Having more shards enhances the indexing performance and allows to distribute a big index across machines and having more replicas enhances the search performance and improves the cluster availability.

More info here: Index settings properties reference
Analysis Settings
This is where you can define the analysis settings.

Safe Reindex
Reindex in a temporary index and switch to it once finished. Especially useful for large product catalogs.

Automatically run indexers if invalidated
In some cases, you might need to reindex indexes automatically as it can take a lot of time. Then you can choose to automatically run indexers via a cron task when they are invalidated.

A notification is displayed in the header of Magento when indexes are invalidated.
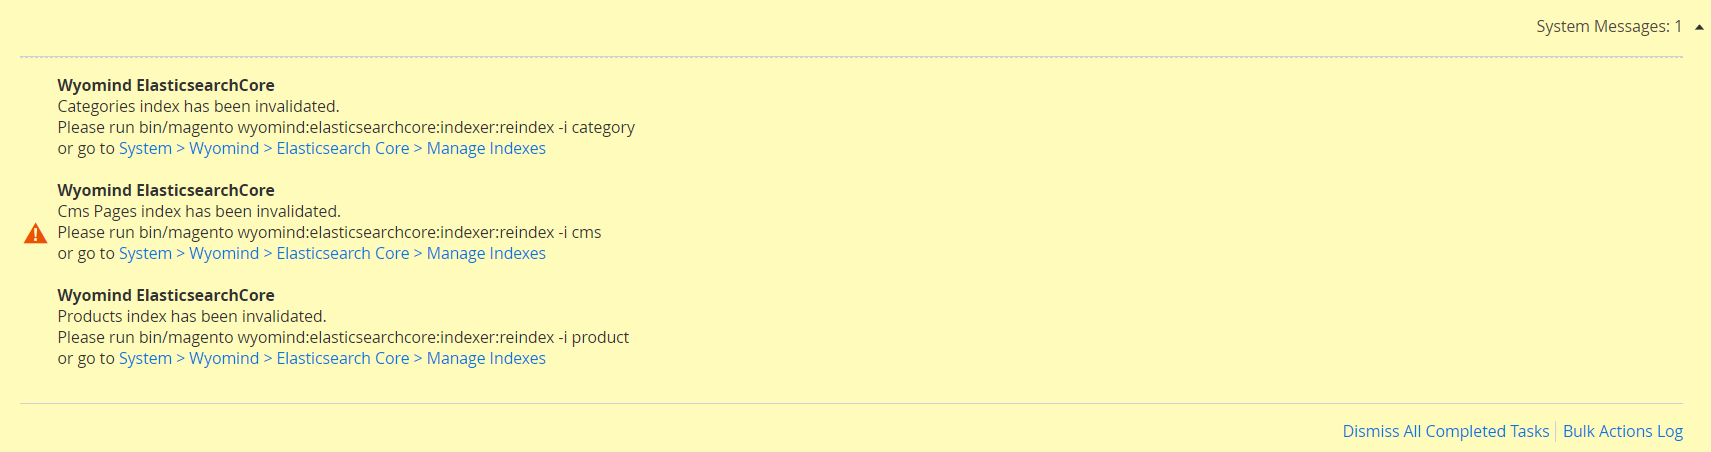
If you disable this option, see how to run your indexes manually.
Configure the search settings
Query Operator
By default, it is set to AND. You may have fewer results with the AND operator but they’ll be more relevant.
"digital camera" is translated to "digital AND camera" or "digital OR camera"

Enable Product Weight
This enables product weight modifier. It is only available for search results.

Use parent images
By enabling this option, when a product (configurable or bundle) is found from the data of a child product, then the parent product images will be used instead of the child product images.

Return available products first?
Enable this option to return the products available for purchase before the products not available.

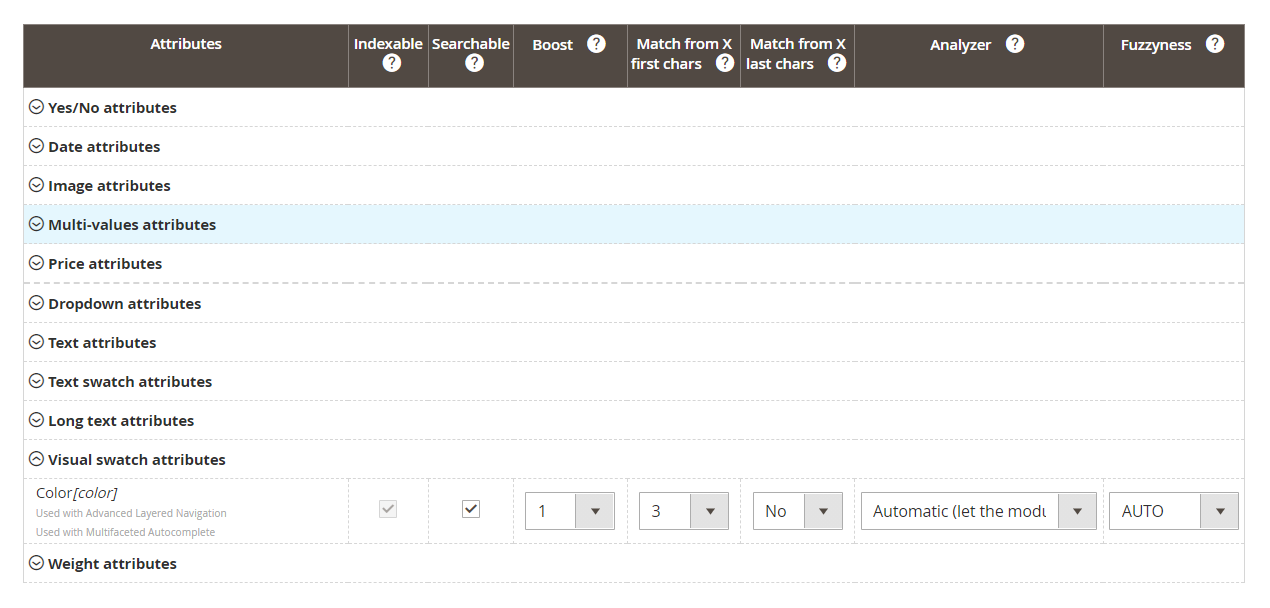
Configure the entities settings
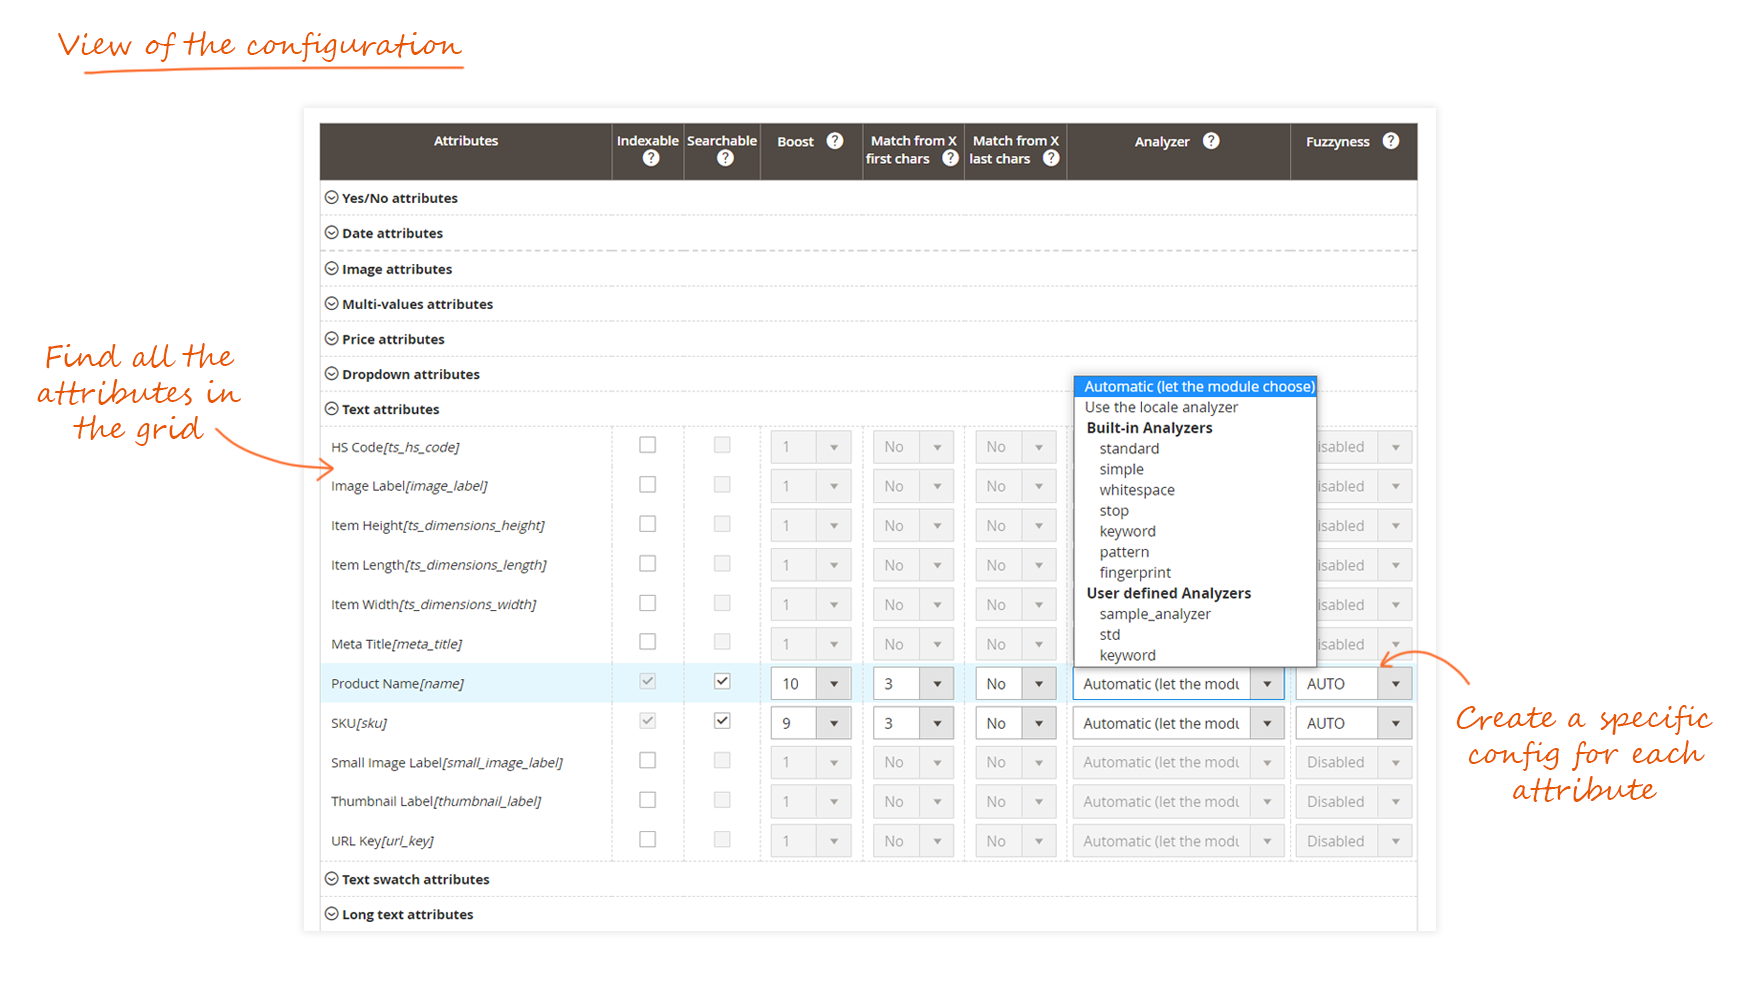
You can configure the indexing of the attributes more finely.
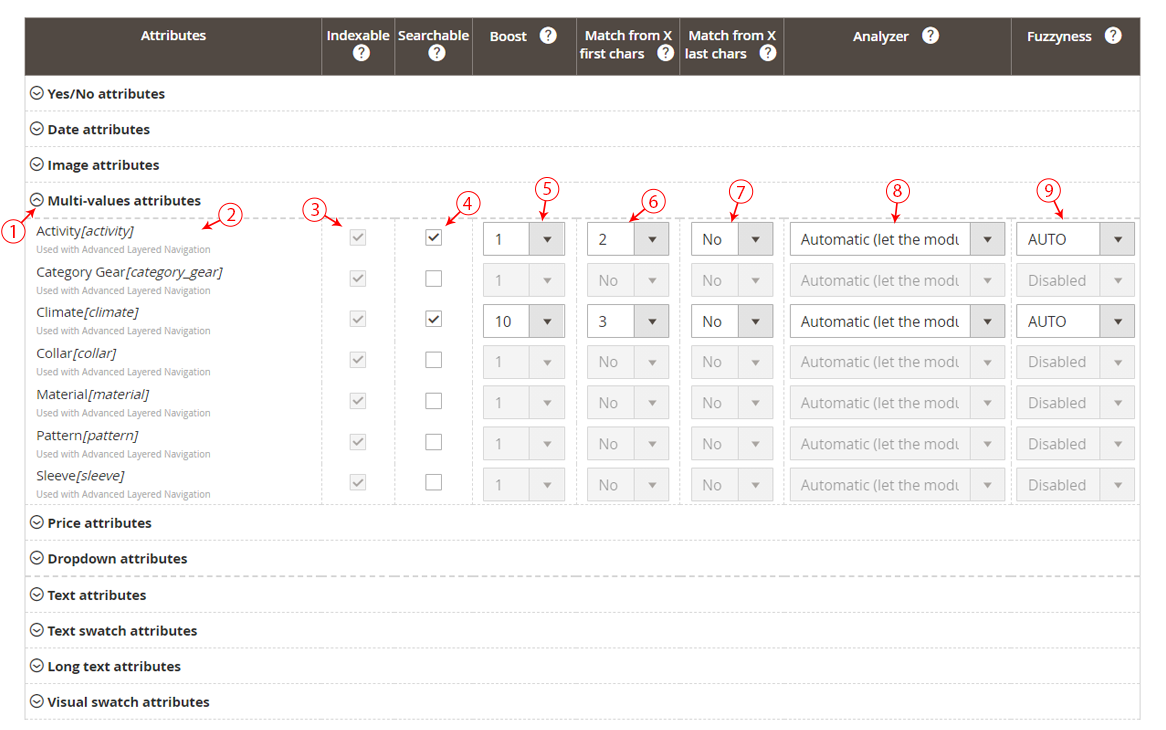
- Open each group of attributes using the arrow.
- Find all the attributes grouped by type.
- When fields are grayed out, it means that the attribute is indexed by default by the module.
To be able to modify the searchable option, the attribute must be indexable. - For an attribute to be searchable it must be indexed.
To be able to modify all of the following options, the attribute must be searchable. - You can boost each attribute you are indexing by assigning them a weight from 1 to 10.
Note that 10 is the highest weight. - You can start matching results from the first 1 to 5 characters.
- You can start matching results from the last 1 to 5 characters.
- The analyzer defines the way in which the content of the attributes will be analyzed. You have the choice between several analyzers.
Note that the automatic mode is suitable in most cases.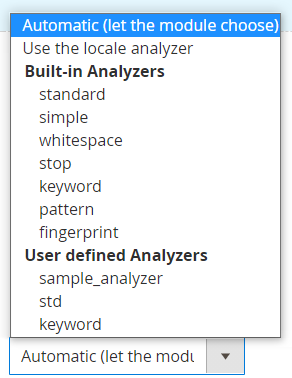 See how to create your own analyzers with our module.
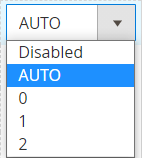
 - You have the possibility to enable the approximative search for each attribute and choose the fuzzyness level:

0: the number of possible errors is 0 whatever the size of the search word
1: the number of possible errors is 1 whatever the size of the search word
2: the number of possible errors is 2 whatever the size of the search word
AUTO: generates an edit distance based on the length of the term. Should generally be the preferred value.For the AUTO mode, the length of the words has an impact on the edit distance:
0..2: must match exactly
3..5: one edit allowed
>5: two edits allowedCheck the Elasticsearch documentation for more info on the fuzzy query mode.

Product
When the Product Search is enabled, the products are indexed in Elasticsearch.
You can define the image size in pixels.
50px
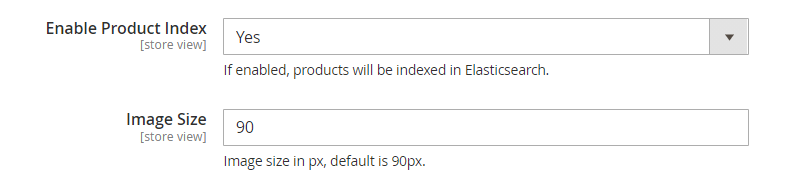
Then, select and configure the attributes that are searchable.
Product Name
SKU
Color
Description
Gender
Manufacturer
Developer tools
Test Search
The Test Search is equivalent to the frontend search with debug info. This allows you to control how the search will work with the Elasticsearch Core configuration.
You can access the Test Search page from:
SystemWyomind Elasticsearch coreTest Search
You can configure:
- Search term
Add the term you want to search. - Results limit
Define a limit for the number of results displayed. - Storeview
Choose the store view from where you want to run the search. - Customer Group
Choose the customer group to search from.
Useful to control the product prices for a specific customer group.
After that, you can click on Search.
A grid will display the results for your search.
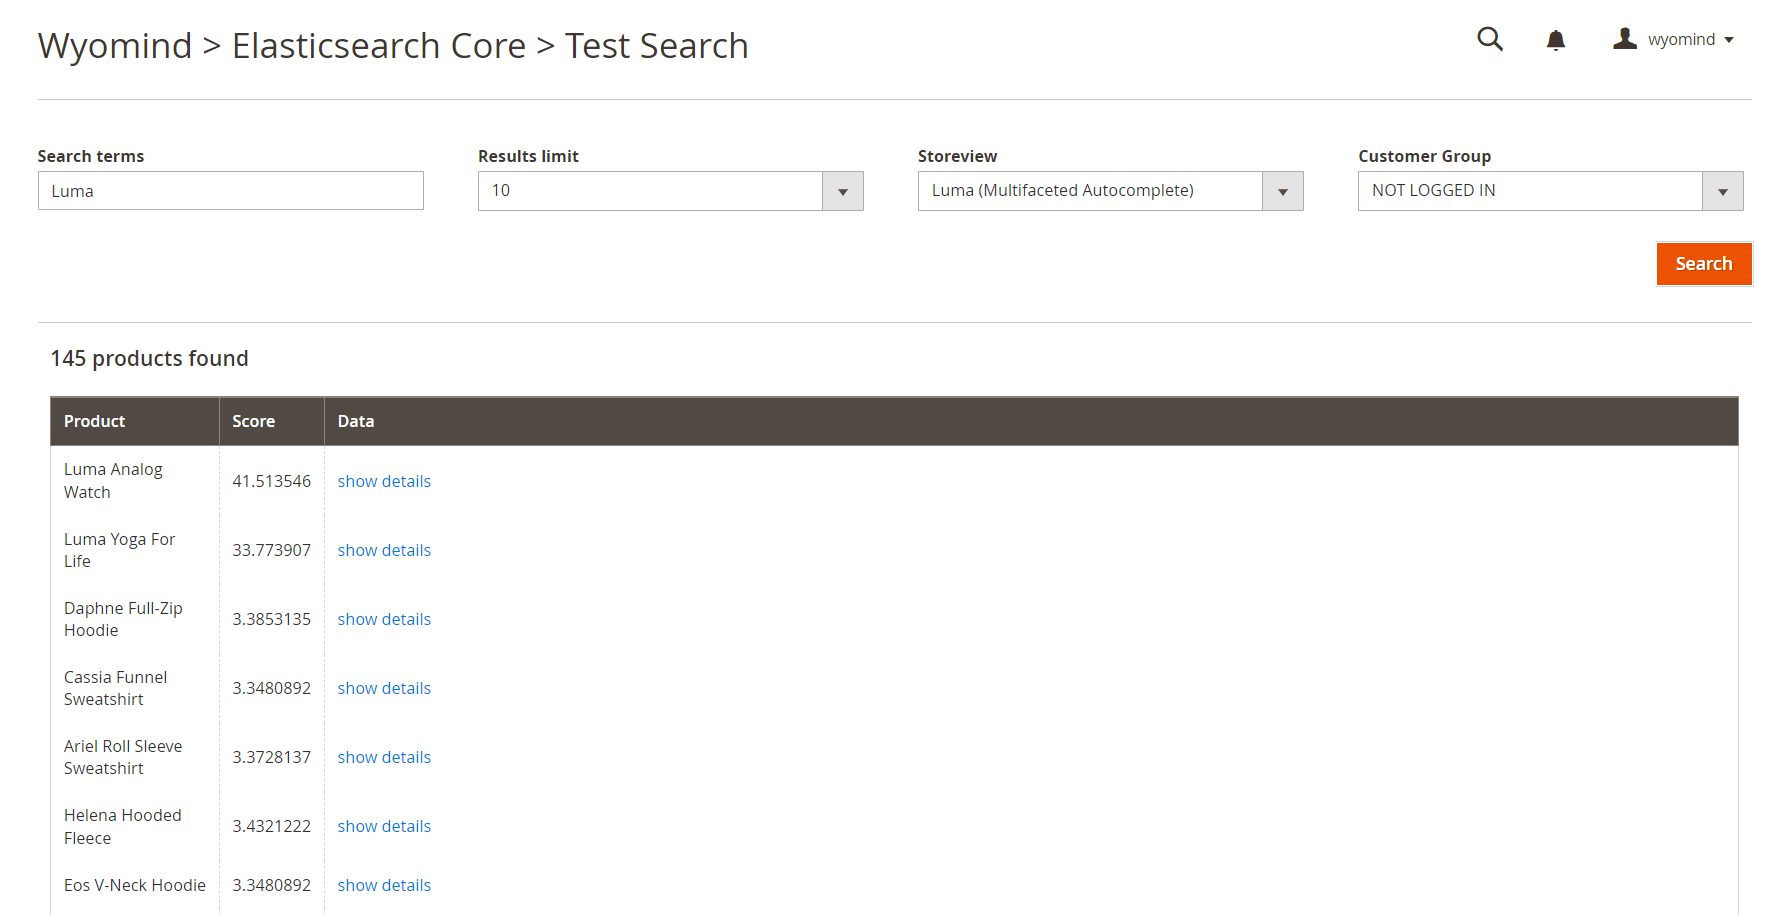
When clicking on Show details, you should get more details about the results.
This is particularly useful to know everything that is returned in the search.
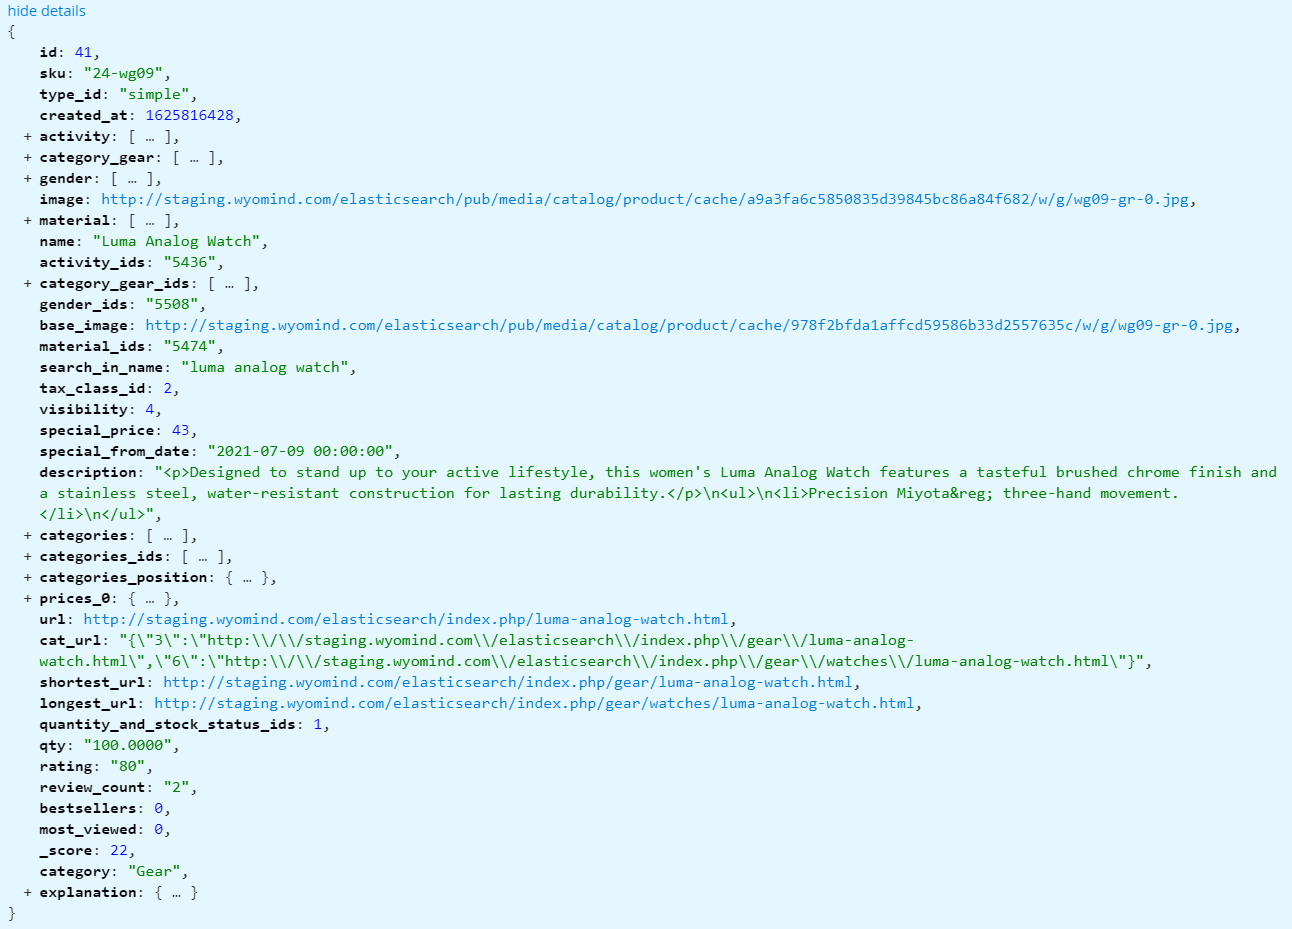
The explanation field explains how the score is calculated and why the product appears first in the search results.

Test Analyzers
As our module offers the possibility to create your own analyzers, it is important to be able to test them.
You can access the Test Analyzers page from:
SystemWyomind Elasticsearch coreTest Analyzers
Add your code in the Custom Analyzers field, select the Built-in Analyzers you want to test, and add a Test phrase.
Click on Run Tests.
The result of the analyzer will be displayed in the table below.
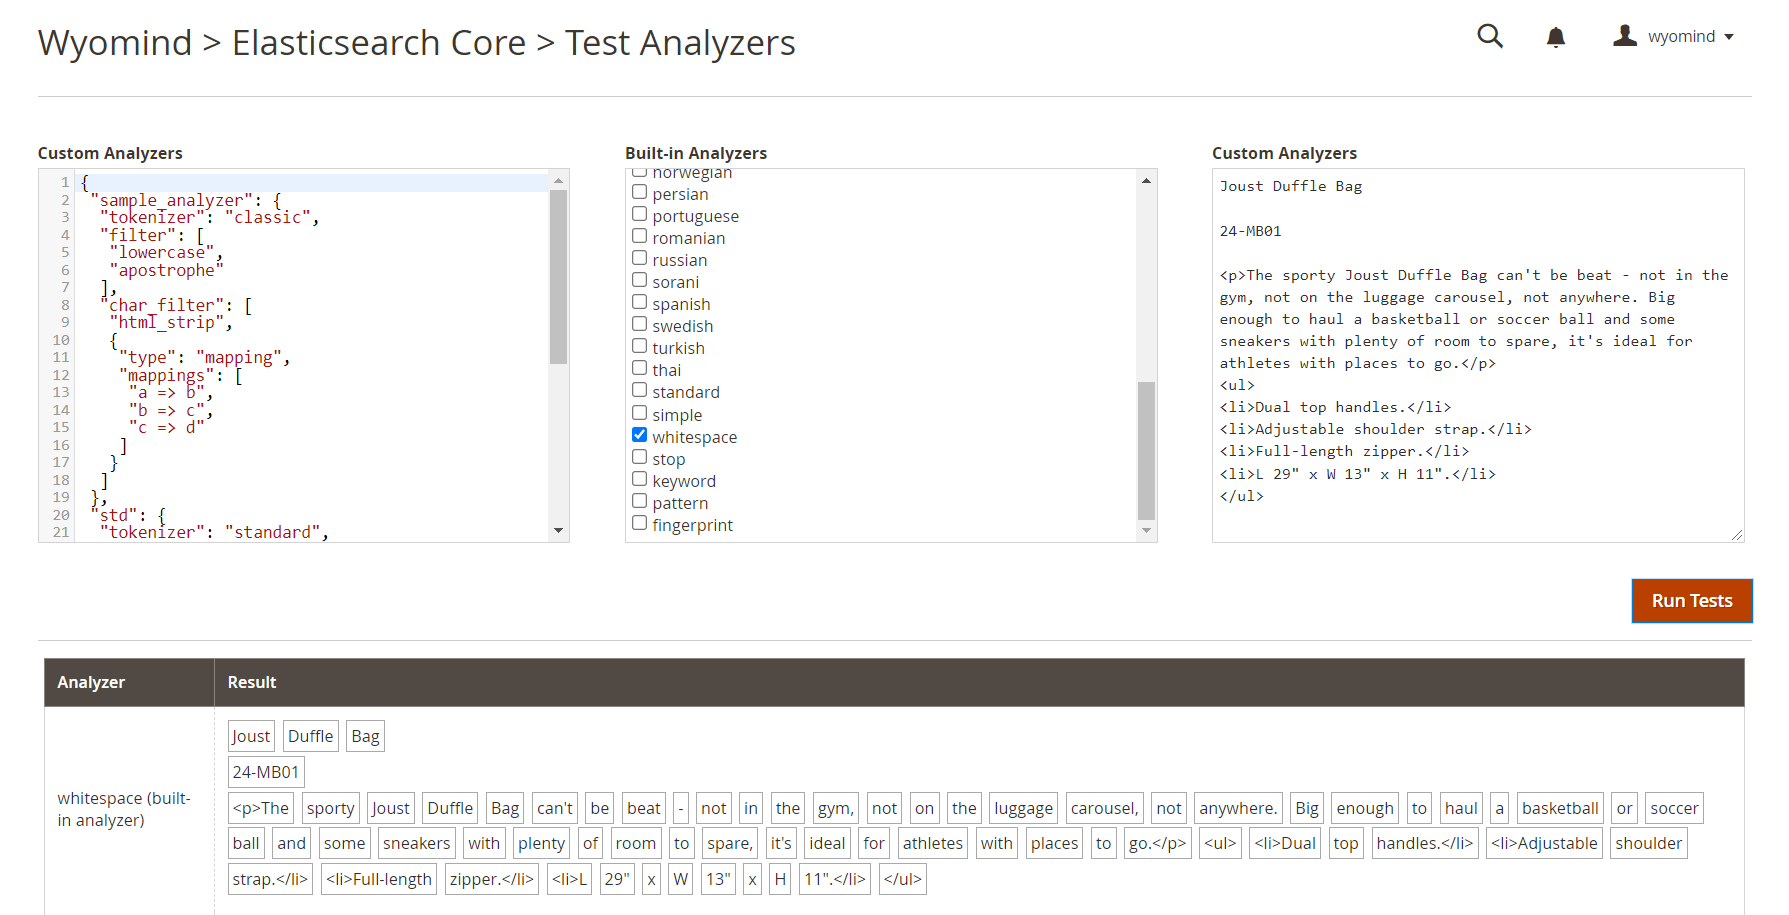
Below are some examples:
whitespace: will analyze by separating words with spaces
standard: will separate words with spaces, apostrophes, chevrons ... and remove HTML tags to keep only useful content
Manage the indexes
You have the possibility to get more information and to manage your indexes directly from the table in:
SystemWyomind ELasticsearch CoreManage Indexes

The indexes are automatically updated after the below actions:
- Add / Edit / Delete a product
The product is updated at the product index level. - Category products list update
The category is updated at the category index level and the products previously and currently linked to the category are updated. - Review added to a product
The product rating is updated at the product index level.
Indexer
There are several types of index:
- product
- category (used with the Elasticsearch Suite)
- cms (used with the Elasticsearch Suite)
- brand (created by the Shop By Brand extension and used with Elasticsearch Suite)
Description
In the Description column, when clicking on More information, you can see:
- luma_2_product
It is the name of the index at the Elasticsearch server level under the below format:
the prefix + the storeview code + the index type - 2046 documents
It means that 2046 products are indexed. - 4187,21 kB
It is the size of the index on the disk. - View Mapping
When clicking on View Mapping, a popup should open and display the mapping data.

Last Update
The last time the index has been run will be recorded in the Last Update column.
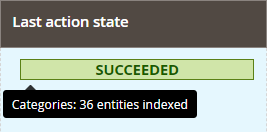
Last Action State
The last action state will be recorded in this column. You can also see the number of entities that were indexed by hovering the mouse over the status.
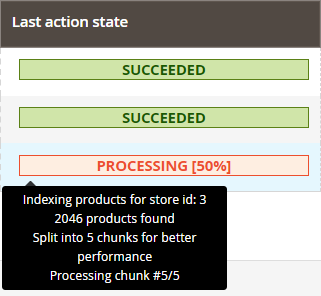
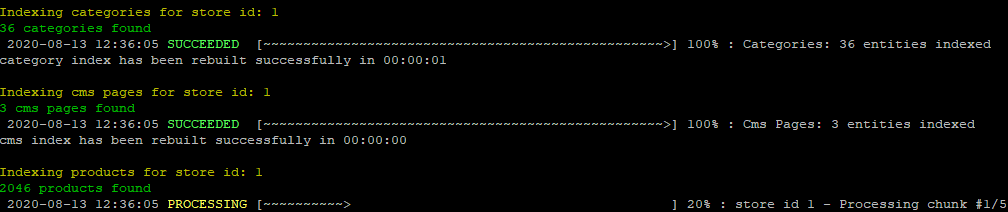
When running an index, a progress bar will display its status and some information about the indexing process.
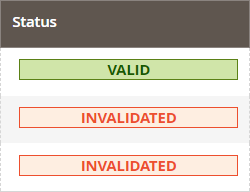
Status
From the Status column, you can see if the indexes are valid of invalidated.
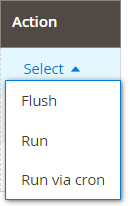
Action
From the Action column, you can choose to:
- Flush the index: this will empty, reset the index.
- Run the index: this will fully reindex the entities.
- Run via cron: this will trigger the cron task to run the selected index.
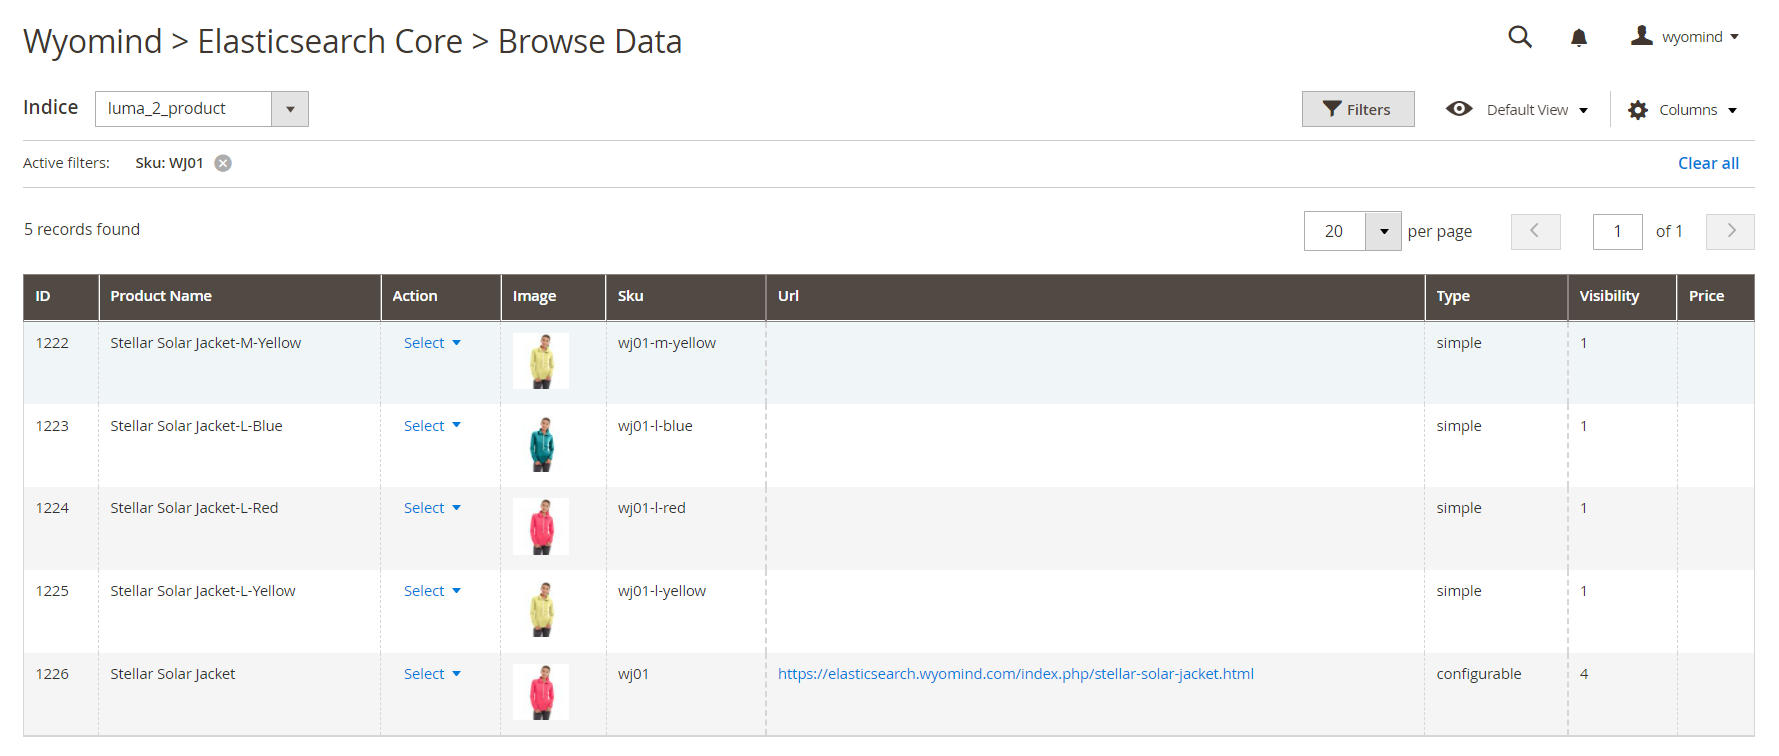
Browse Data
You can easily see what is indexed at the product level in that section:
SystemWyomind ELasticsearch CoreBrowse Data
From the Action column, you have the possibility to:
- Edit each line
Redirects you to the product page - See the raw data
Opens a popup that displays the raw data; what is really indexed in Elasticsearch.
Use the Command Line Interface
The extension comes with several command lines you can easily use.
Update Elasticsearch server version
To update the Elasticsearch server version with the right, you can use the below command line:
bin/magento wyomind:elasticsearchcore:update:server:versionReindex your data
To reindex your data, you can use the below command line:
bin/magento wyomind:elasticsearchcore:indexer:reindex [options]Options:
- -s storecode or --store storecode
The code of the store view for which to re-index data.
Note that this parameter is unique, you can’t add many store codes.To reindex data for the store view which code is “storefr”:
bin/magento wyomind:elasticsearchcore:indexer:reindex -s storefror
bin/magento wyomind:elasticsearchcore:indexer:reindex --store storefr - -i type or --index type
The index types: product
To reindex products:
bin/magento wyomind:elasticsearchcore:indexer:reindex -i productor
bin/magento wyomind:elasticsearchcore:indexer:reindex --index productYou can also reindex your CMS pages and categories when using the Enhanced Autocomplete or the Multifaceted Autocomplete extension. - -p ID or --product ID
The ID of the product to reindex.
Note that this parameter is unique, you can’t add many products.To reindex product with ID 2:
bin/magento wyomind:elasticsearchcore:indexer:reindex -i product -p 2or
bin/magento wyomind:elasticsearchcore:indexer:reindex --index product --product 2
When running an index, a progress bar will display its status and some information about the indexing process.
Manage your search results
Like the product attributes, you can assign weight to your products directly.
Give weight to your products
Assign weight to products
To boost your products in the search results, you can give them a weight. For this, go in:
CatalogProducts
There, edit a product you want to showcase.
In the Wyomind Elasticsearch Core tab, you can define the weight from 1 to 10.
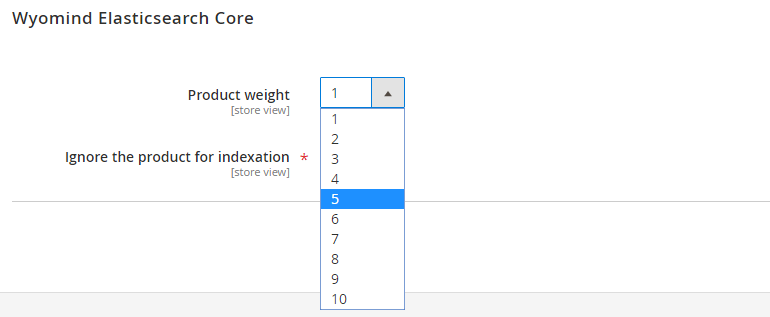
Ignore products in the indexation
You have the possibility to ignore products in the indexation process. For this, go in:
CatalogProducts
There, edit a product you want to ignore.
In the Wyomind Elasticsearch Core tab, you can switch the Ignore the product for indexation option to Yes.

Manage the synonyms in your search results
The extension takes into account the synonyms in the search.
Create groups of synonyms
You can create new groups of synonyms from:
MarketingSeo & SearchSearch Synonyms
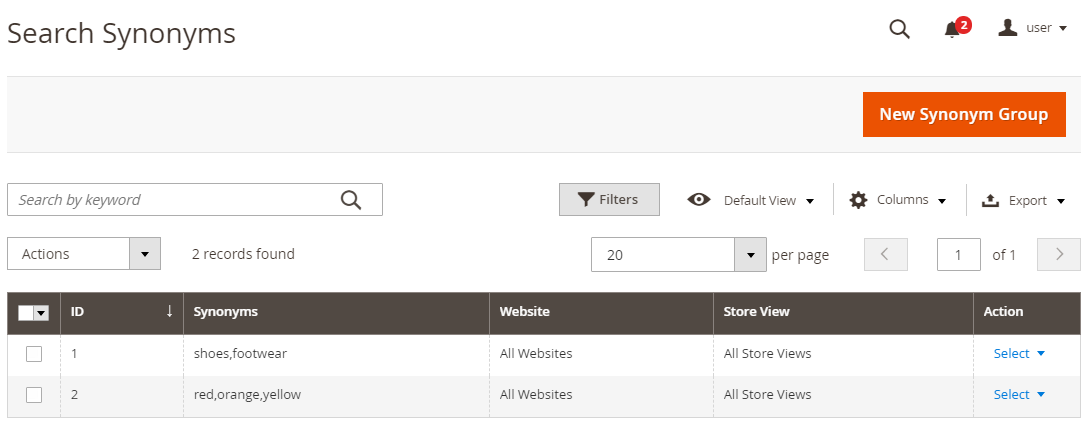
For example, if you create the list of synonyms:
shoes,footwear
This means that when searching for "orange shoes", the extension will search:
orange shoes
orange footwear
If other synonyms are defined such as:
red,orange,yellow
In that case, the extension will search:
red shoes
red footwear
orange shoes
orange footwear
yellow shoes
yellow footwear
All the corresponding products will then be displayed in the same list.