13 years of business2563 reviews 4.9 average rating
Magento 2
Cron Scheduler
Makes visible and comprehensible the cron tasks that run in the background of your Magento 2 website. This extension helps to monitor cron jobs and provides many features that help to prevent errors.
The cron tasks mechanism in Magento requires to understand a few basic principles:
The main cron task that runs on the server triggers regularly (ideally each minute).
bin/magento cron:run
The above command analyses each cron job (configured in the different enabled modules) and for each one of them, it programs the cron tasks for a few hours ahead depending on your preferences in: Storeconfigurationsystem cron
Then, the same command runs the cron tasks that match with the current time, flags the tasks that are too old as missed, and cleans up the history of the tasks.
How to use Cron Scheduler on Magento 2
STEP 1: Install the Cron Scheduler extension
To install the Cron Scheduler extension in your Magento 2 back office, you need to:
Before installing the extension, it's advisable to backup your Magento 2 installation.
Then, you need to refresh caches in: SystemToolsCache Management
Now, you can download the zipped extension from: your Wyomind accountLICENSES & DOWNLOADS
Once you have downloaded it, unzip the folder content.
Copy the appfolder and paste it into the Magento 2 root directory. You can merge the directories.
Open a console and run the following command on the Magento 2 root directory:
bin/magento setup:upgrade
Once your installation is complete, don't forget to clear the cache and log in again.
STEP 2: Use the Cron Scheduler extension
Cron Scheduler offers three distinct views allowing to visualize and manage the cron tasks.
Tasks Timeline Chronological view of the executed and scheduled cron tasks.
Task list Grid view of the executed and scheduled cron tasks.
Job configuration Grid view of all cron jobs that generate new cron tasks.
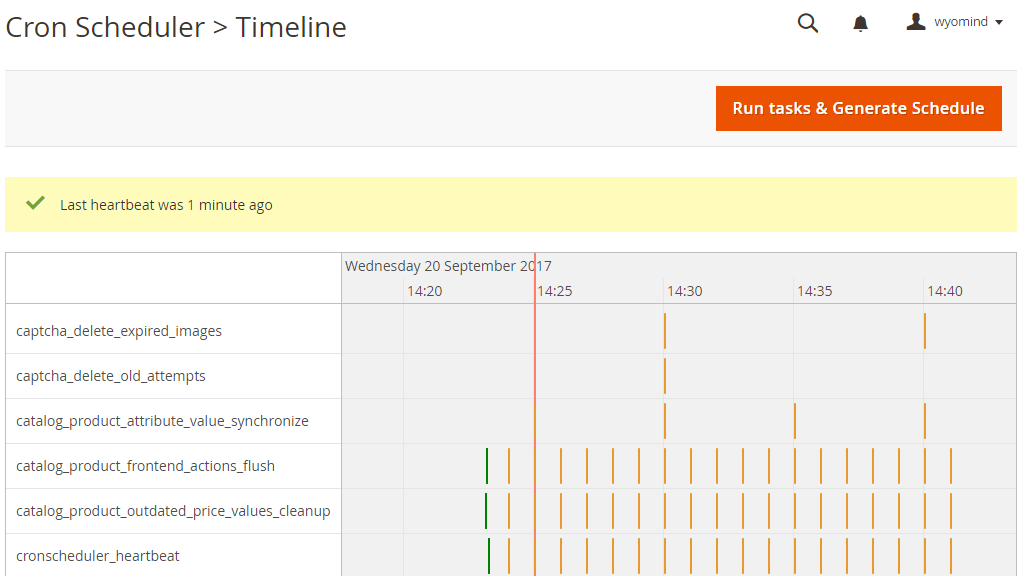
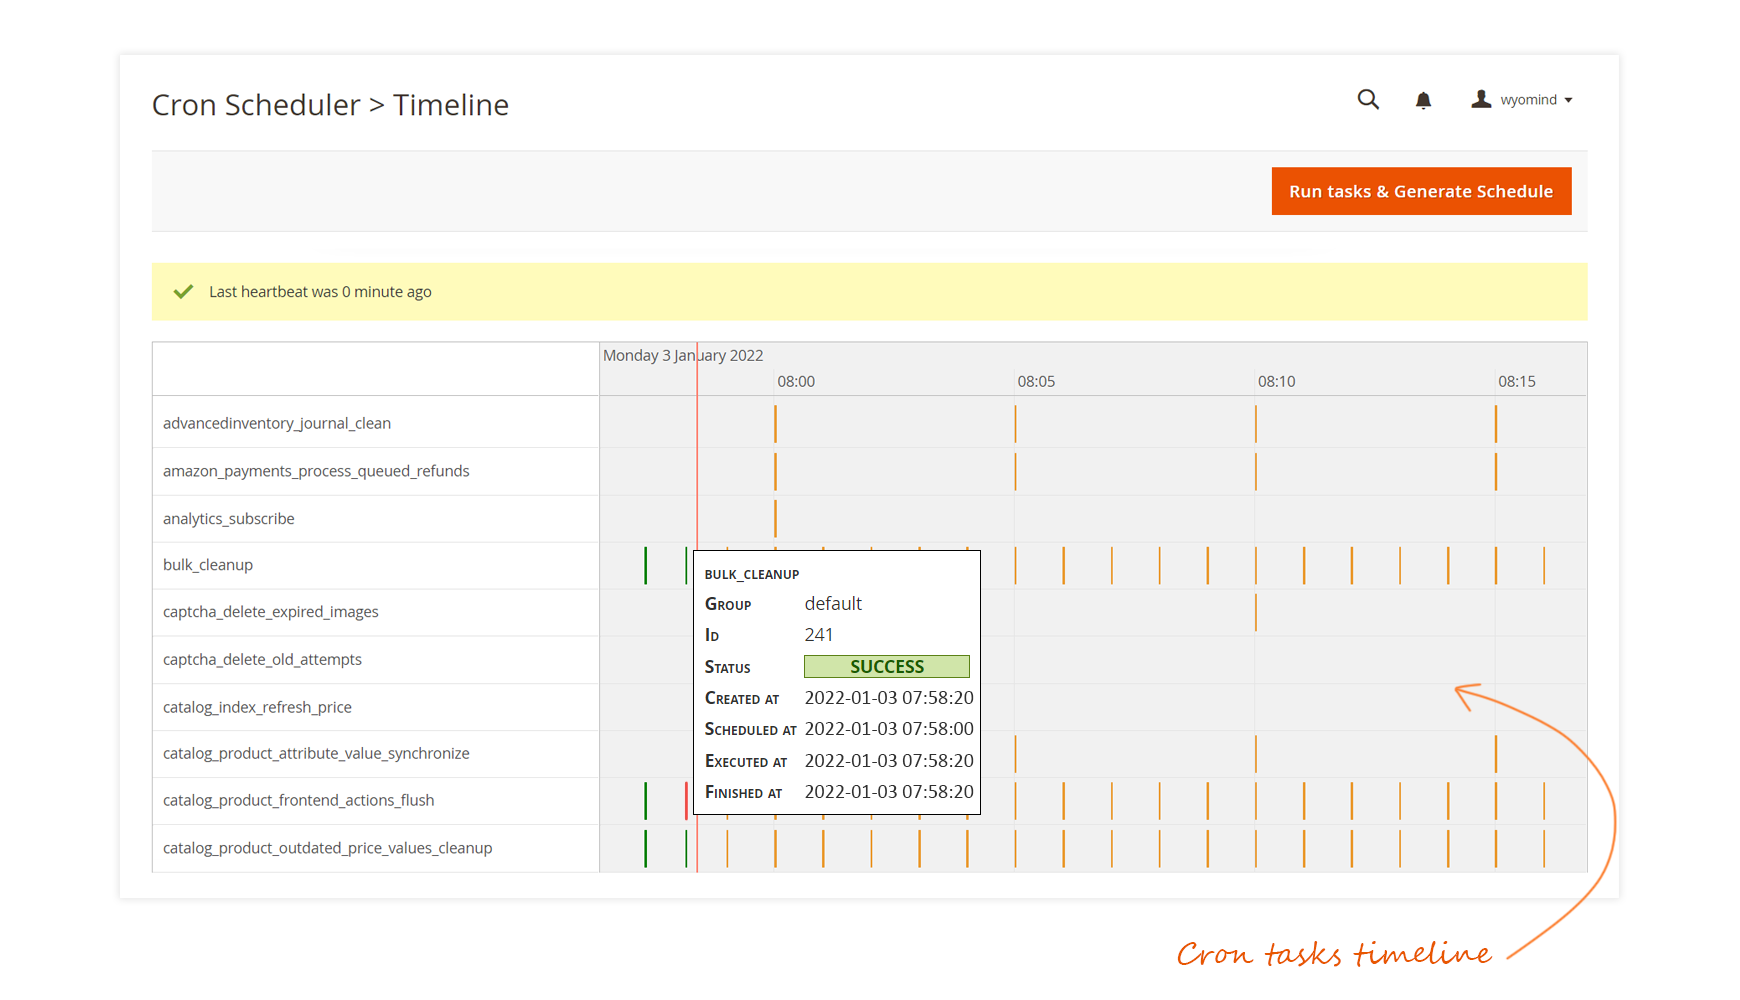
Tasks Timeline
To display the timeline, go to: systemcron SchedulerTasks Timeline
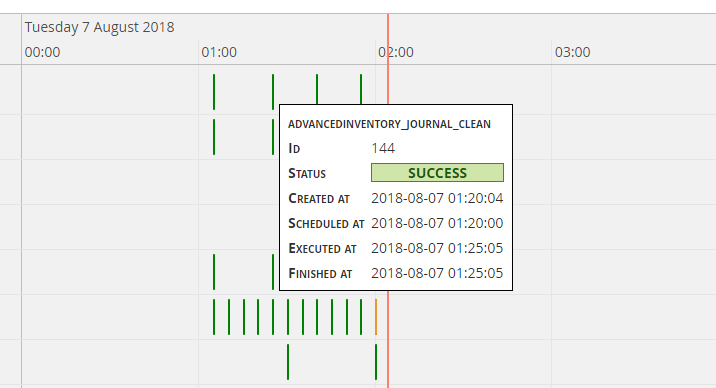
The timeline shows all the cron tasks executed and scheduled.
You can get more information by moving the mouse over each task mark.
Zoom in and out using the mouse wheel on the timeline.
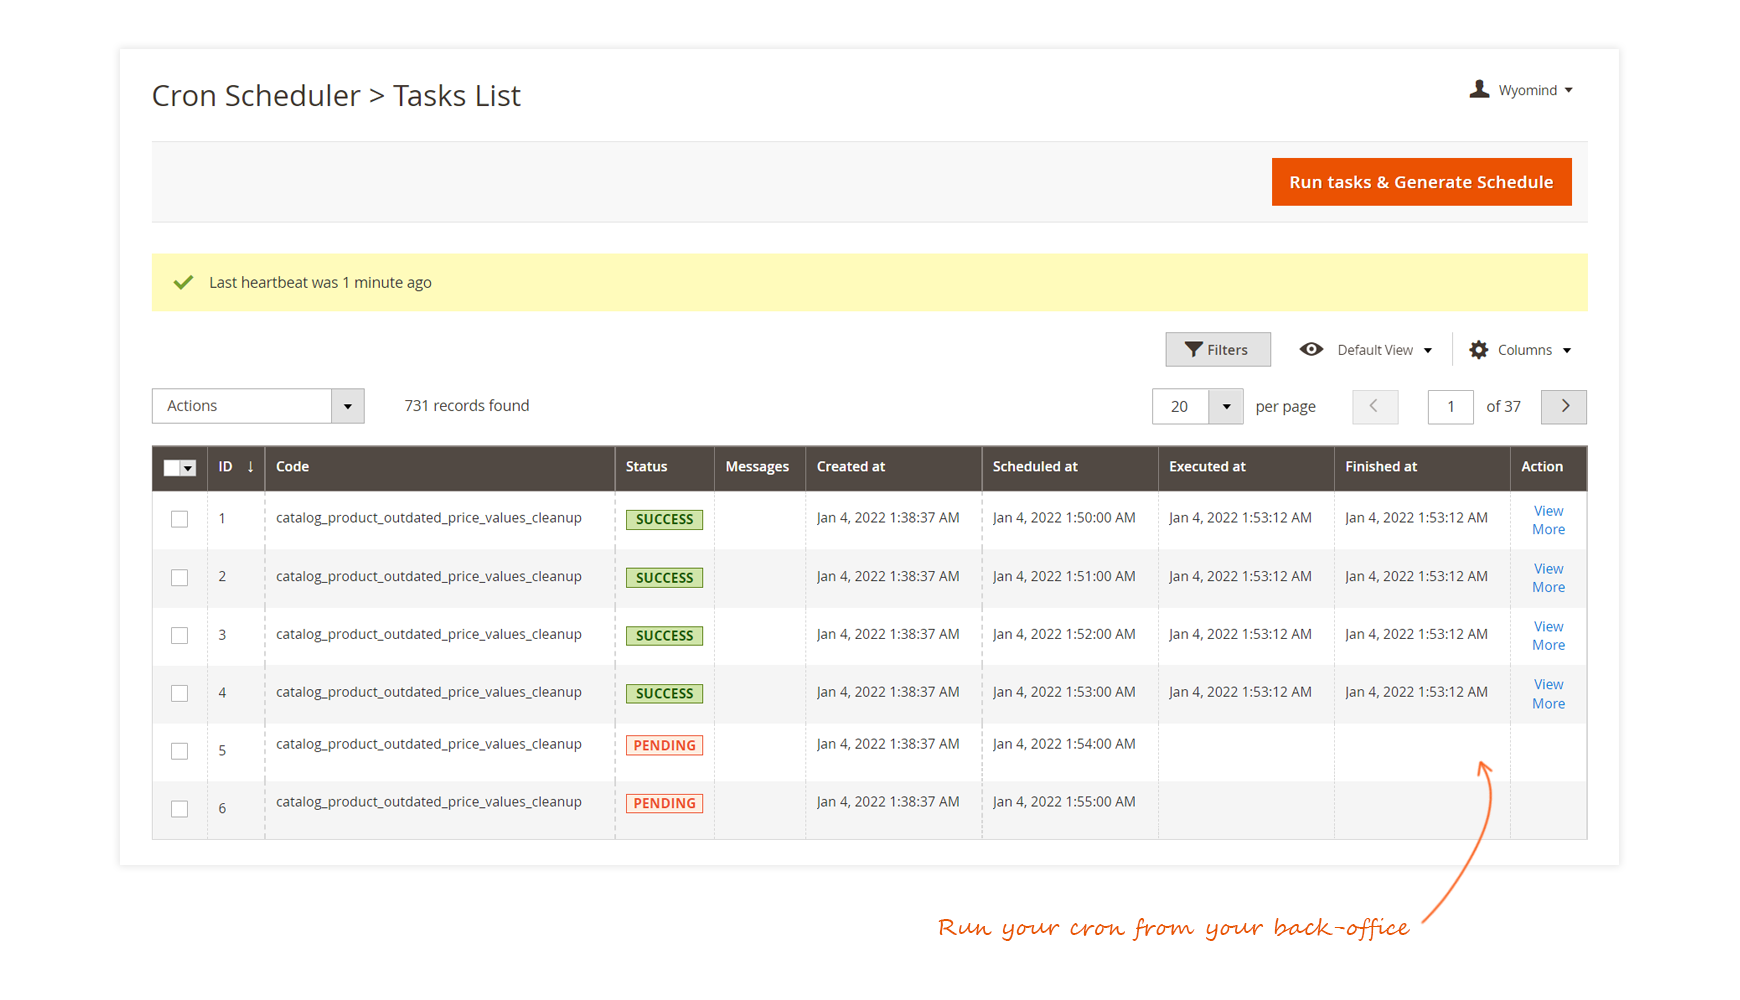
Tasks List
To display the tasks list, go to: systemcron SchedulerTasks list
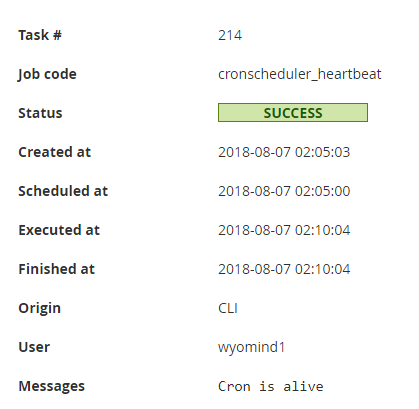
The grid lists all the cron tasks executed and scheduled.
You can get more information by clicking on View More in the right column.
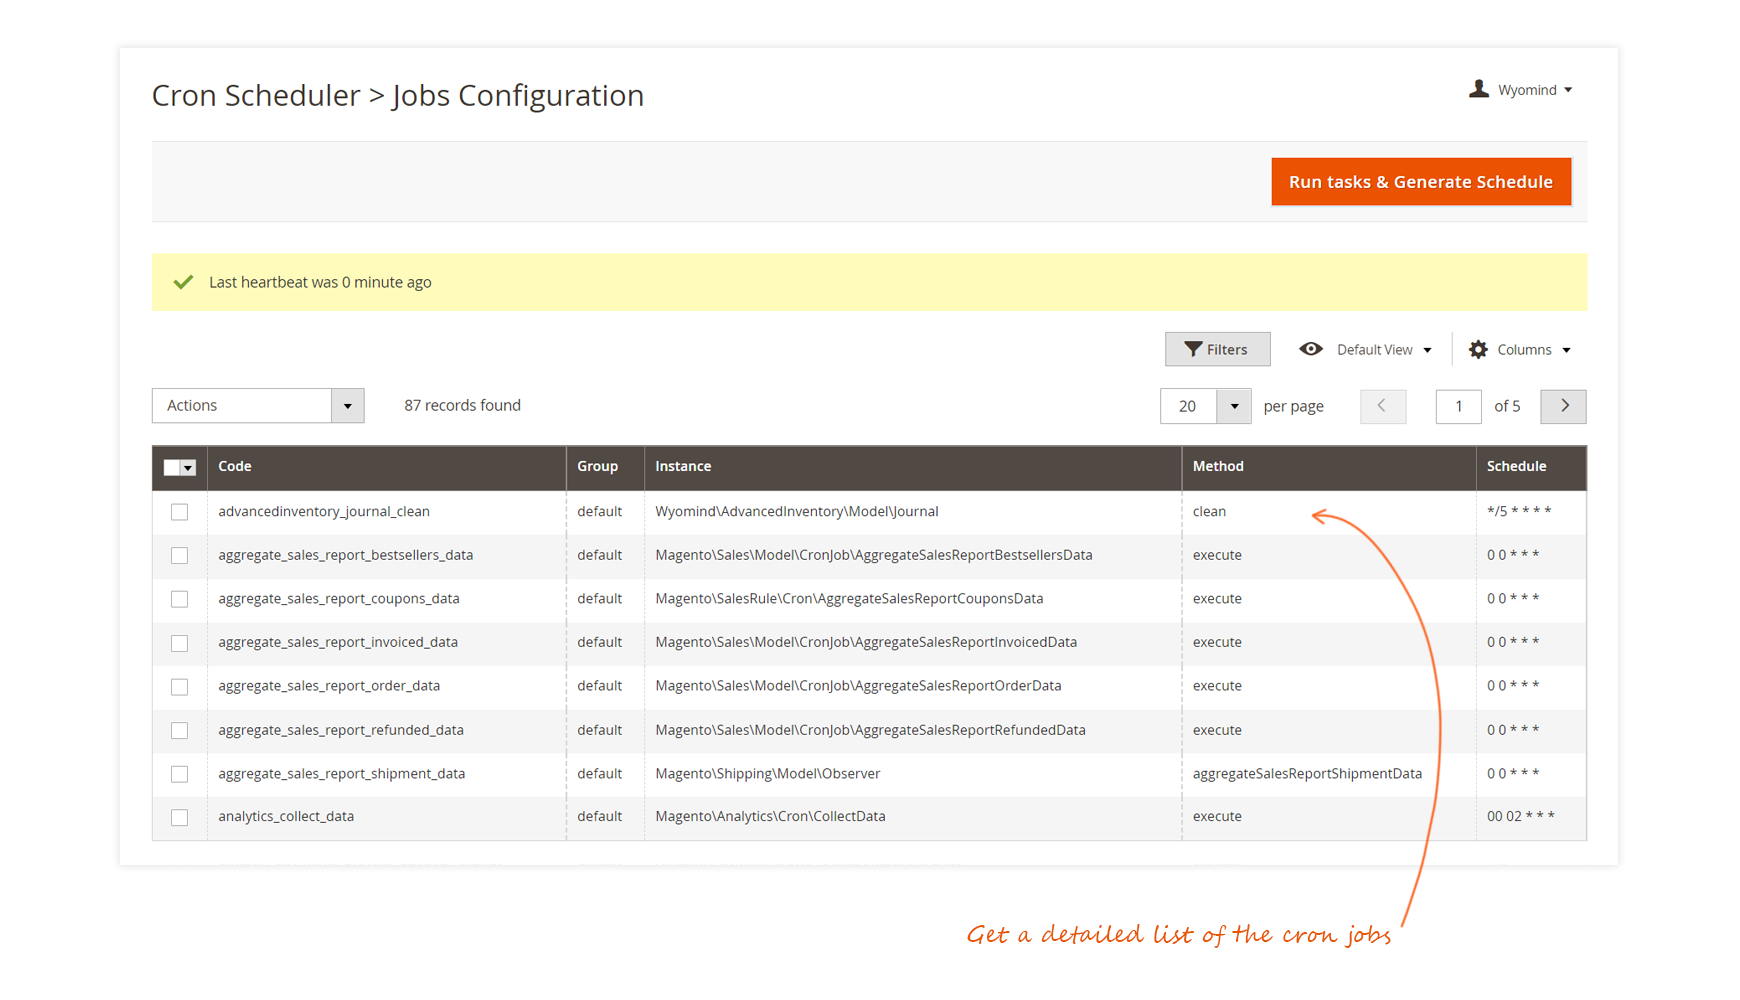
Jobs Configuration
To display the jobs configuration list, go to: systemcron Schedulerjobs Configuration
This grid lists all the cron jobs that generate new cron tasks.
Run cron jobs
You only have to click on run task & generate schedule from: systemcron Schedulerjobs Configuration
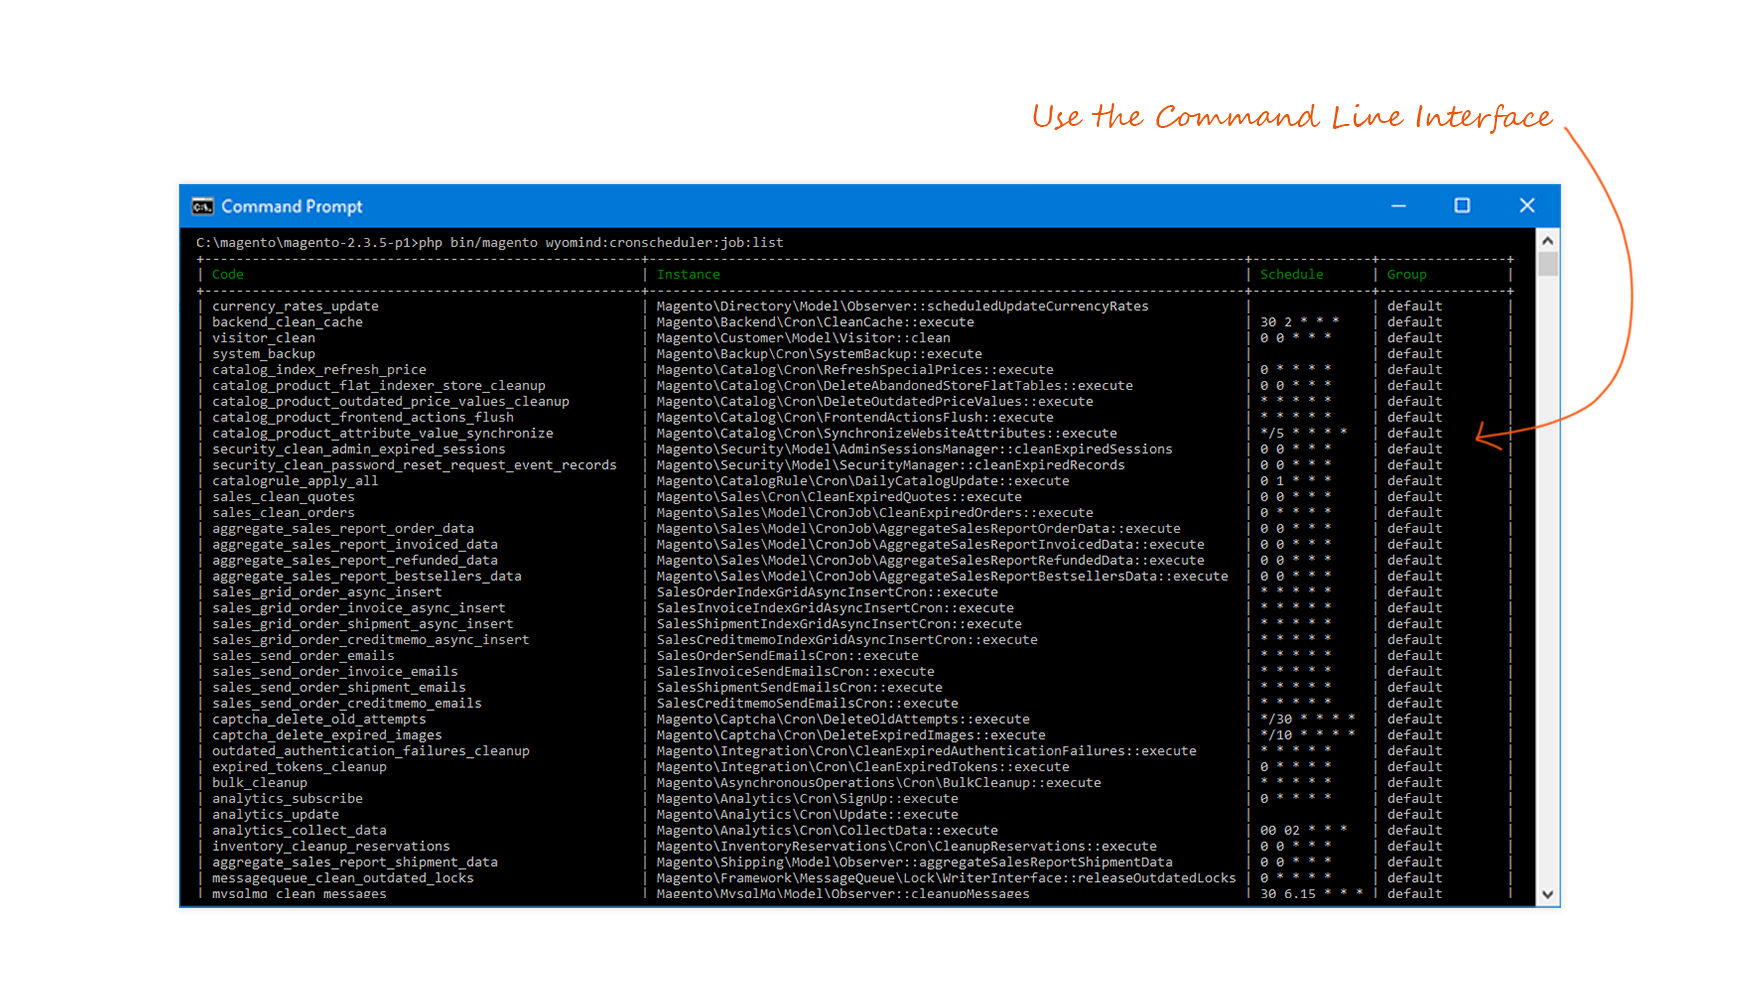
STEP 3: Use the CLI
Cron Scheduler includes new command lines that allow managing the cron jobs from the CLI.
Run all cron jobs and generate new tasks:
bin/magento cron:run
List all the cron tasks:
wyomind:cronscheduler:task:list
Show details about a given cron task:
wyomind:cronscheduler:task:show task_id
List all cron jobs:
wyomind:cronscheduler:job:list
Monitor the cron tasks that run in the background of your Magento® 2 website!
Keep an eye on your cron jobs with Cron Scheduler. Make cron jobs running in the background of your Magento® 2 website completely understandable.
This extension works with Magento Community Edition and also Magento Enterprise Edition. To know if Cron Scheduler is compatible with your Magento version, please check the Compatibility tab.
A license is valid for an unlimited period of time on one single installation
If you're using more than one installation, you will have to buy a separate license for each instance.
if you're running several domains on a same installation, you will need only one license for all of them.
Although your license doesn’t have a limited period of validity, your Support & Upgrade period does. By purchasing a module, you’ll be granted a 12-month support period for free. Passed this period, you will have to pay for a new one (see FAQ: Extend your Support period)
One license is valid for an unlimited period of time on oneinstallation only. However, it is possible to extend or transfer your license in 2 cases:
If you would like to add your testing environments to your license. In that case, it is possible to extend your license to an unlimited number of domains for free. For mywebsite-staging.com or mywebsite-dev.com
If you want to transfer your license to another live domain. In that case, the Support & Upgrade period for your license must still be active.
To be able to use Cron Scheduler on both your production and testing environments, follow the instructions below:
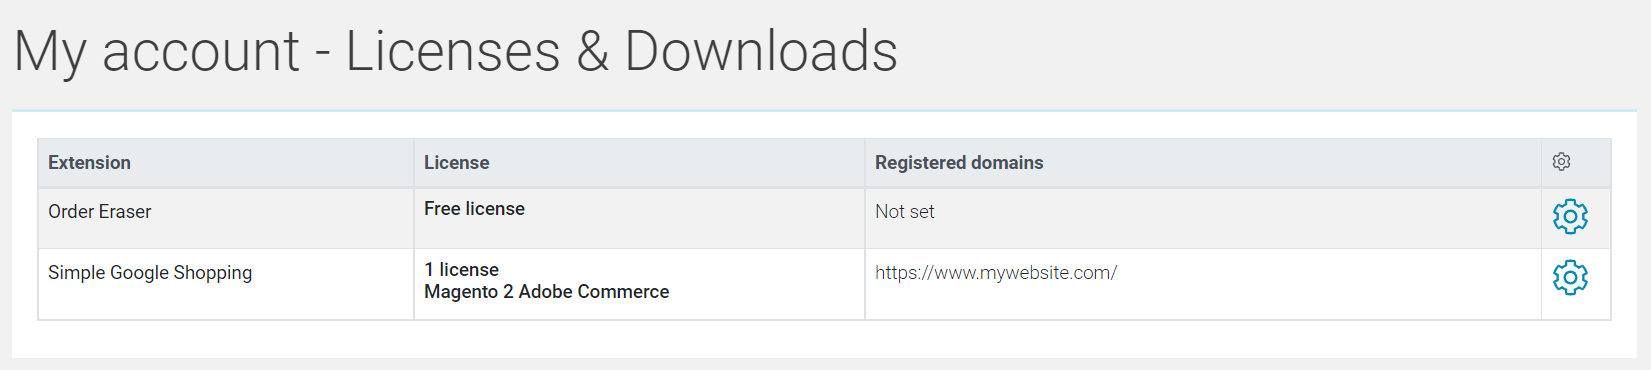
In order to download Cron Scheduler, log into your Wyomind account:
Go to: my accountLicenses & downloads
Click on the settings icon next to Cron Scheduler.
A new window opens.
Click on the download icon.
Only the latest extension version released within your Support & Upgrade period is available. In order to get the very latest extension version make sure your Support & Upgrade plan is up to date.
When purchasing a module from wyomind.com, you benefit from 12 months of upgrade. Within this period you can at any time download the latest version of the module directly from your account.
To upgrade Cron Scheduler, follow the steps below:
Go to: my accountLicenses & Downloads
Click on the settings icon next to Cron Scheduler.
Once Cron Scheduler is installed, you have to activate the license. For previous versions, you can activate the license from your back-office:
Go to your Magento admin panel. A message pops up at the top of the page.
If the message doesn't appear then you must check that:
1. The Adminhtml_Notifications and Wyomind_Core modules are well enabled. 2. The HTML output of the Adminhtml_Notifications and Wyomind_Core modules are not disabled in: storesconfigurationadvanced advanced 3. The encryption key well exists in app/etc/env.php:
Copy your activation key in: StoresConfigurationWyomind Your extension
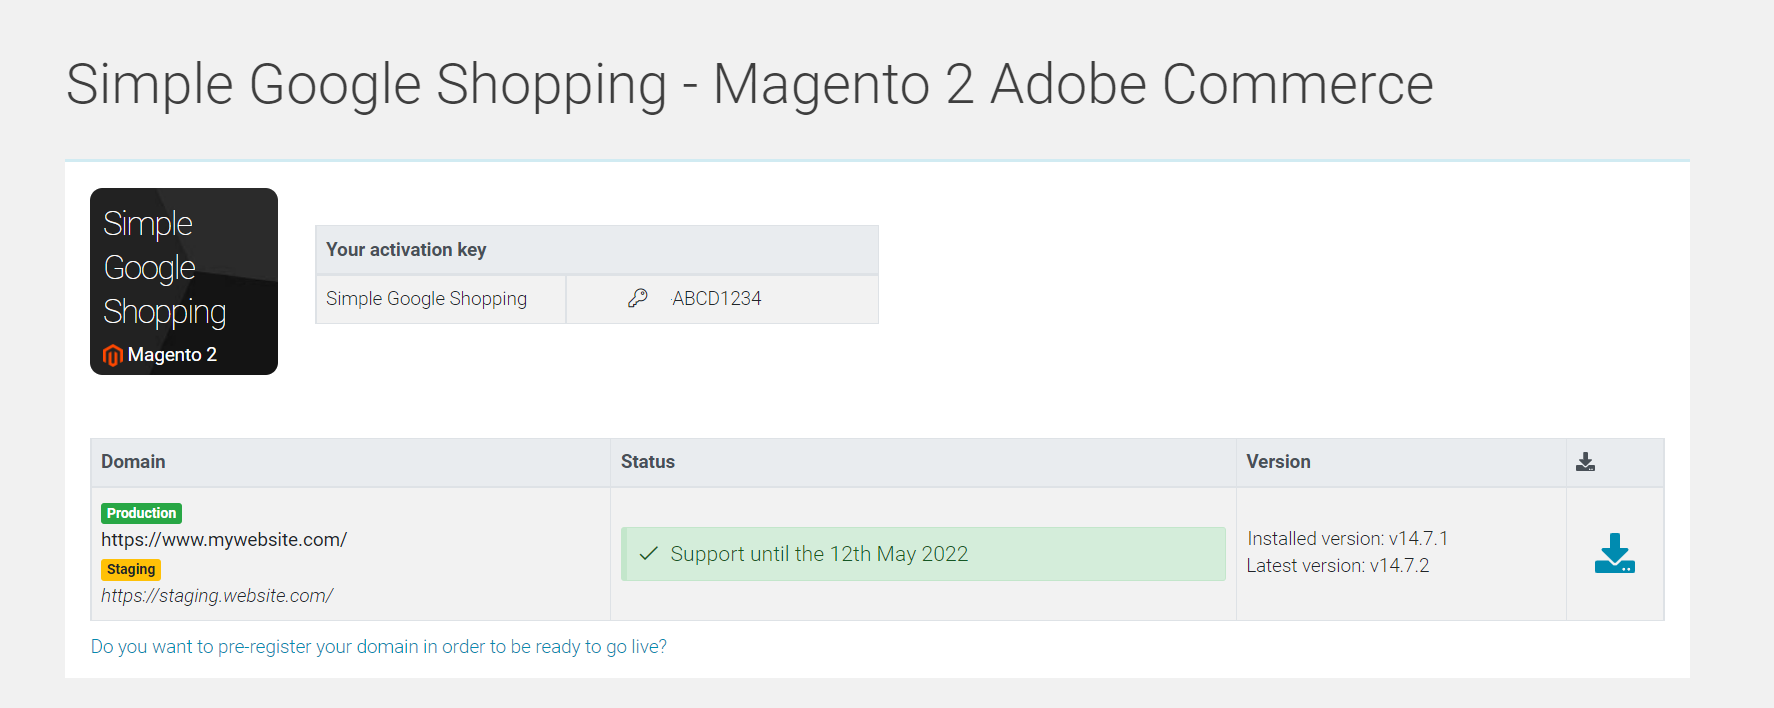
You can find your activation key in 2 different places: - In the confirmation email that you received after purchasing Cron Scheduler. - In your Wyomind account:My account Licenses & downloads Select Cron Scheduler and click on .
A new page opens where you'll find your activation key (see below).
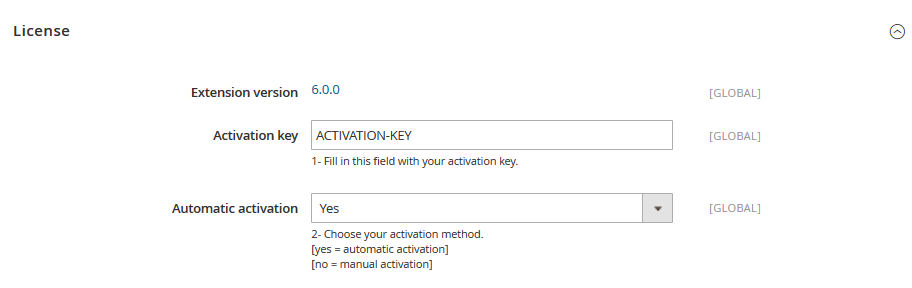
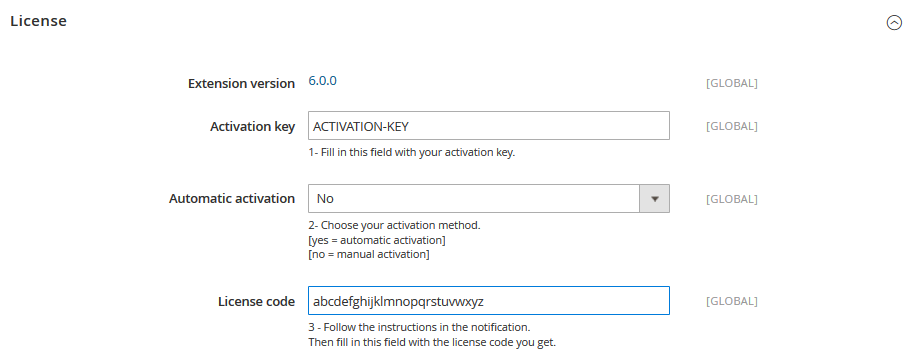
In your Magento admin go to: StoresConfigurationWyomind Your extension
Paste the activation key in the Activation Key field and choose between the automatic (yes) or the manual (no) activation method: - By choosing Yes, the connection to Wyomind license server will be automatic. - By choosing No, you will have to log on to Wyomind license server yourself.
Click on Save config .
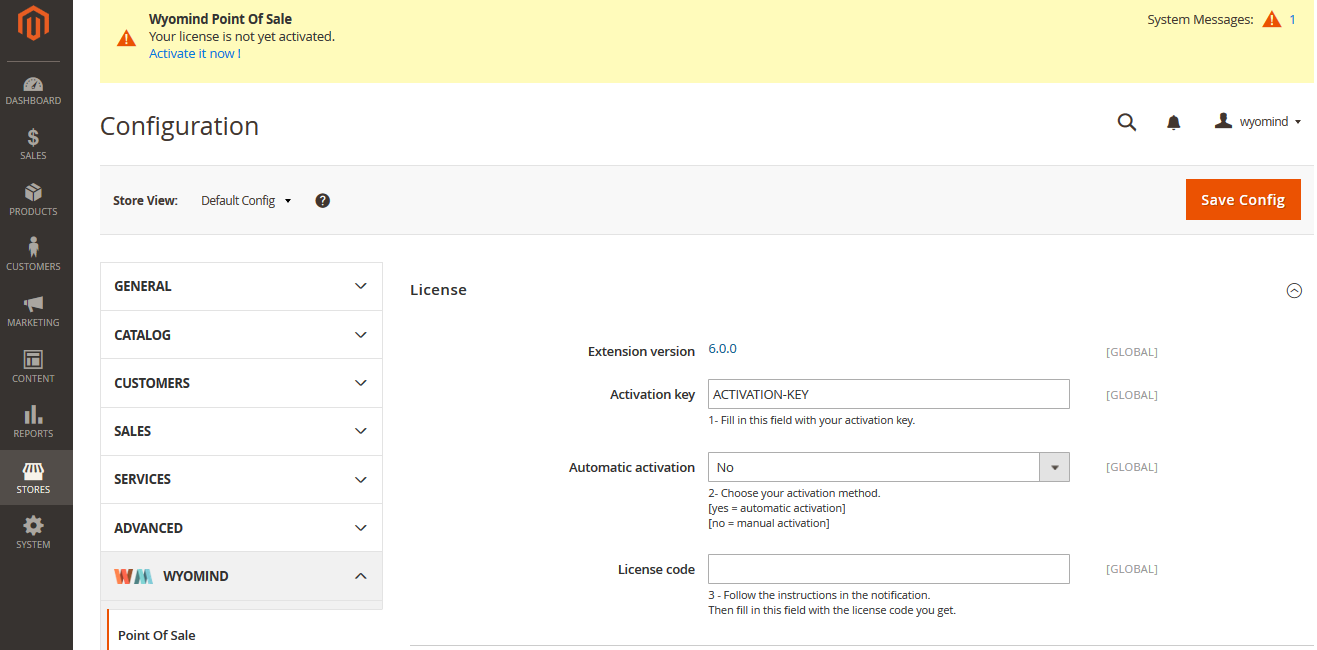
A message appears at the top of your admin panel. Click on that link: Activate it now!
Copy and paste the license code in theLicense code field from your admin or simply click on Activate now!
Finally, refresh your cache, log out and log in back straight after, to complete the installation.
When the extension includes other modules, repeat the steps described above for each one, using the corresponding activation keys (each module has its own activation key).
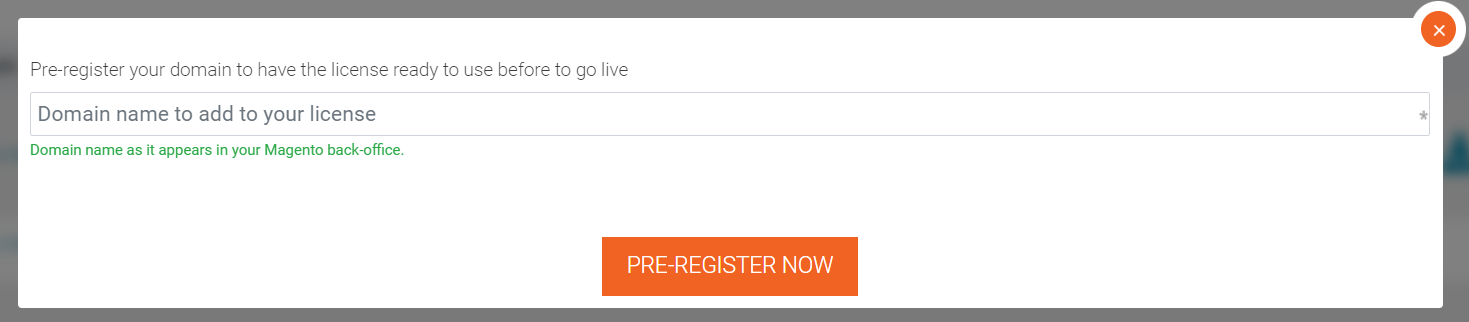
Add another domain to your license
To activate the license on another domain (test, staging...):
Once the extension is installed on the new domain, copy your activation key in: StoresConfigurationWyomind Your extension
After having saved the configuration, a notification appears. Click on Add this domain to my license.
A transfer request will then be sent to our team within an hour. Once the request is taken care of, you will receive a confirmation email. If your transfer request is accepted, you can use Cron Scheduler on both environments at the same time.
Note that the order in which you activate your license on your domains does not matter. You can start with your staging/dev/local environment or with your live domain, the process will be the same.
Also, if you have loads of staging domains, or if you are an agency managing load of domains for your customers, please contact us so that we can automatically whitelist these domains.
This is a very helpful extension for our Magento 2 webshop. It's easy to spot missed or failed task.
8th July 2021
Very usefull 1click tool
You can easily run cron job by 1 click. Never had problems with Cron Scheduler. I have a small shop and the tool meets my requirements. I add a few new products or mass-change attributes and can run cron right away when I need it. In future have to try PRO version.
12th June 2021
Very useful plugin
The plugin is very usufull to indentify any issue regarding Cron Job. It's really recommended to investigate a problem that block your Magento ecommerce
15th April 2020
Must have to monitor your site
Sometimes our cron's died, this extension is our goto.
9th July 2019
Must have exxtension
Great extension.It is perfect for seeing the schedule of jobs inside Magento. I used the pro version on Magento 1 for many years, I guess I'll purchase that also for Magento 2, but I started with this version to see if it is sufficient (and because I definitely did not want to miss the view on cron tasks inside Magento that this extension offers). With this extension, it is very easy to find failed tasks.On Magento 1 I have had some issues with an extension that locked the cron process, and I don't know how long it would have taken me to find that issue if I hadn't had this extension. As with all extensions: if there is any issue, Wyomind will act and resolve it very fast. For me it is a huge advantage that this is a European organisation, there is no time zone difference that causes any delay in service.
9th October 2018
I rely on this
Great extension. Used it on Magento 1 and now use it on Magento 2. Perfect for seeing the schedule of jobs and for seeing missed or failed tasks in a visual way. The timeline view is great simply click the button to run tasks and generate the schedule.
28th March 2018
how long it will take?
we asked Cron Scheduler thank you.
20th October 2017
Rock Solid Extensions
We used two of the extensions (Order Eraser and Cron Scheduler), both installed easily and work just as advertised.
Even though these are free extensions, I will come back for some others paid extensions since I know I can trust these guys not to deploy untested code.
Provide your customers with fully optimized and responsive layered navigation on your category and search results pages thanks to the Advanced Layered Navigation for Magento 2!
Complete Magento MSI module with the Advanced Multi Stock Inventory extension to leverage the default tools and workflow as well as manage your stocks in several warehouses.
Cron Scheduler Pro adds many features to the free version of Cron Scheduler that not only allows to monitor the cron jobs but that also allows to manage each cron task individually and directly from the Magento 2 back-office or via the command line interface.
The Dynamic Category extension allows you to automatically associate products to categories according to your product attributes and to special conditions.


 This is a very helpful extension for our Magento 2 webshop. It's easy to spot missed or failed task.
 Great extension.It is perfect for seeing the schedule of jobs inside Magento. I used the pro version on Magento 1 for many years, I guess I'll purchase that also for Magento 2, but I started with this version to see if it is sufficient (and because I definitely did not want to miss the view on cron tasks inside Magento that this extension offers). With this extension, it is very easy to find failed tasks.On Magento 1 I have had some issues with an extension that locked the cron process, and I don't know how long it would have taken me to find that issue if I hadn't had this extension. As with all extensions: if there is any issue, Wyomind will act and resolve it very fast. For me it is a huge advantage that this is a European organisation, there is no time zone difference that causes any delay in service.
 Great extension. Used it on Magento 1 and now use it on Magento 2. Perfect for seeing the schedule of jobs and for seeing missed or failed tasks in a visual way. The timeline view is great simply click the button to run tasks and generate the schedule.
 we asked Cron Scheduler thank you.
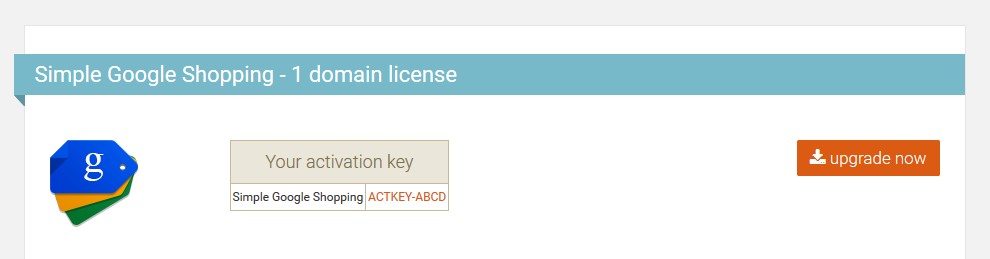