How to use Store Locator for Magento 2
According to Google, a great part of retail sales are influenced by the web, but the majority is made in shops from local retailers to the big chains.
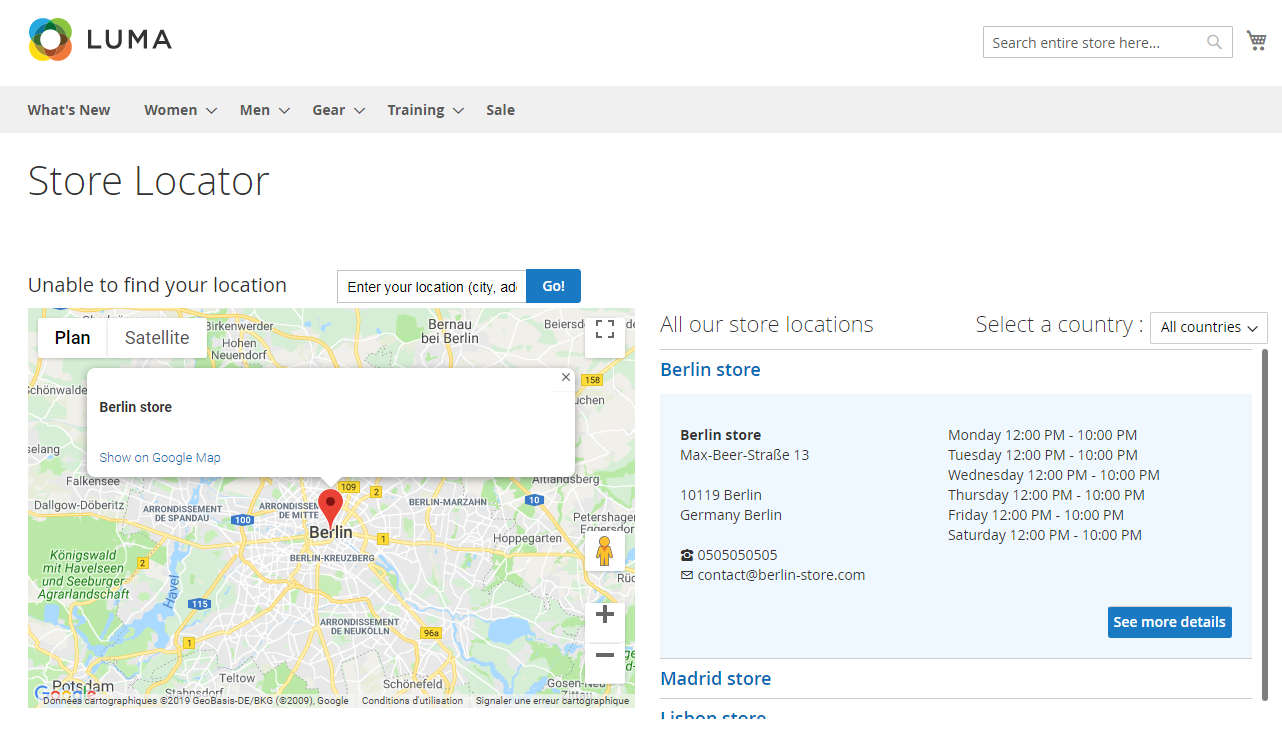
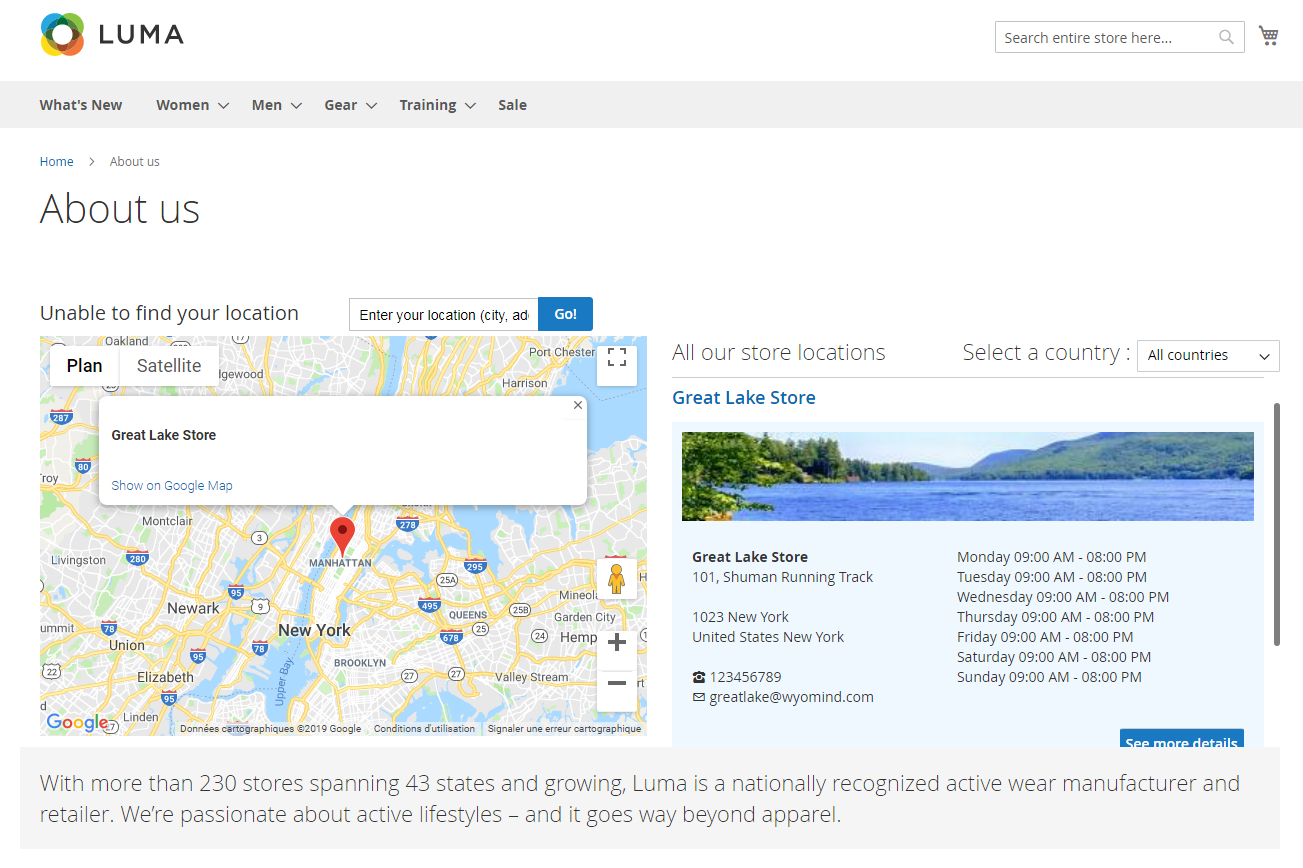
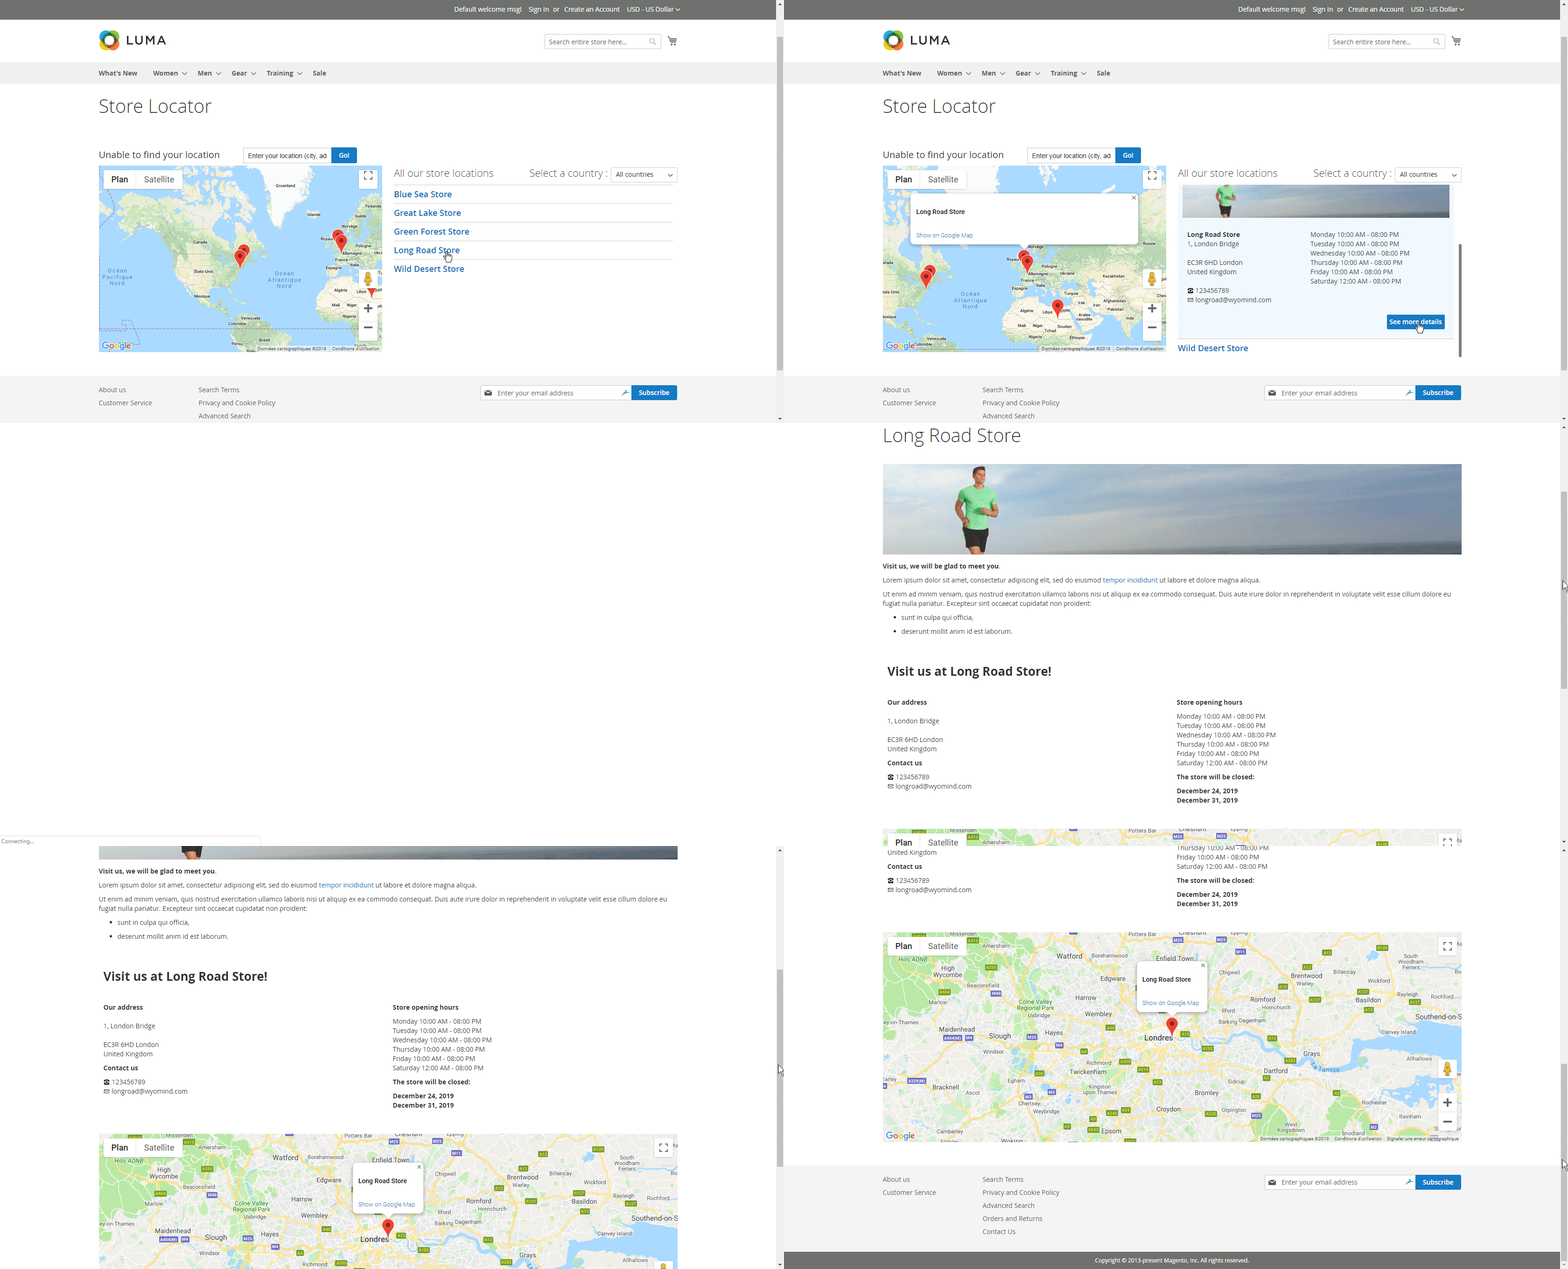
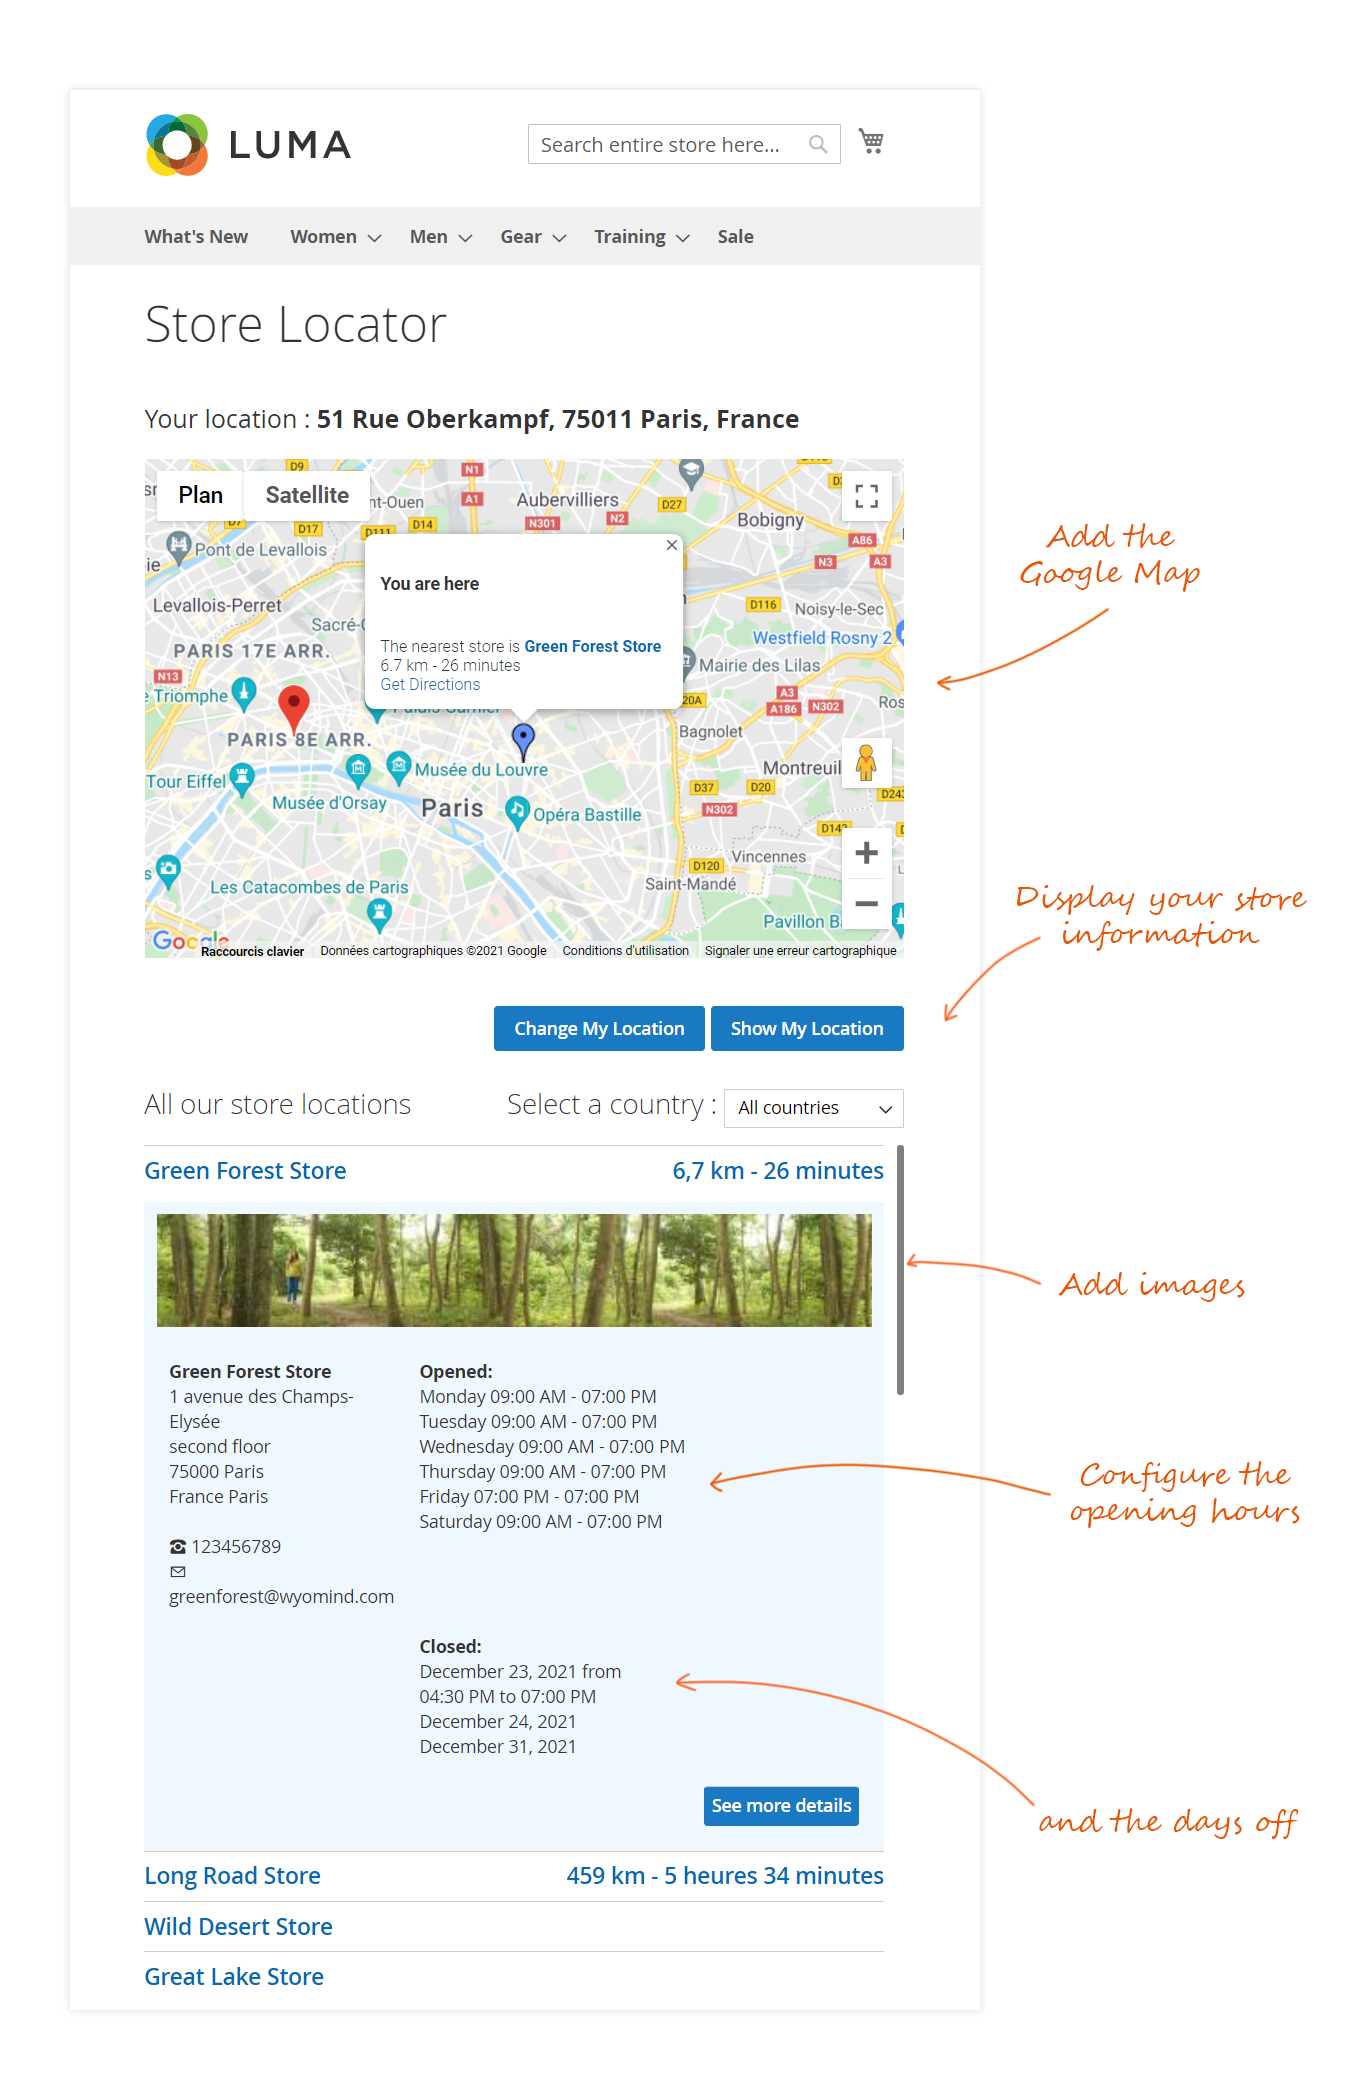
The Store Locator extension for Magento 2 will increase awareness of all your stores by allowing you to highlight them on a customized Google Map which is then placed on any page of your website.
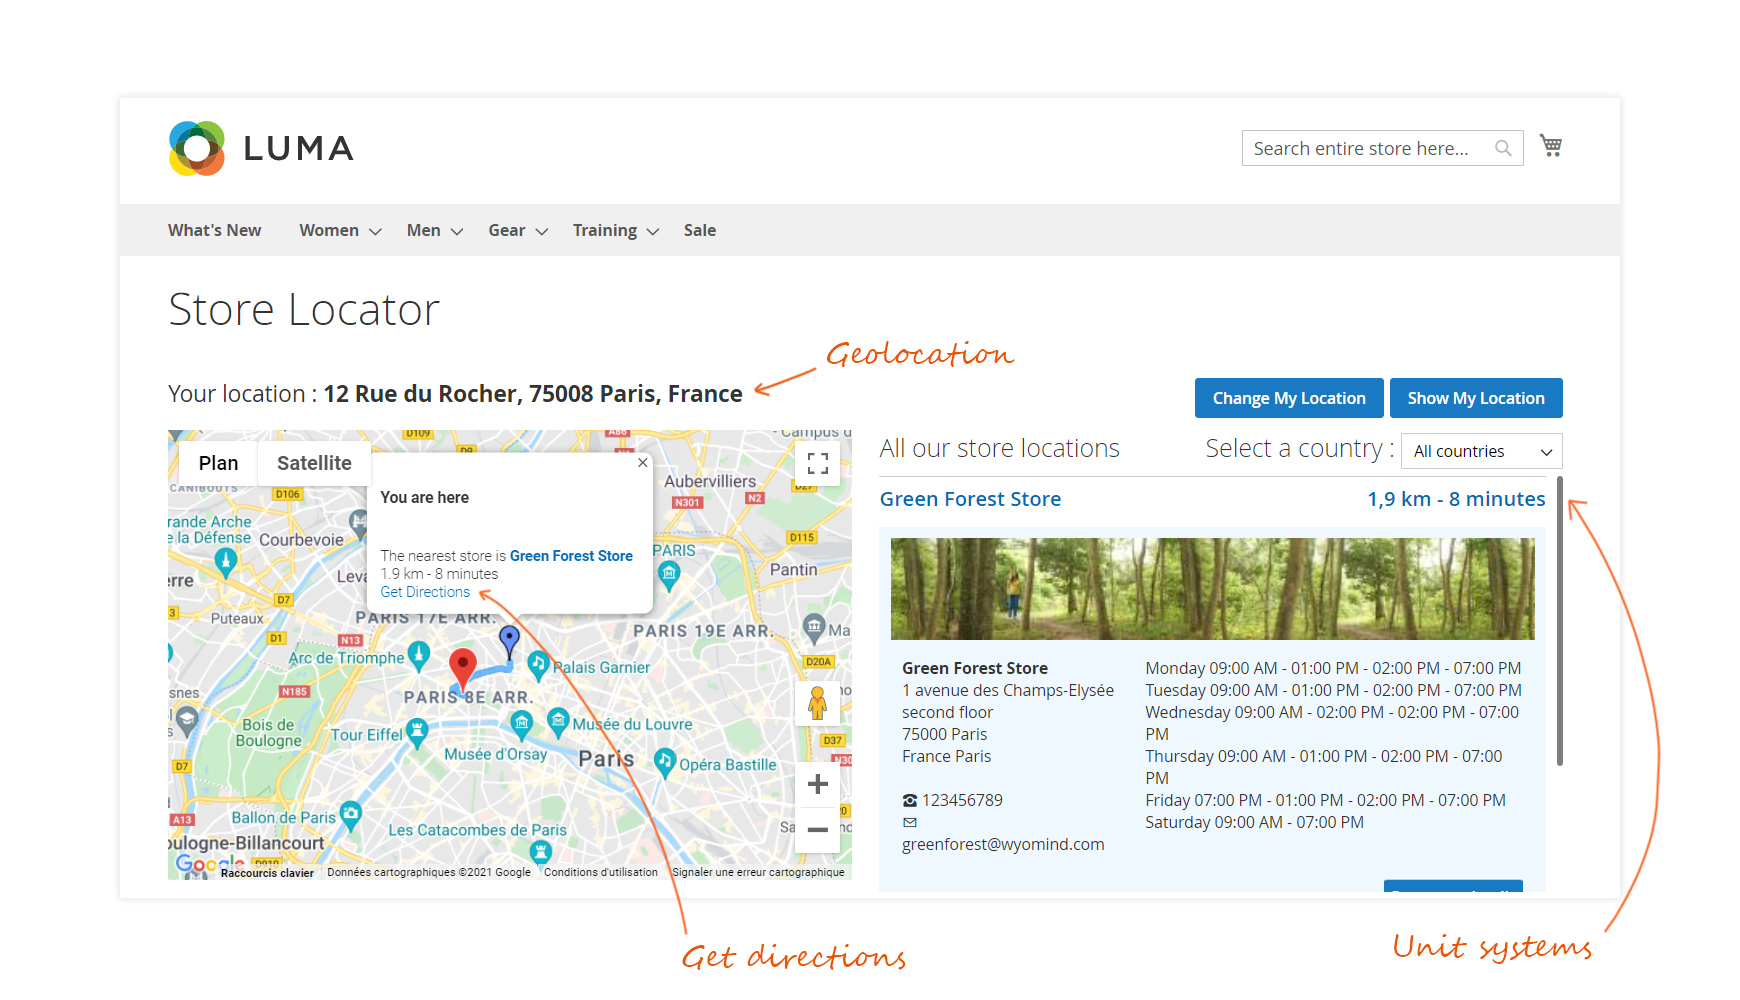
This map uses HTML5 code which helps the customer by providing, on the same web page, their current position, and a route map to their nearest store.
Specific information relative to each store location can be easily customized from the Magento 2 back-office. For example, opening times, postal, and website addresses.
That extension enhances the Multi Stock Inventory module from Magento 2 and is fully integrated with the suite by providing additional features.
STEP 1: Manage your locations
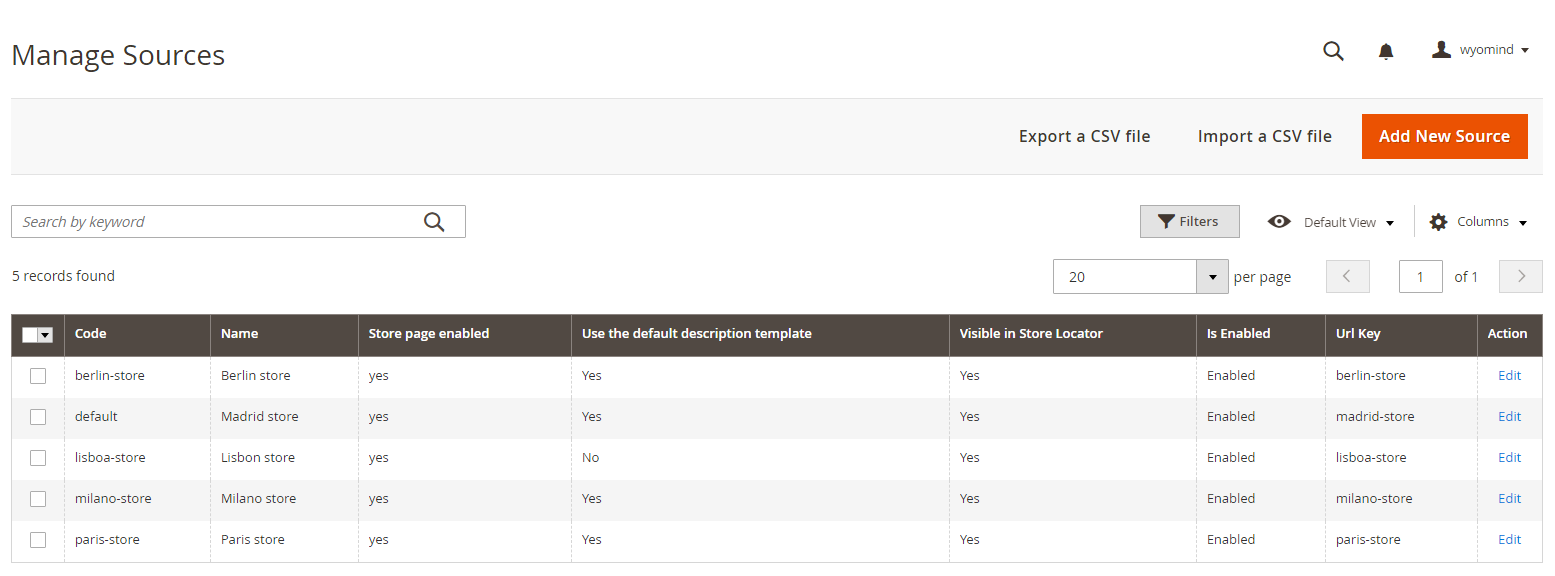
First of all, you need to create your store locations by adding new sources. For this, go to:
StoresInventorySources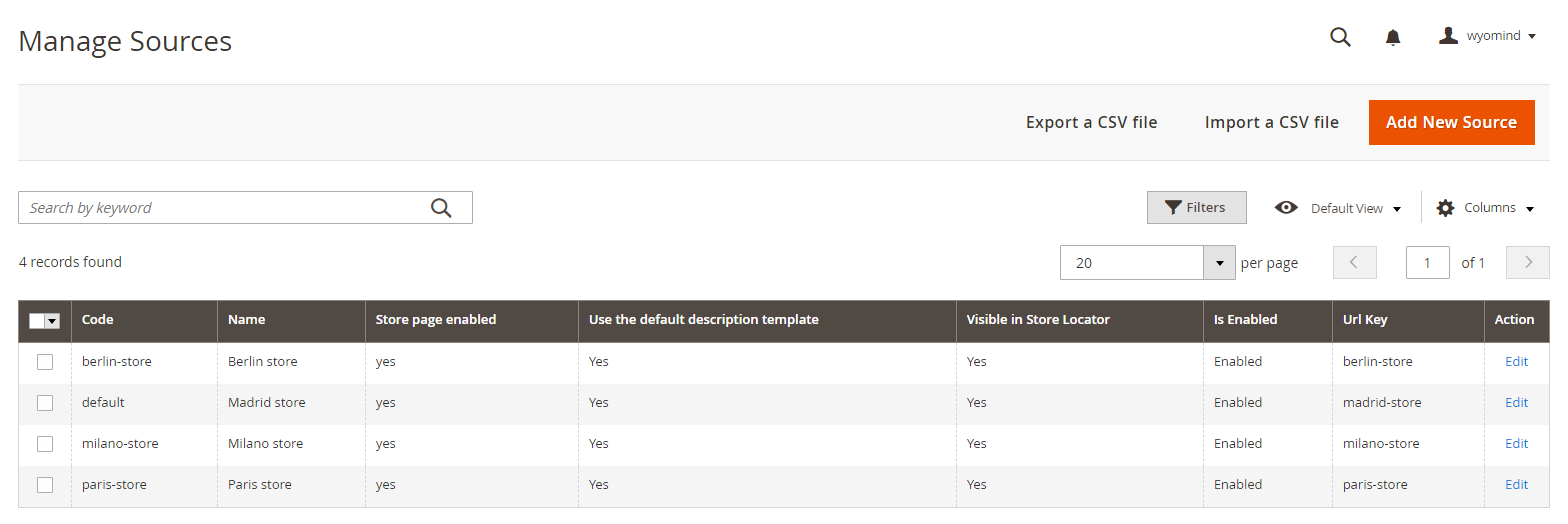
Add New Source
With Store Locator, you can manage as many sources as you want from the backend of Magento 2.
To configure your sources, click on ADD NEW SOURCE.
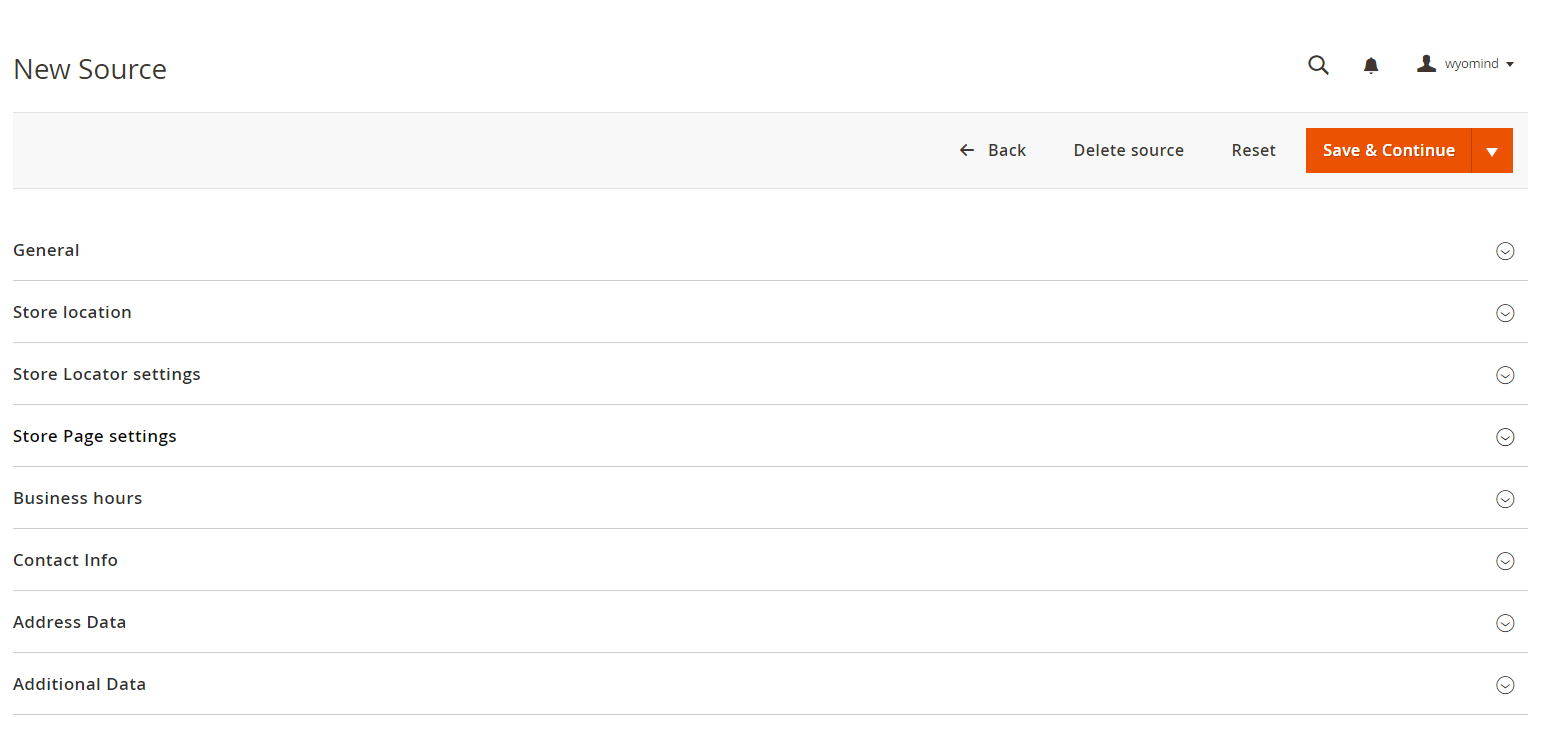 So that a source can be created, it must have:
- a name
- a code
- a store view
- a customer group
- longitude and latitude coordinates
- a URL key
- a country
- a postcode
Other information is additional, however, we recommend you to fill in a maximum of fields to be able to reuse them in the Google Map display.
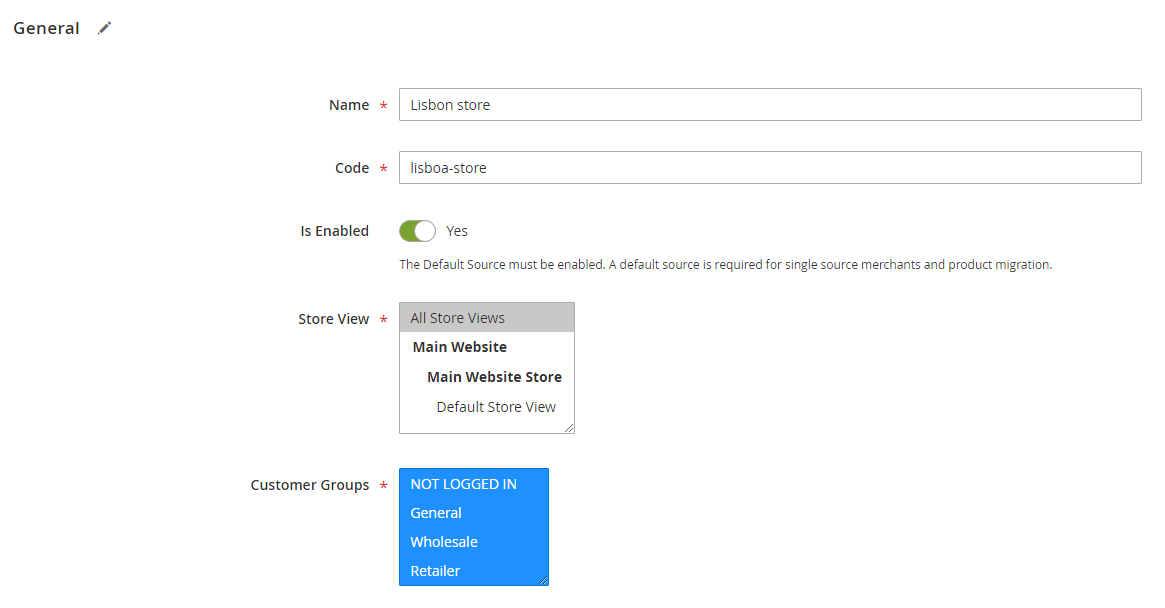
General
- Name
This is the name that appears on the front-office of your website in Google Maps. It can be a shop sign or help to localize the store.
USA Washington Store - Code (internal use)
This is a unique identification code used in the back-office of Magento 2 for each store.
This code is also used by Google Addresses to identify stores if data files are exported to a Google Places account. - Is enabled
The Default Source must be enabled.
A default source is required for single-source merchants and product migration. - Store View
A source must be linked to at least one store view to be displayed for customers in Google Maps. - Customer Groups
You must then select the customer group(s) that will be able to see the store.
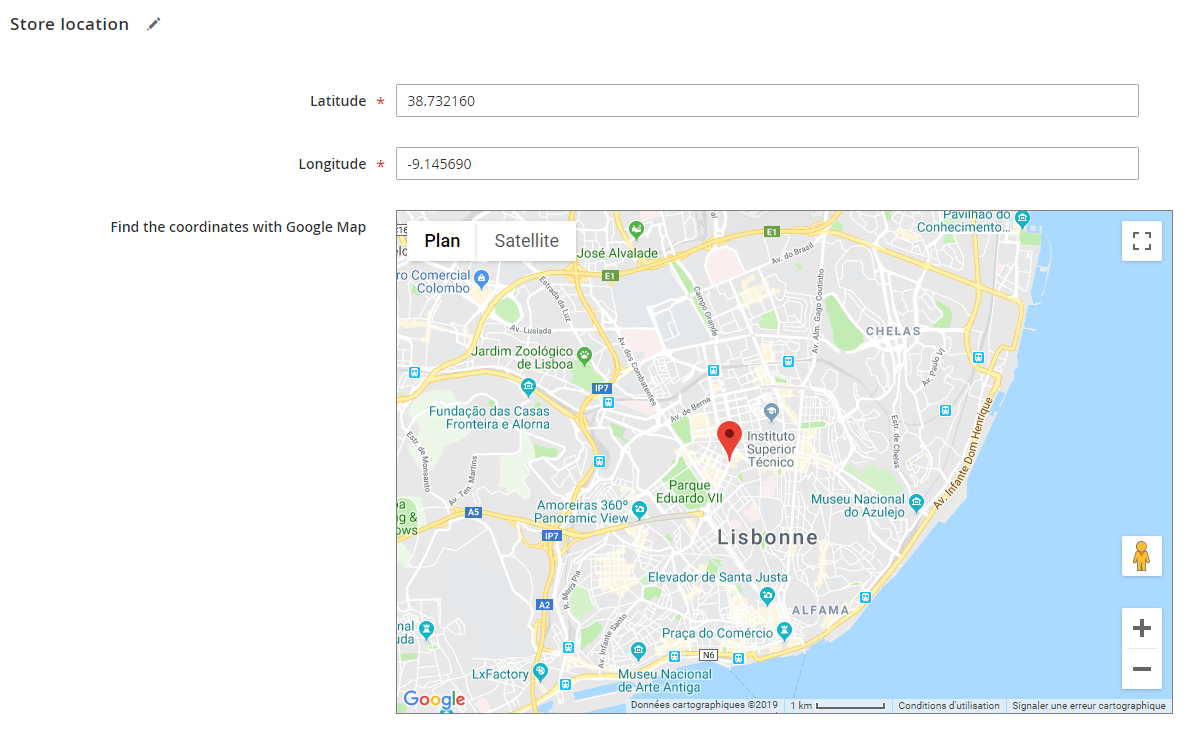
Store Location
- Latitude & Longitude
This information is essential to allow the store to be displayed in Google Maps. - Find the coordinates with Google Map
You can find this information with Google Maps directly by dragging the red cursor.
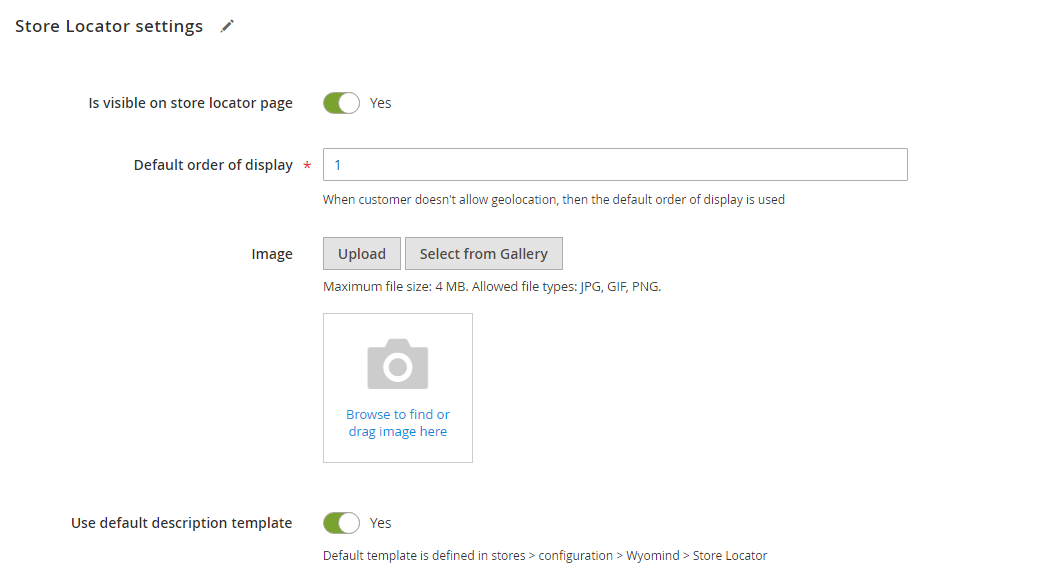
Store Locator settings
- Is visible on Store Locator page
YES/NO - Default order of display
When customer doesn't allow geolocation, then the default order of display is used. - Image
Browse/Drag the image for the store.
This is the image associated with the store such as the shop front, the logo etc...
The image appears in the information section when a customer selects this particular store.
The image can be a .jpeg, .gif or .jpg file. - Use default description template
The default description template is defined in:
StoresConfigurationWyomindStore Locator
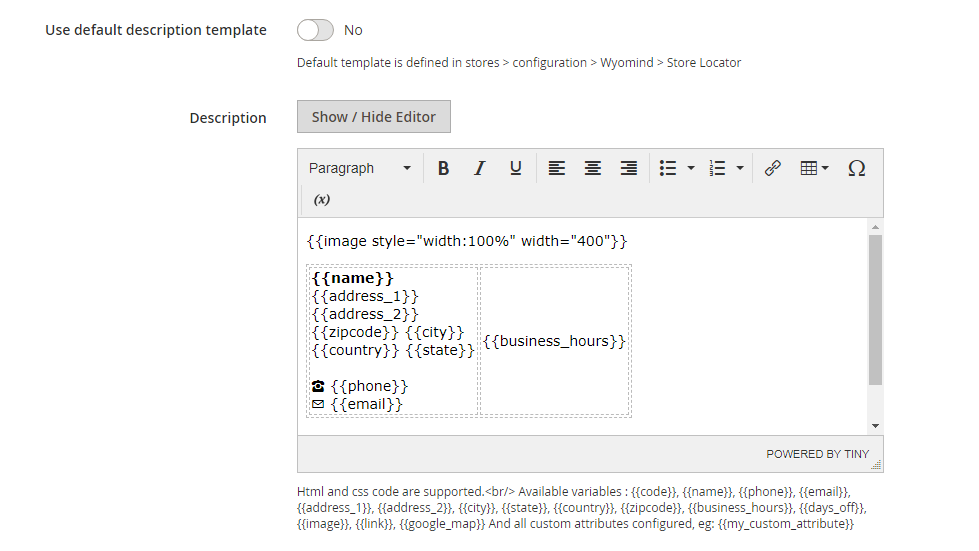
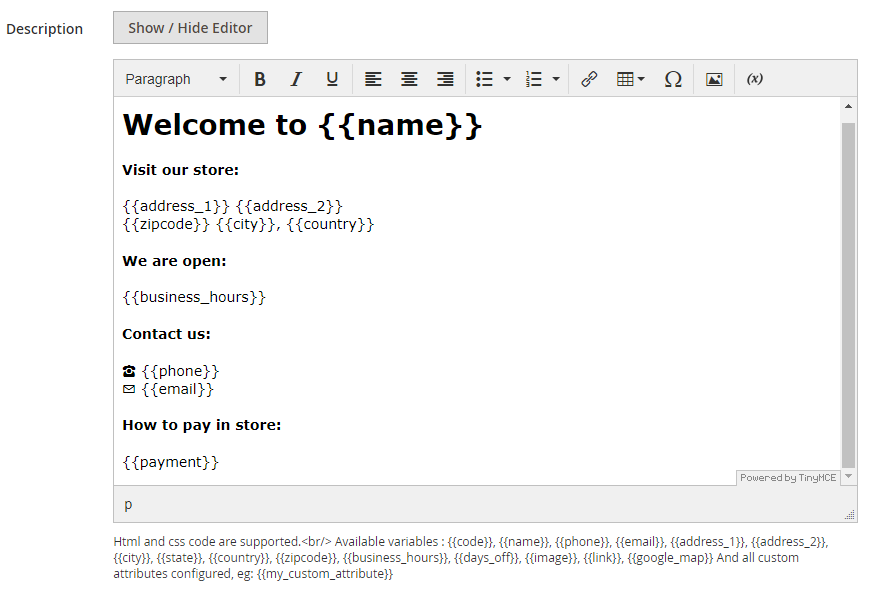
- Description
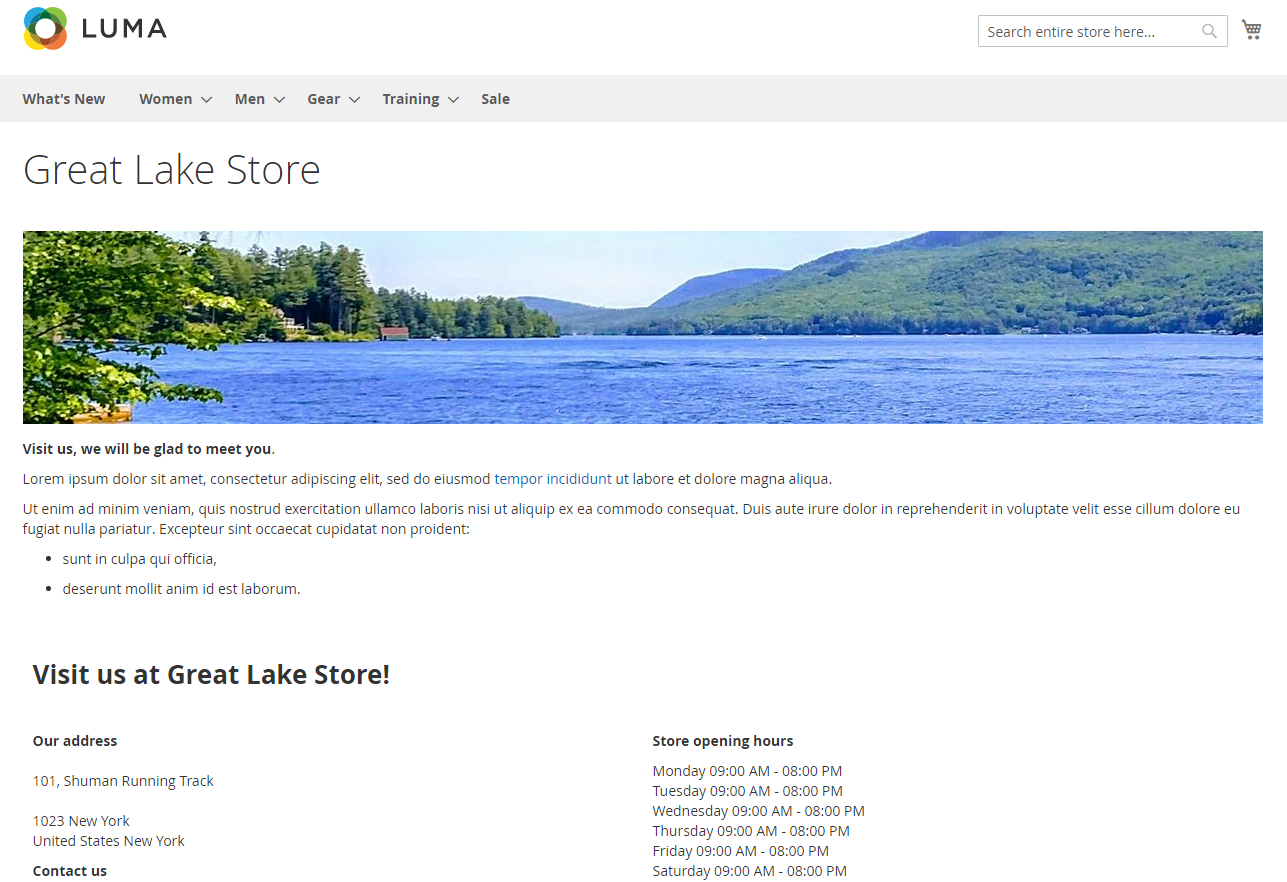
You can also define a description for that particular store. The description appears in the information section when a customer selects this particular store.
HTML and CSS codes are supported.
See available variables
Variables available for the store descriptions:
- {{code}}
The store's code - {{name}}
The store's name - {{phone}}
The store's phone number - {{email}}
The store's email address - {{address_1}}, {{address_2}}, {{city}}, {{state}}, {{country}}, {{zipcode}}
The store's address - {{business_hours}}
The store's opening hours - {{days_off}}
The store's days off - {{image}}
The store's image - {{link}}
Link to the store's page - {{google_map}}
The Google map with the targeted store
Note that you can't use the Google map variable in the description template of the Store Locator. - {{additional_attribute_code}}
All custom attributes that you have configured:
See how to configure your own attributes
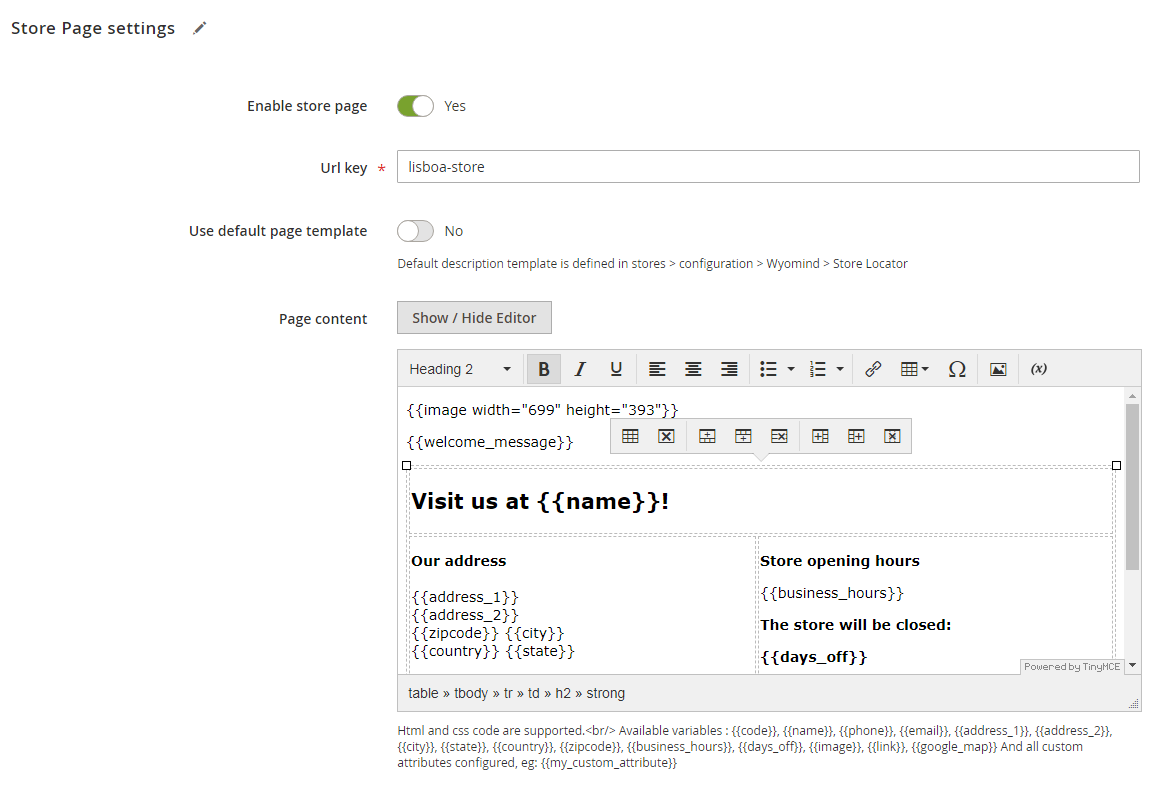
Store Page settings
- Enable store page
YES/NO - URL key
URL of the store page.
italy-storeYou'll be able to access the store page from: https://www.yourstore.com/italy-store - Use default Page template
The default page template is defined in:
StoresConfigurationWyomindStore Locator - Page Content
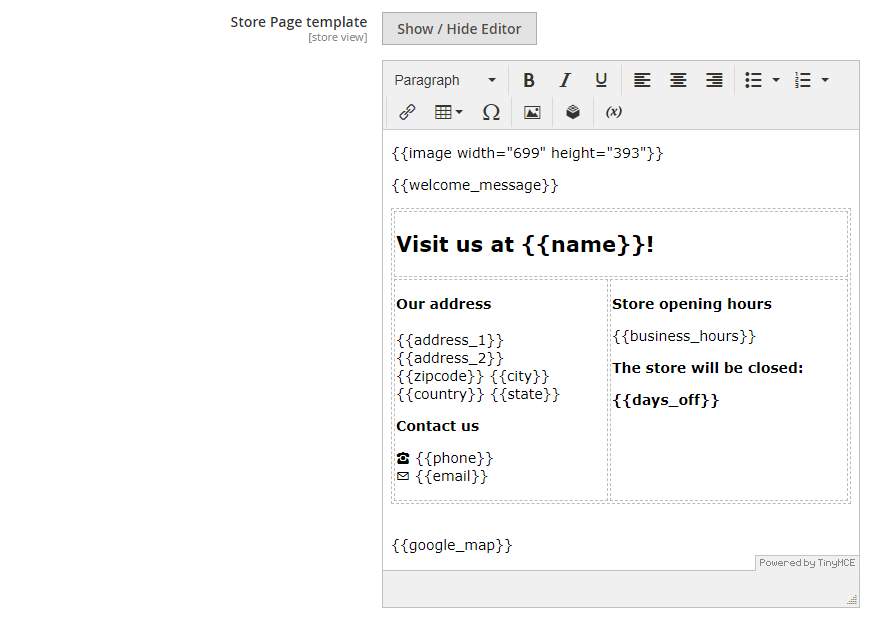
You can also define a page template for that particular store.
HTML and CSS code are supported.
See available variables
Variables available for the page content:
- {{code}}
The store's code - {{name}}
The store's name - {{phone}}
The store's phone number - {{email}}
The store's email address - {{address_1}}, {{address_2}}, {{city}}, {{state}}, {{country}}, {{zipcode}}
The store's address - {{business_hours}}
The store's opening hours - {{days_off}}
The store's days off - {{image}}
The store's image - {{link}}
Link to the store's page - {{google_map}}
The Google map with the targeted store
Note that you can't use the Google map variable in the description template of the Store Locator. - {{additional_attribute_code}}
All custom attributes that you have configured:
See how to configure your own attributes
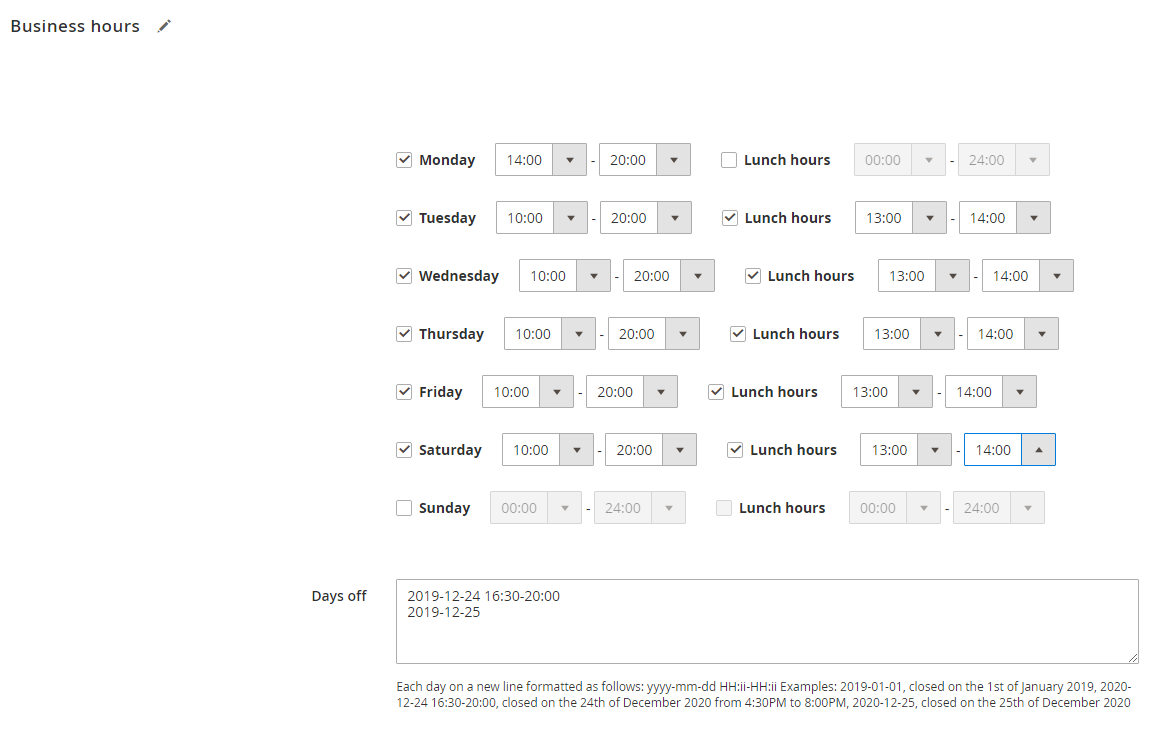
Business hours
- Hours
The opening hours can be shown for each store. You can set lunch hours as well. - Days off
You can list all the days off. Each date must be on a new line formatted as follows:
YYYY-MM-DDFor example, if the store is closed on the 1st of January 2019, you can write:
2019-01-01
Note that you can also add hours off. Each date and hour must be on a new line formatted as follows:
yyyy-mm-dd HH:ii-HH:ii For example, if the store is closed on the 24th of December 2020 from 4:30PM to 8:00PM, you can write:
2020-12-24 16:30-20:00
Contact Info
- Contact name
Name of the contact of the store. - Email
It is the email to contact the store. - Phone
Telephone number of the store. - Fax
Fax number of the store.
Address Data
All the details specified in Address Data appear in the information section when a customer selects a particular store. You must fill in:
- Country
The country allows customers to filter the store search results. - State/Province
The state code is essential if data files are exported to a Google Places account. - City
- Street
- Street (additional)
- Postcode
Additional Data
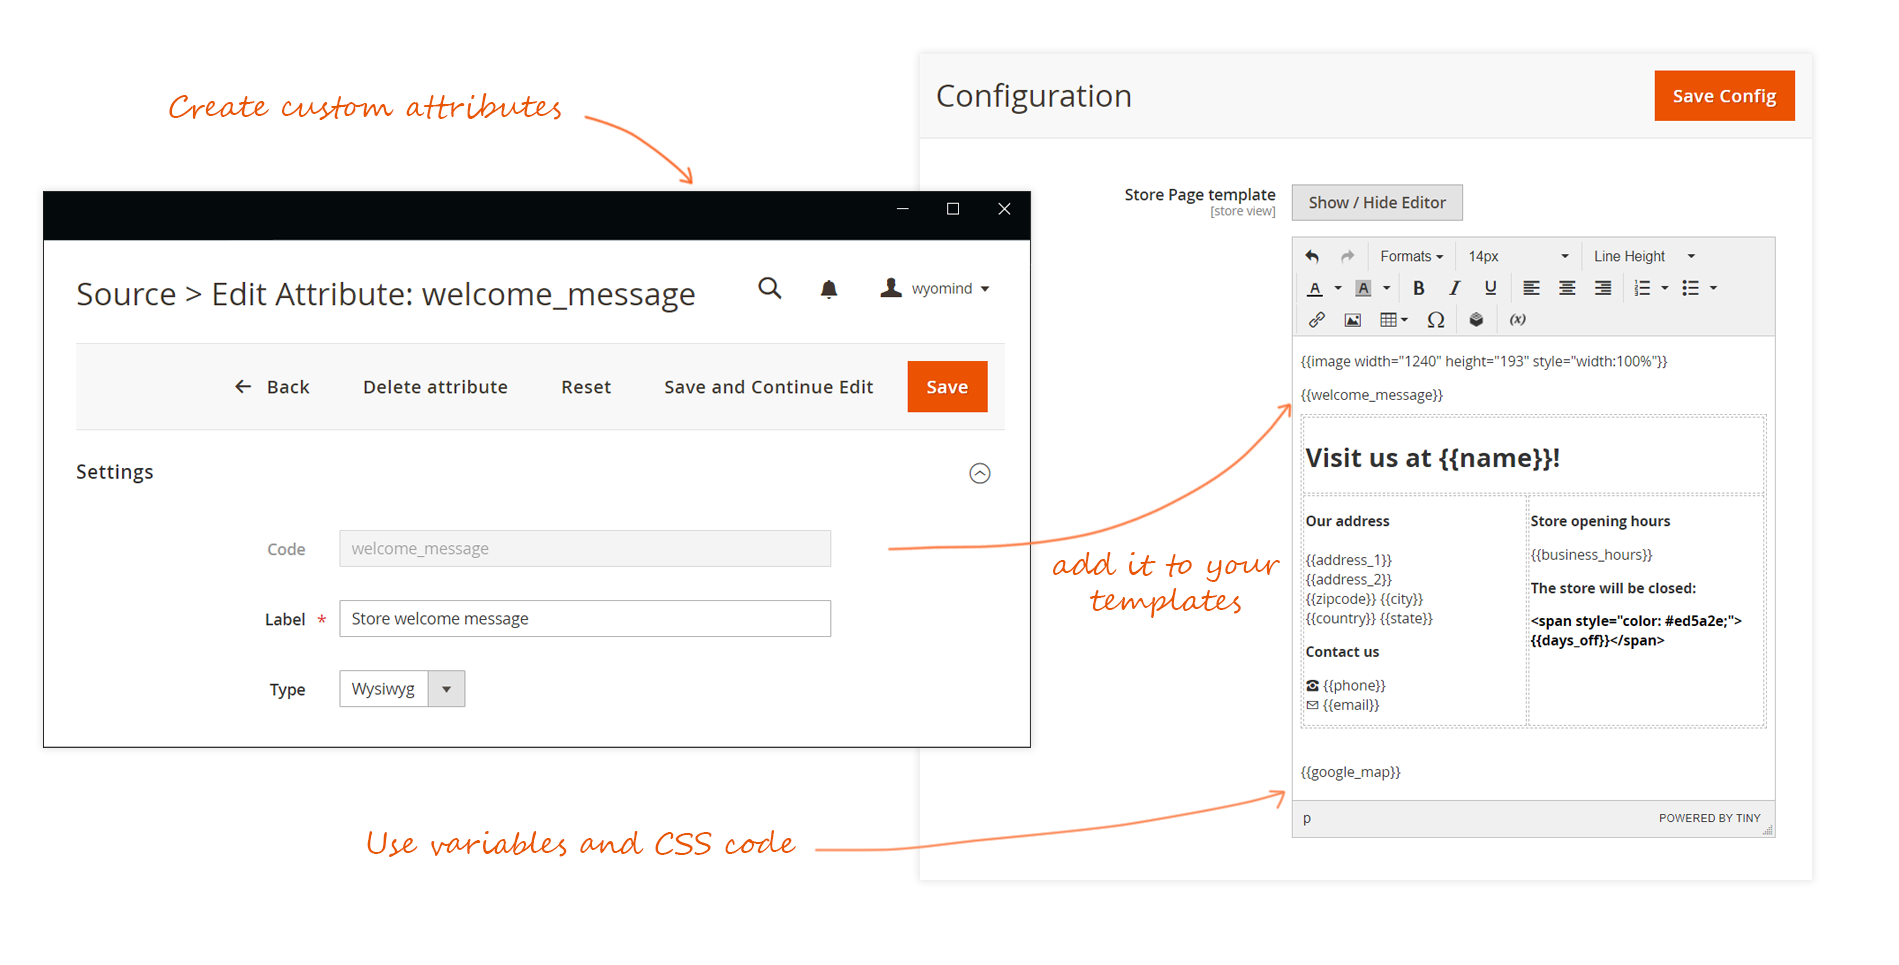
For each store, you can define your own attributes in order to customize the store page as you want.
For this, go to:
StoresInventorySource Attributes
Click on ADD A NEW ATTRIBUTE.
This works the same way as product attributes.
The attribute can be:
- text: simple input
- textarea: multi-line input
- wysiwyg: HTML input
 Once saved, a notification displays, and the attribute is listed in the grid.
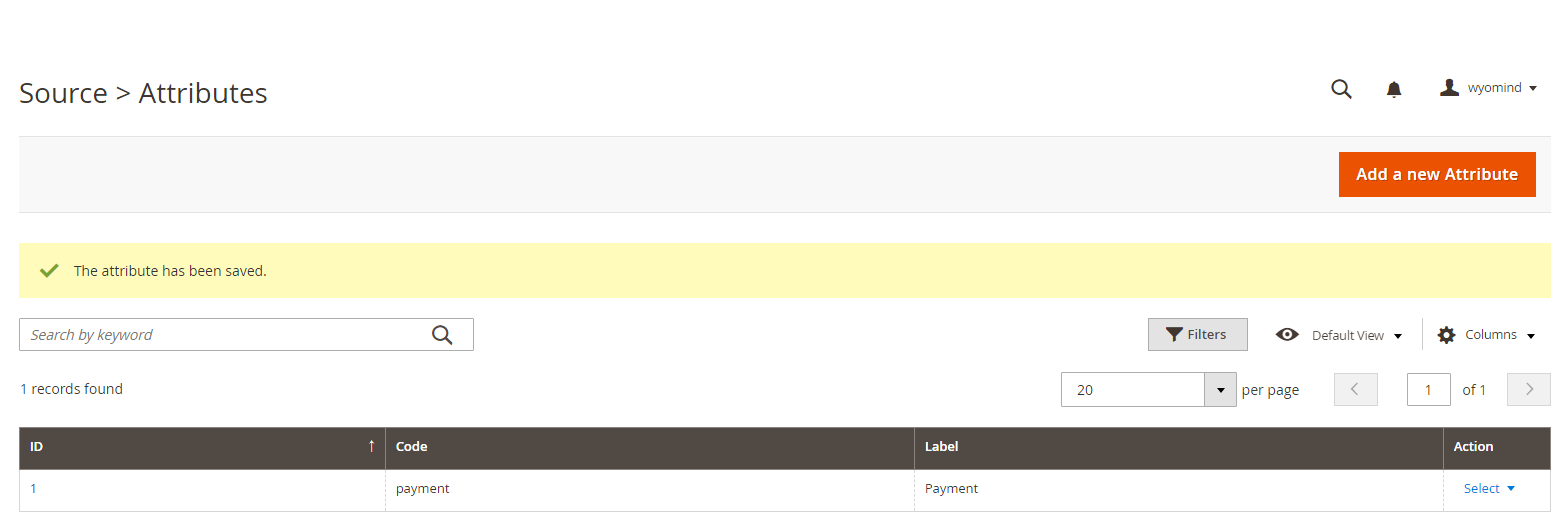 Once created, the attributes will be displayed in the Additional Data tab of each source.
 Then, they can be used in the description template for the Store Locator and in the template for the store page.
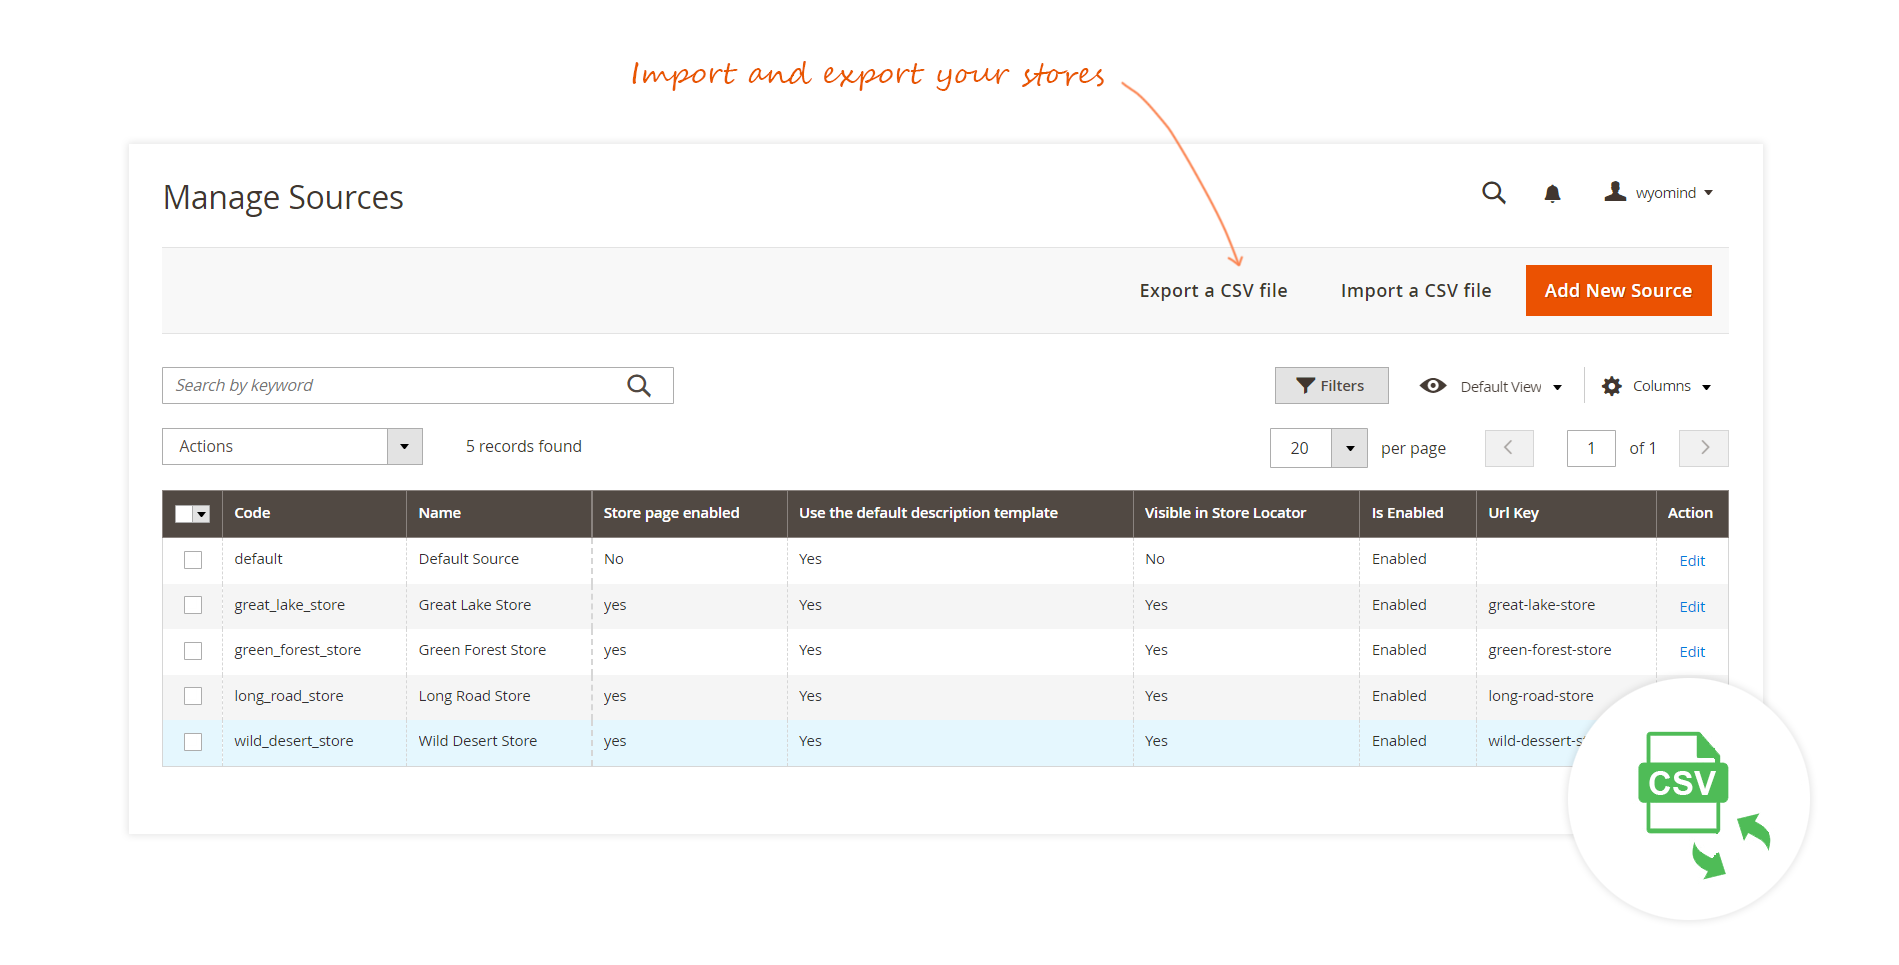
Import and export a CSV file
Import
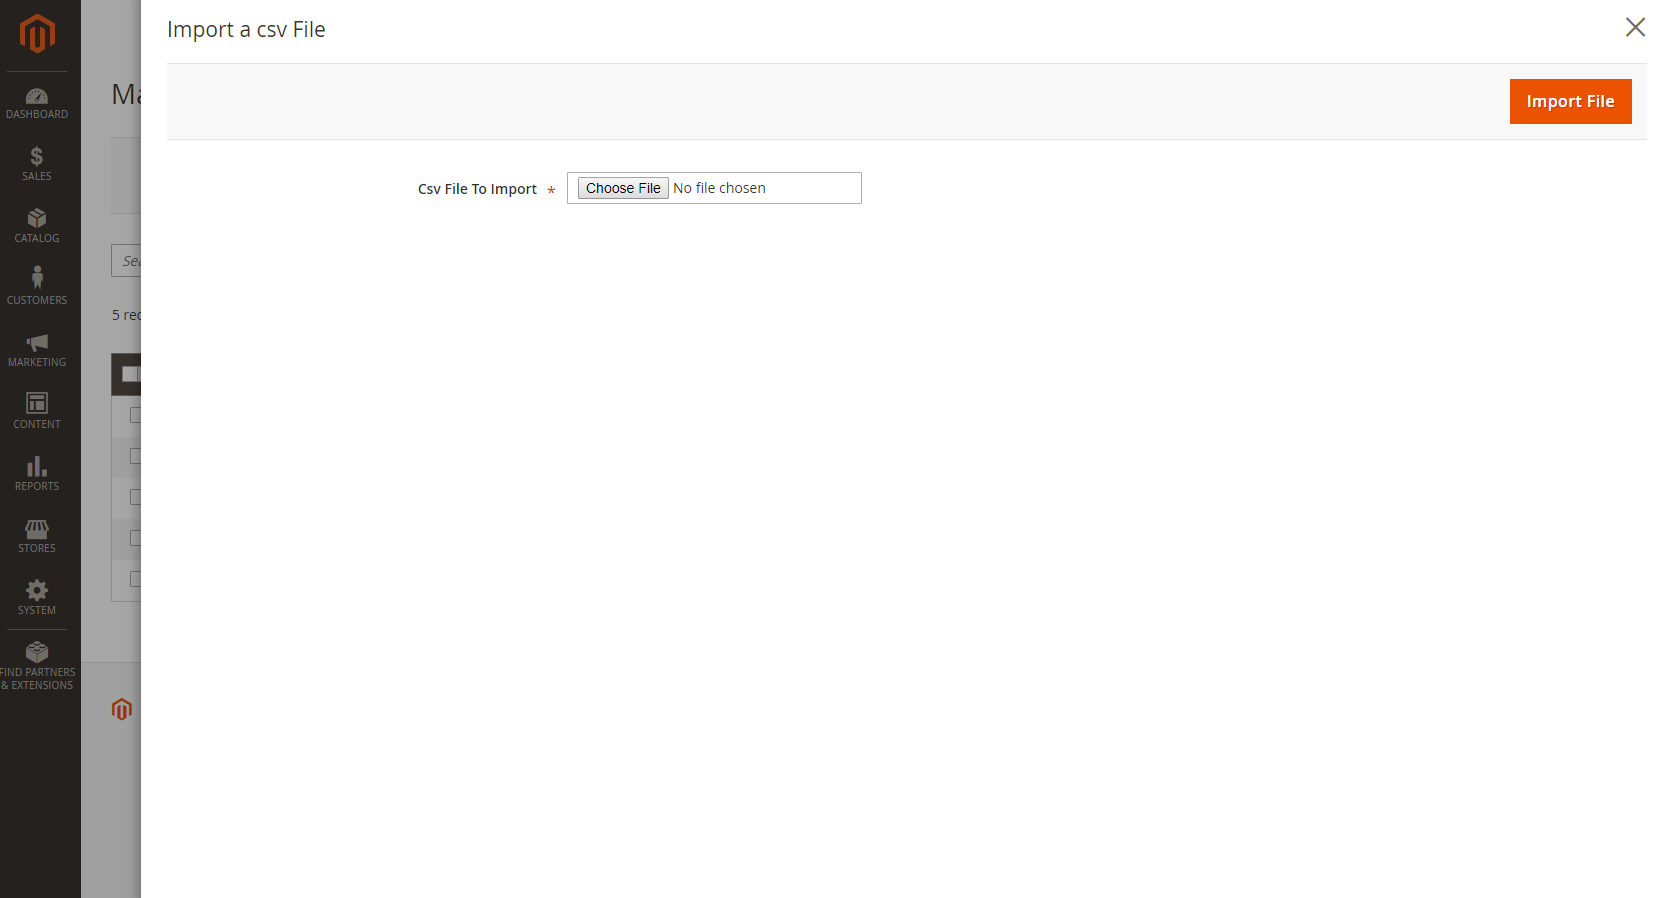
To import a CSV file, click on IMPORT A CSV FILE. You can then click on CHOOSE FILE to upload your file in Magento 2.
Your file must be a CSV file. Values must be separated by tabulations and enclosed by quotation marks.
Once you have chosen your file, click on IMPORT FILE.
A message is displayed and notifies that the sources have been imported in:
StoresInventorySources
![]()
Export
To export a CSV file, it is quite easy, you need to click on EXPORT A CSV FILE, and you will be able to download a CSV file that includes all information about the sources you've just created or imported.
Configure the display of your sources
In order to edit the display of your sources in the Google map, go to:
StoresSettingsConfigurationWyomindStore Locator
To see your stores on the map, go to: http://www.yourwebsite.com/storelocator
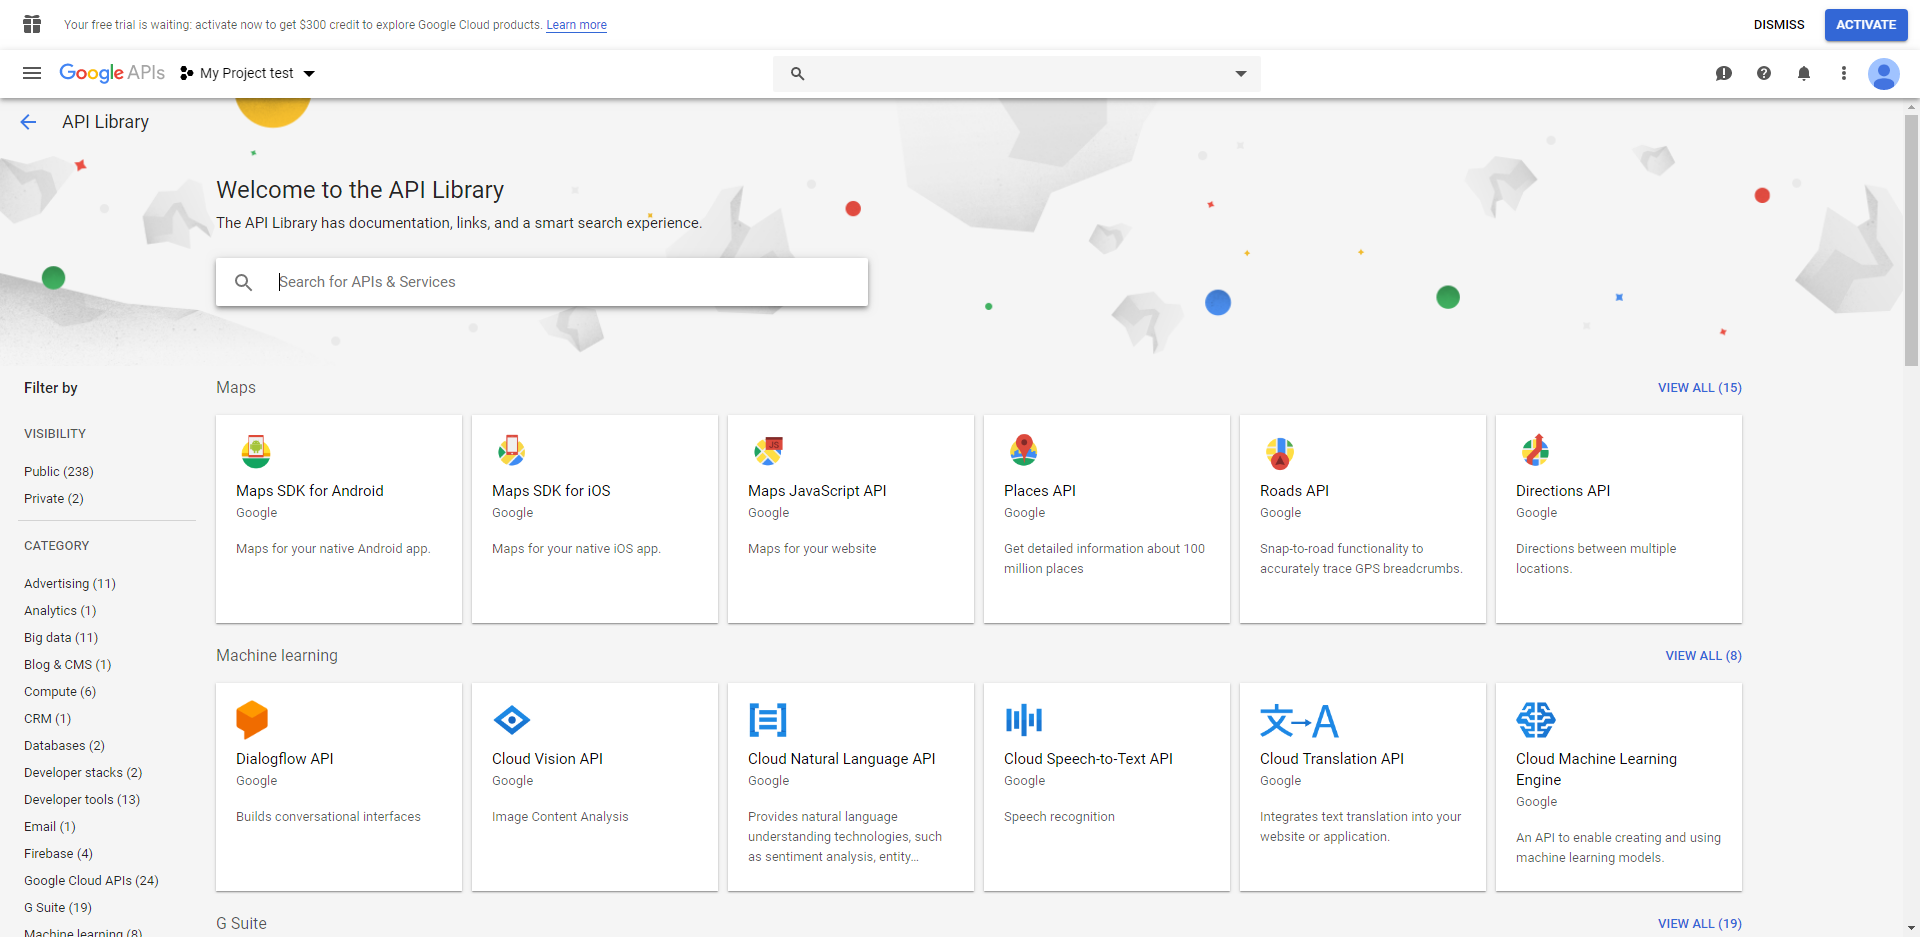
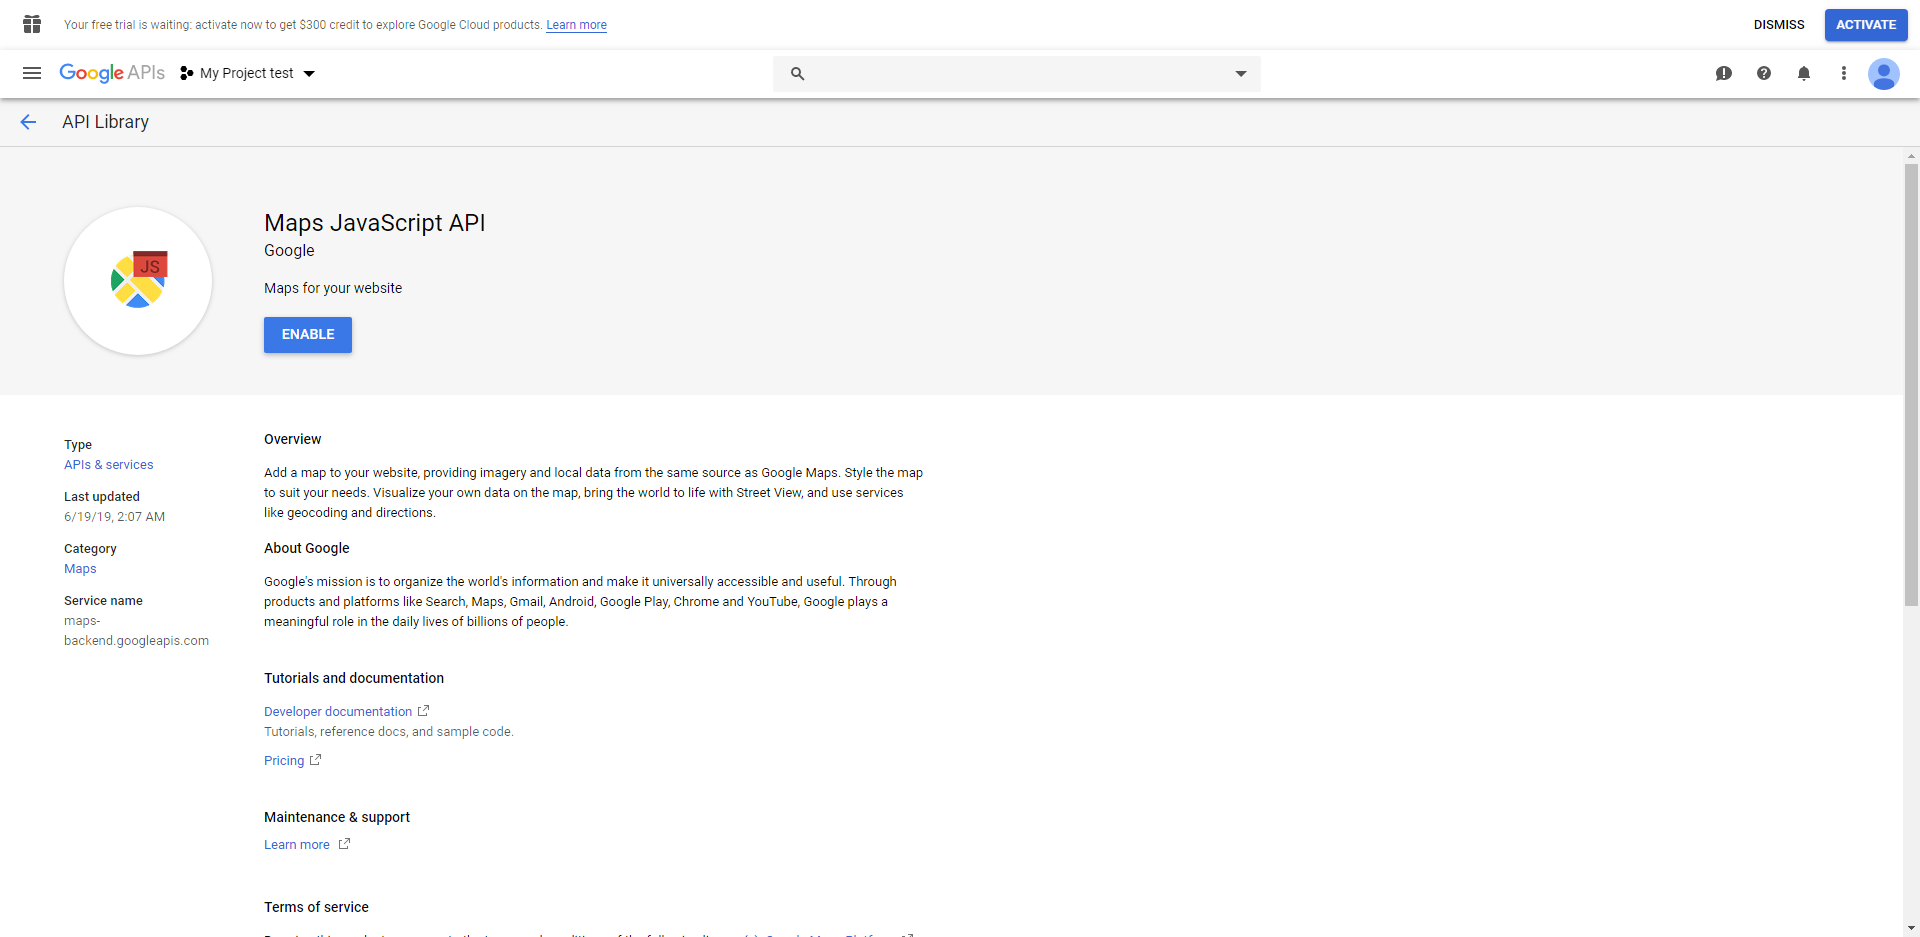
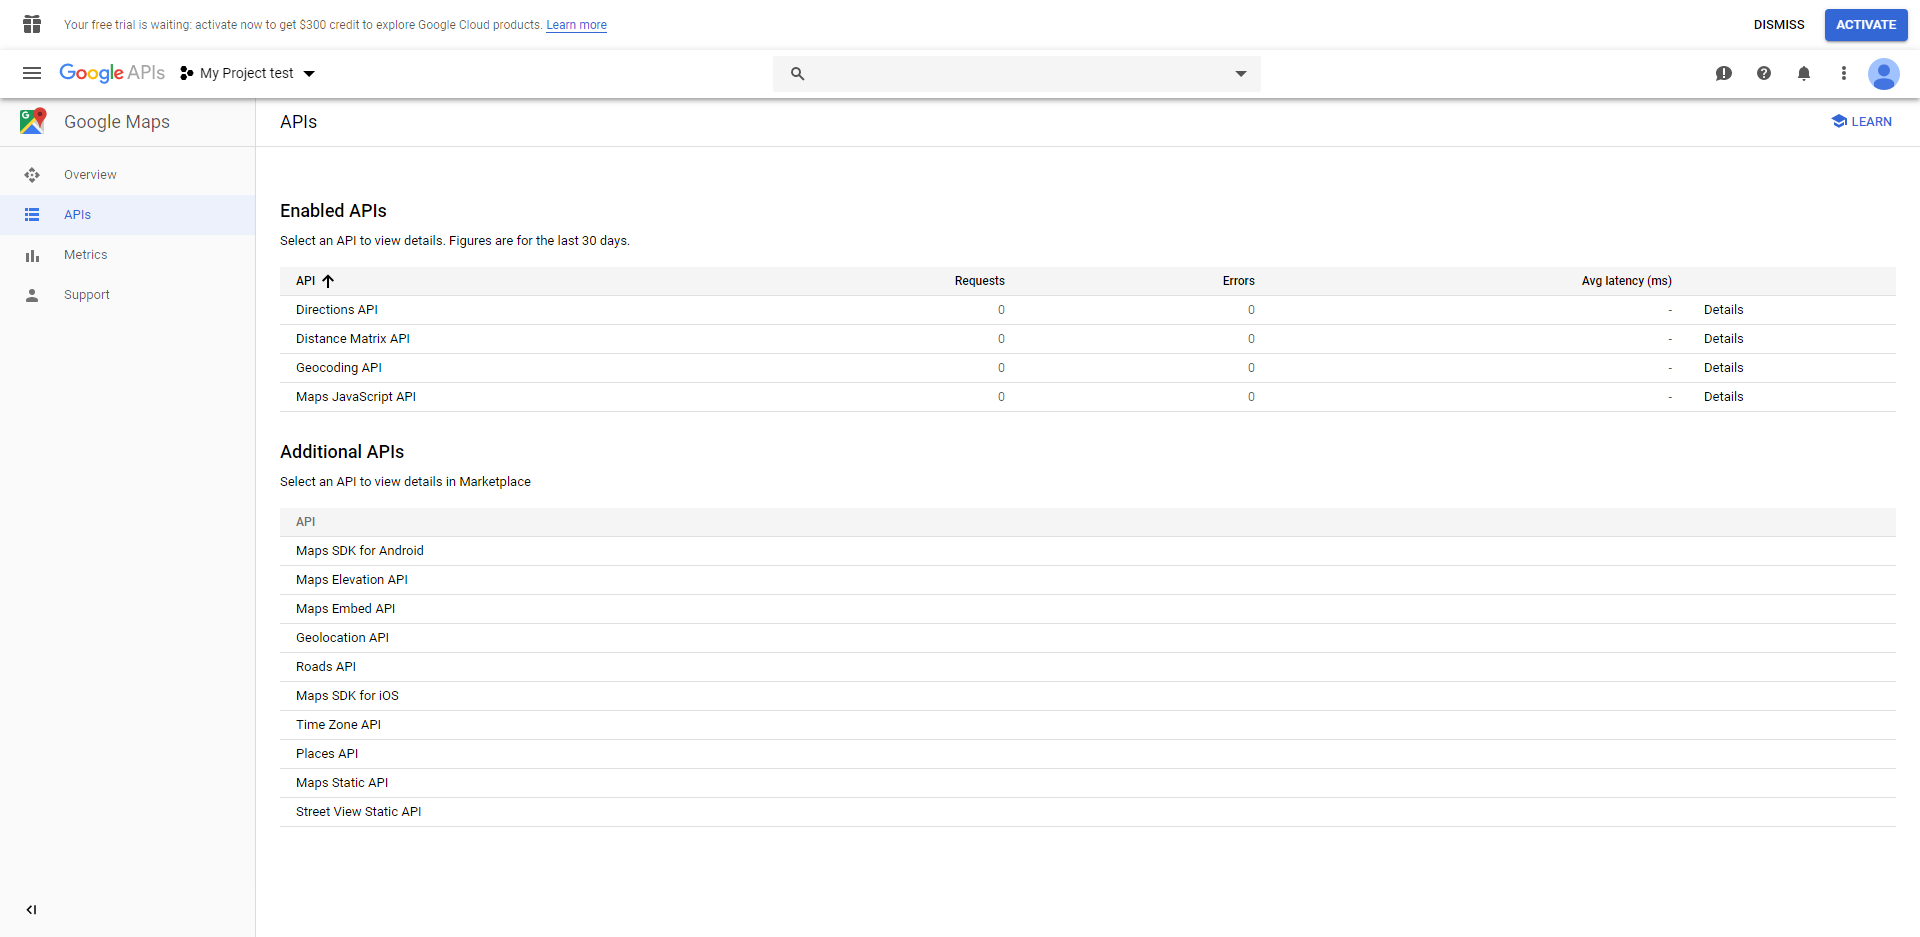
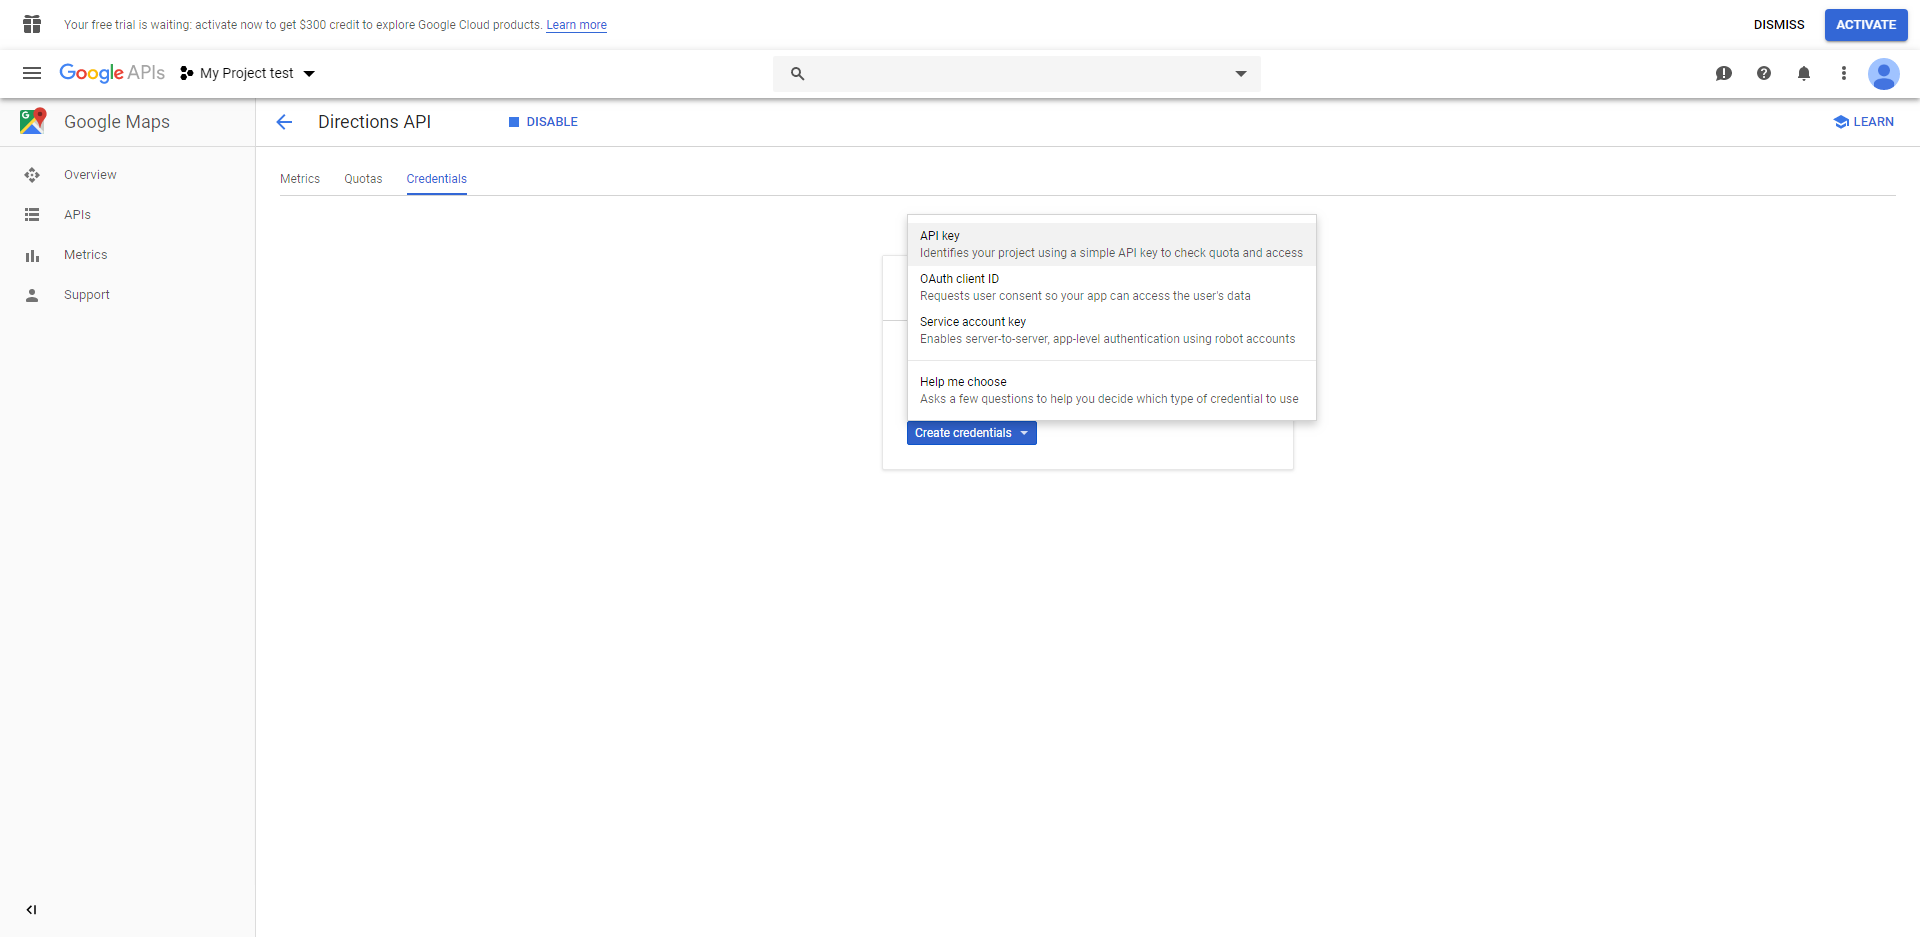
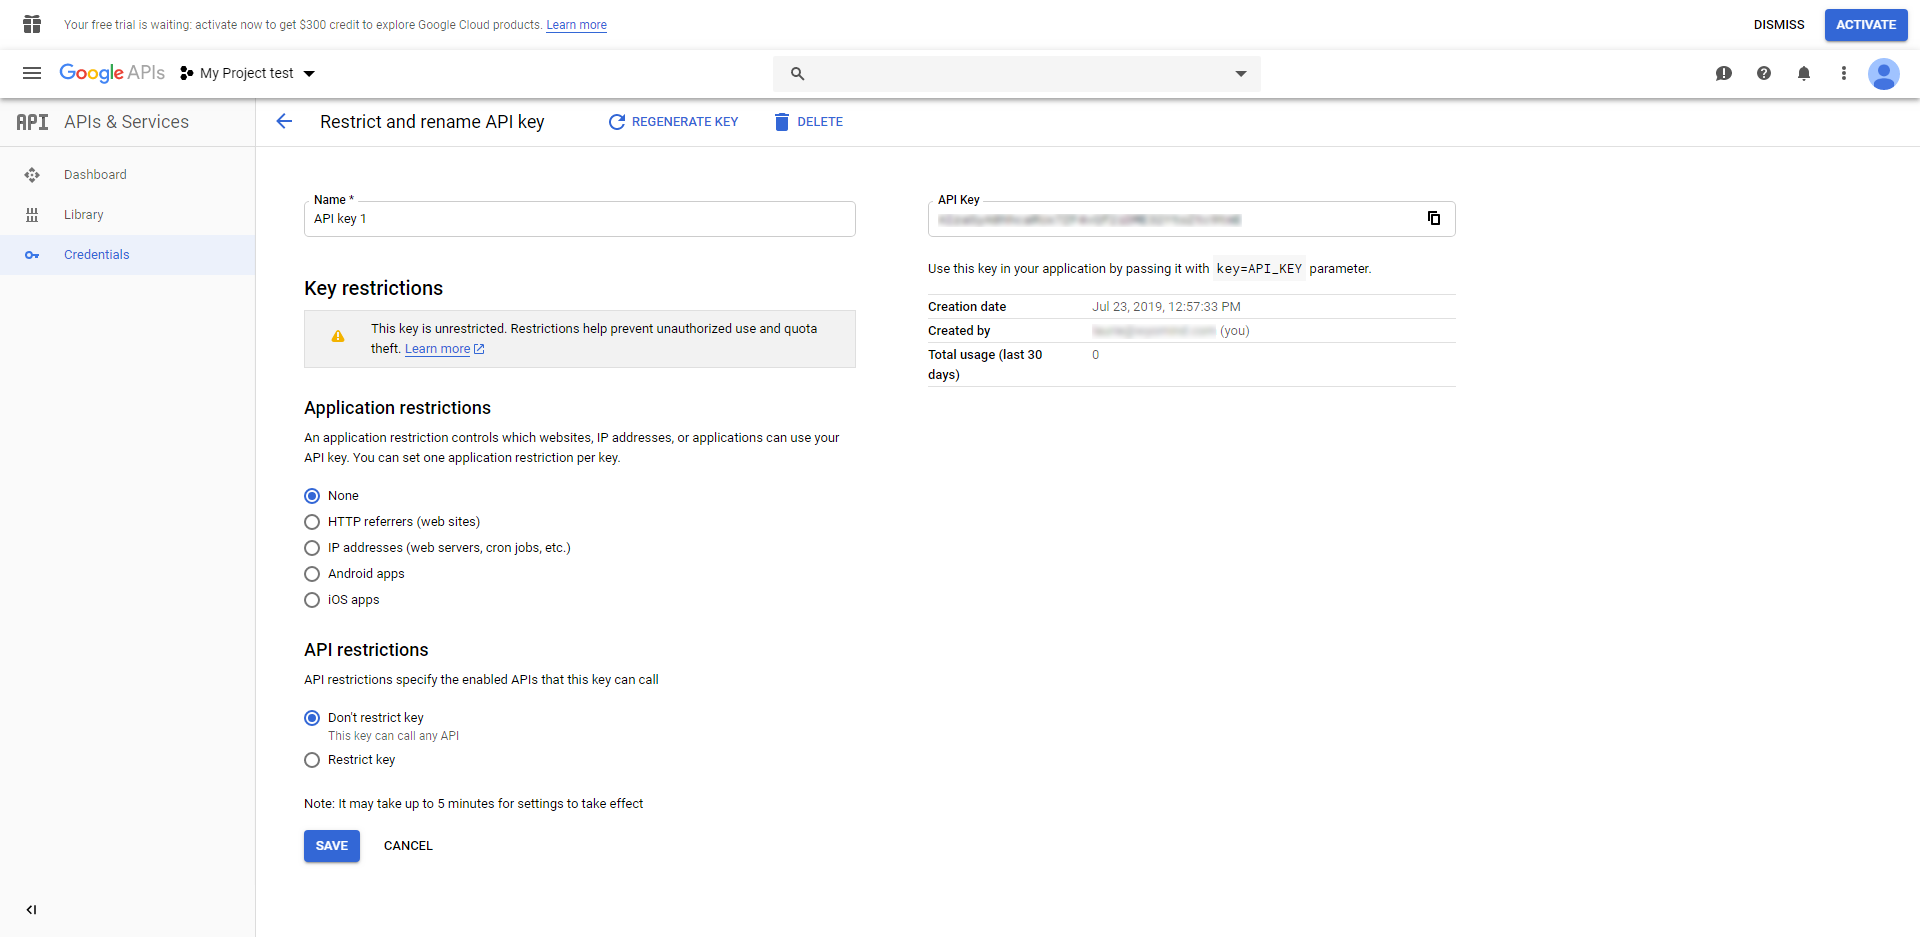
Add your Google API key
There you will be able to add your API key in the Google API key field.
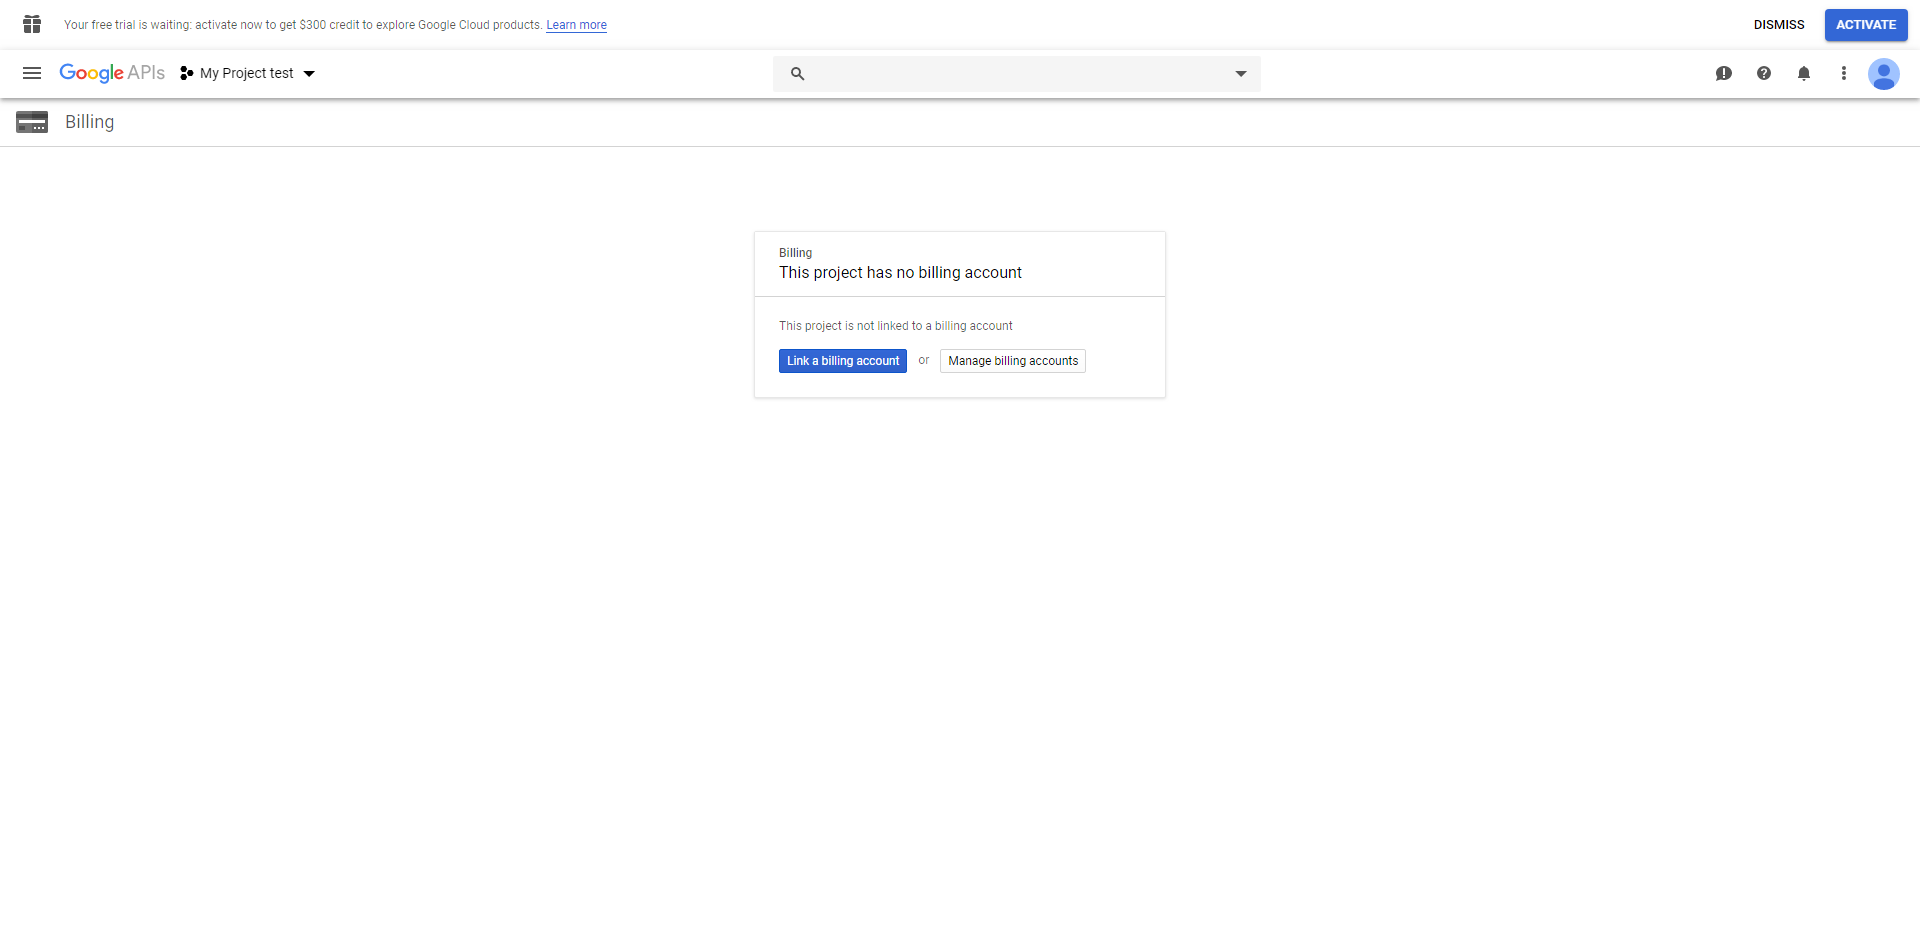
Indeed, Google is now asking an API key to display the Google map. If you don't have an API key yet, check our FAQ to know how to get your own key.
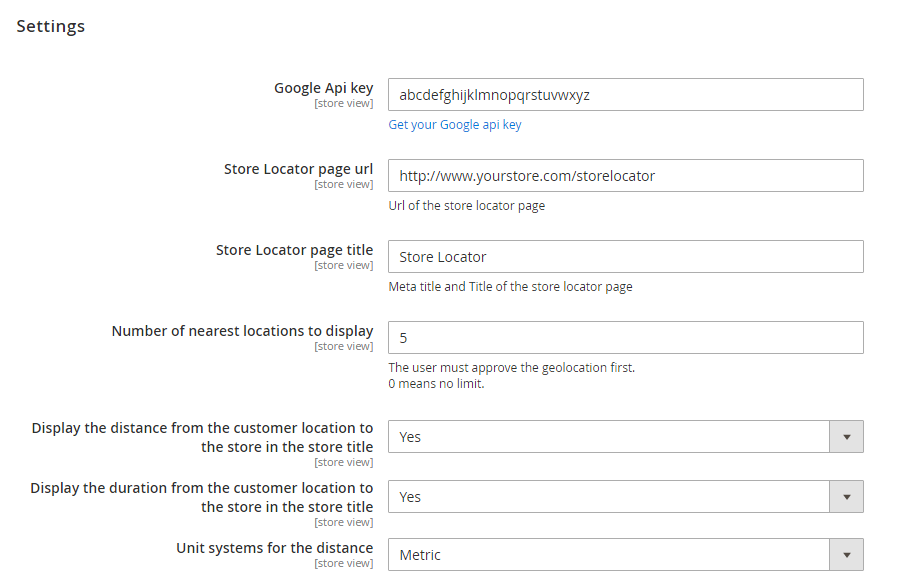
Edit the location configuration
You can totally configure the location:
- Store Locator page URL
It is the URL of the Store Locator page. - Store Locator page title
It is the title of the Store Locator page. - Number of nearest locations to display
Note that 0 means unlimited. - Display the distance from the customer location to the store in the store title
You can add the distance to the store from the customer location. - Display the duration from the customer location to the store in the store title
You can add the time it takes from the customer location to go to the store. - Unit systems for the distance
Choose between Metric or Imperial.
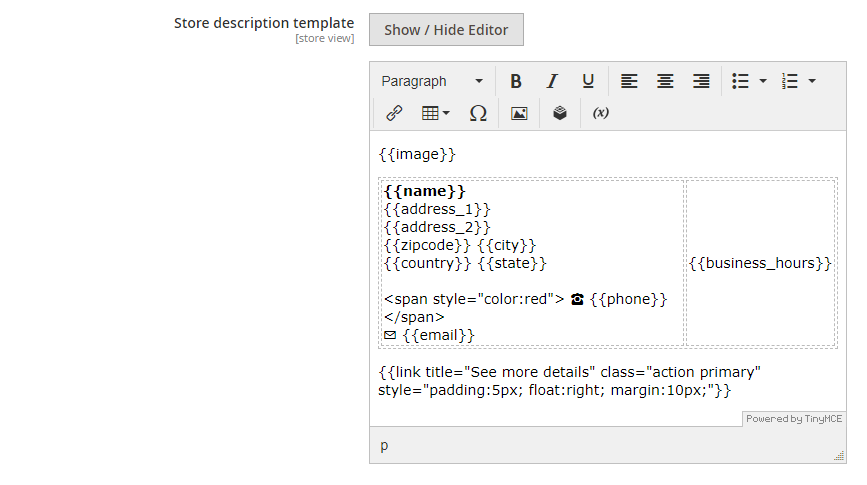
Edit the store description template
You can change the display of your stores and even add some PHP code.
For example, let's say you want to display the phone number in red. You'll just need to add in the Store description template field:
<span style="color:red"> {{phone}} </span>Edit the store page template
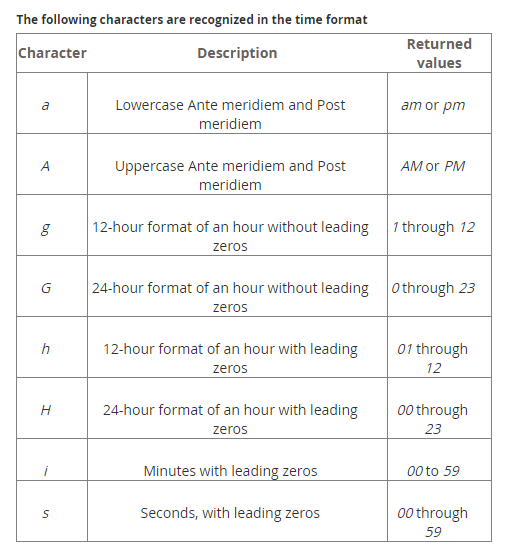
Edit the time format
You have the possibility to change the format of the date.
For example, for 2:30 AM, use:
h:i A
STEP 2: Configure the store map
The Store Locator extension allows you to configure the Store Locator map and to add it on any page of your Magento 2 website.
Add the Store Locator map to any CMS page
You can easily add the Store Locator map to any CMS page saved in the Magento 2 back-office in:
ContentElementsPages
Add the following code in the Layout Update XML field in the Design tab of the CMS page concerned:
<referenceContainer name="content">
 <block
  class="Wyomind\StoreLocator\Block\StoreLocator"
  name="storelocator"
  template="Wyomind_StoreLocator::storelocator.phtml"
 />
</referenceContainer>Now the Store Locator map must be displayed on the CMS page you have chosen.
Customize the Store Locator map
The template which allows the Store Locator map to display is easy to modify with basic PHP and HTML skills.
- The Store Locator template is found, by default, in:
app/code/Wyomind/Storelocator/view/frontend/storelocator.phtml - All the CSS styles and associated images required to display the Store Locator map are in:
app/code/Wyomind/Storelocator/view/frontend/web - To translate the words on the Store Locator map you can either use the on-line Magento translation tool or copy and translate the translation files available in:
app/code/Wyomind/Storelocator/i18n/en_US.csv


 Magento 2
















 we bought the store locator tool for our client. The took worked amazing and the support team got back to us quickly with installing and questions about setup. strongly recommend. What we loved most is the featuers and how well it works on mobile. Given that mobile is the future, we look forward to using more extensions from here for future projects. I strongly recommend them!
 Great extension, but even better support. The team at wyomind has gone out of their way with helping us get this extension work exactly like we would like it to and they are very easy to work with. Keep up the great work!