According to Google, a great part of retail sales are influenced by the web, but the majority is made in shops from local retailers to the big chains. Then, Click & Collect for Magento 2 is a good opportunity for you to deal with both options:
- Buying online
- Collecting in stores
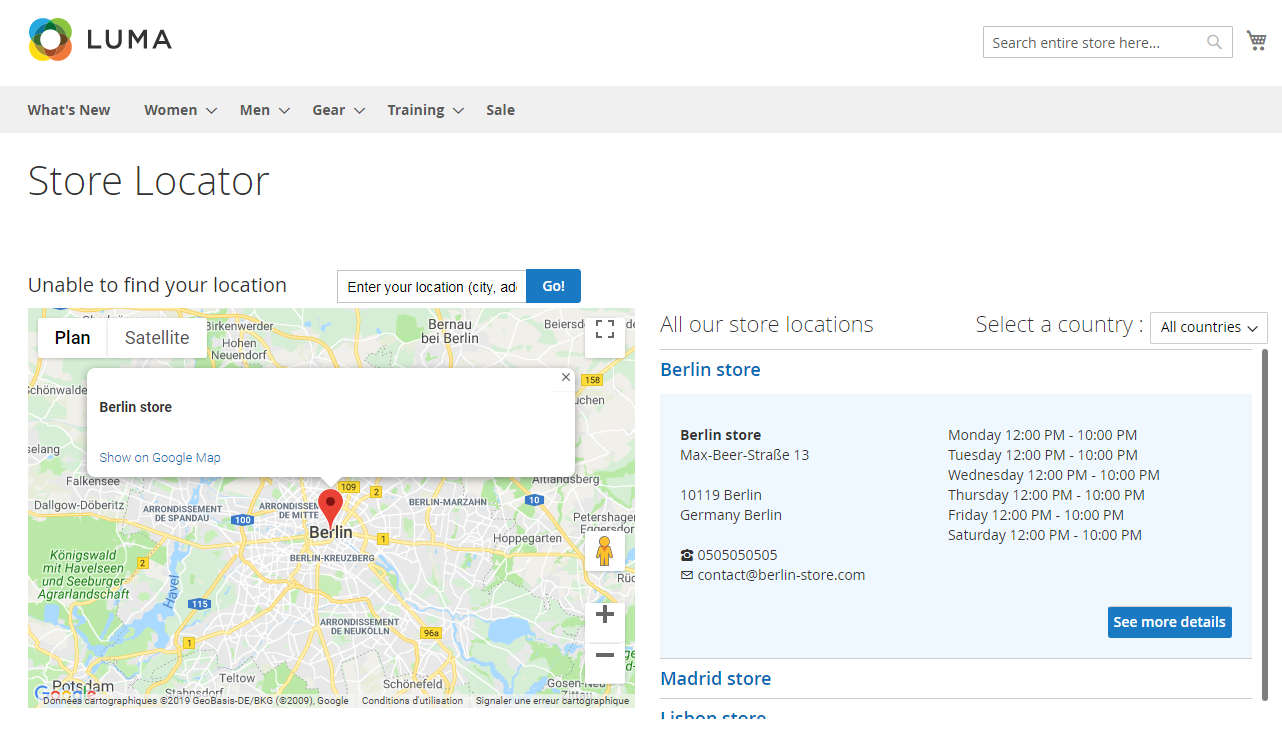
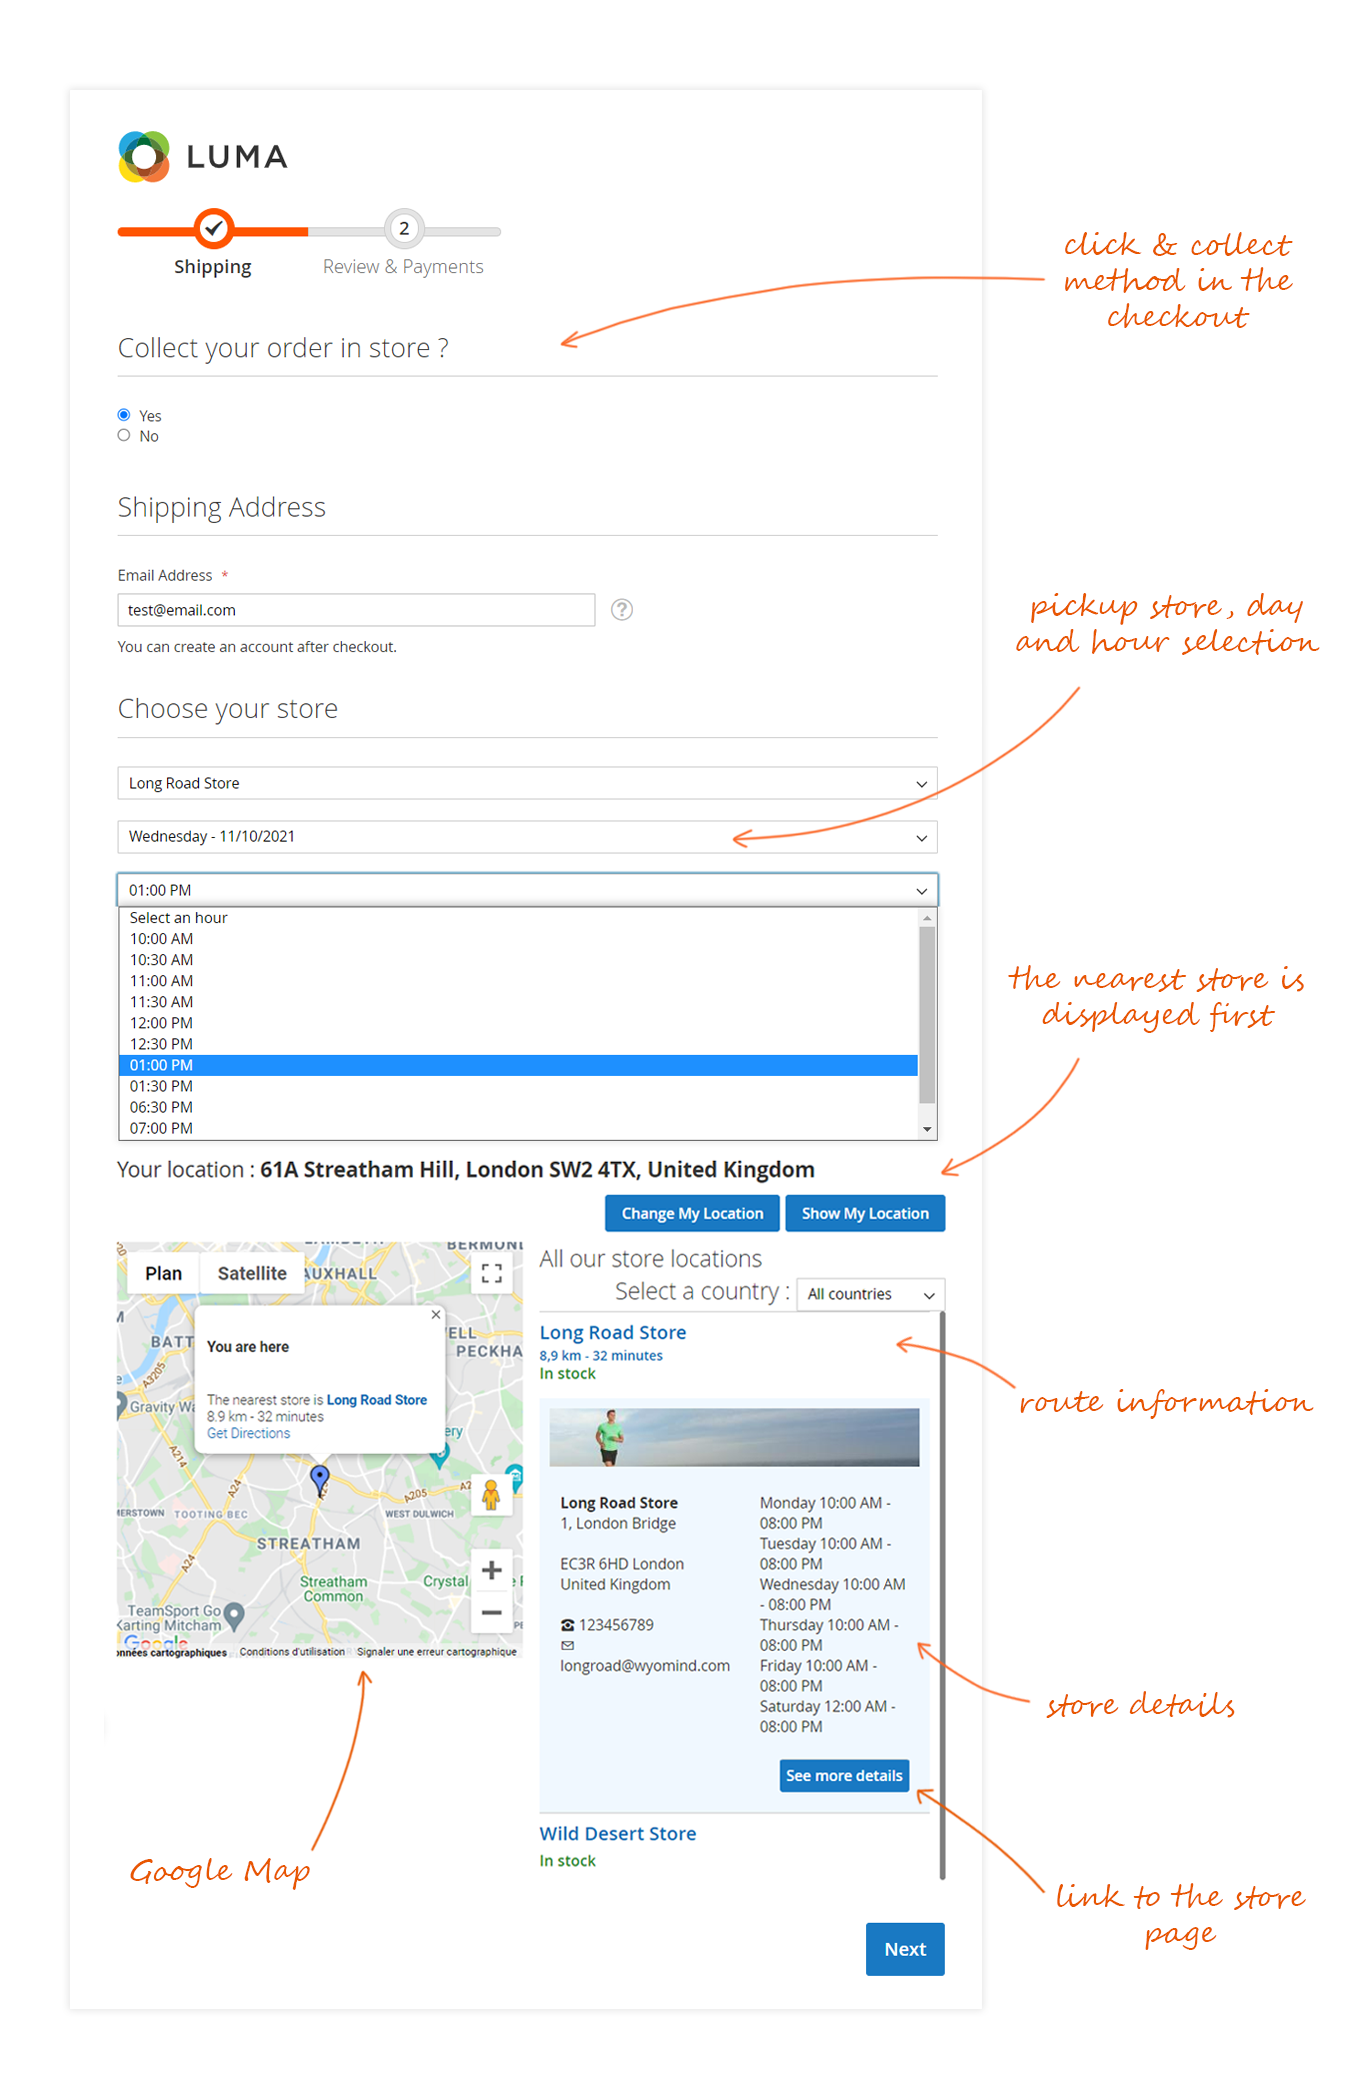
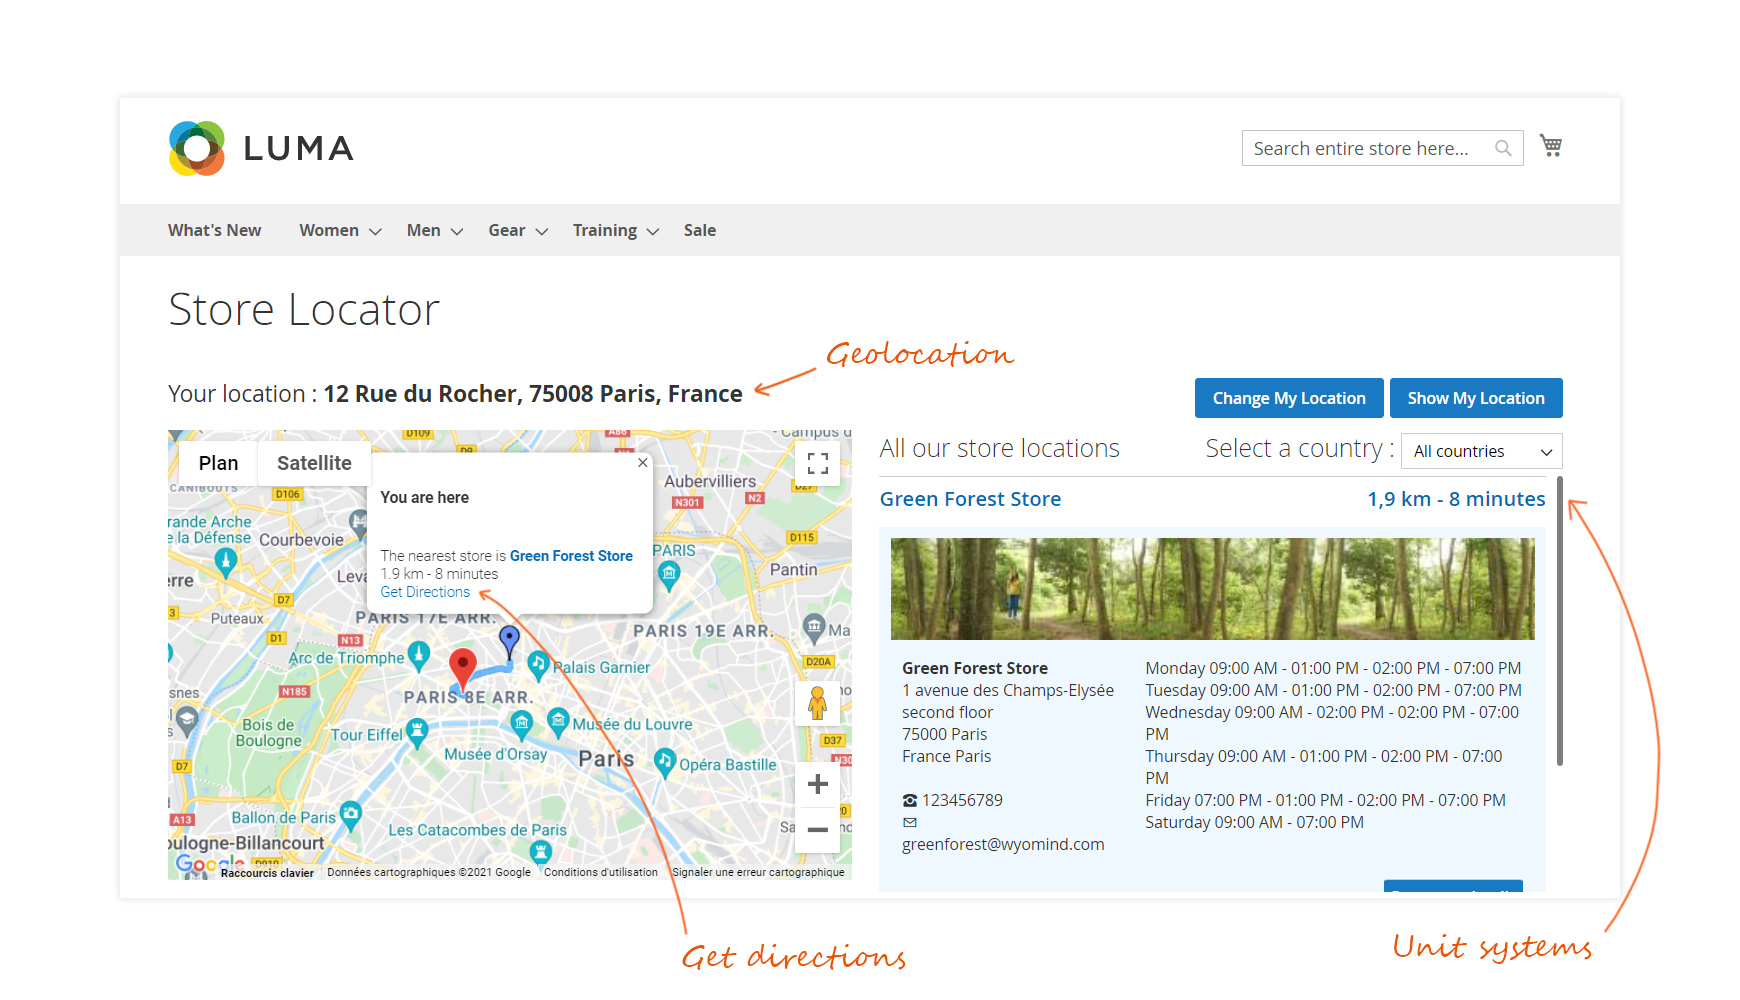
The Click & Collect extension will considerably increase awareness of all your stores by allowing you to highlight them on a store locator including a customized Google Map which is then placed on any page of your website.
This map uses HTML5 code which helps the customer by providing, on the same web page, their current position, and a route map to their nearest store.
Specific information relative to each store location can be easily customized from the Magento 2 back-office. For example, opening times, postal, and website addresses...
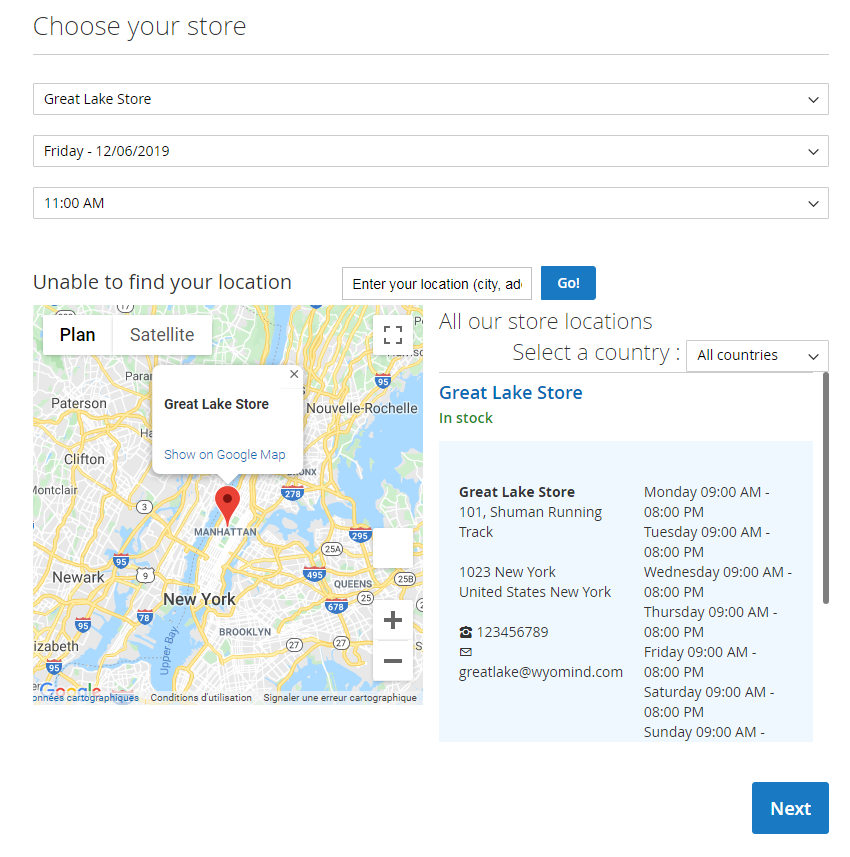
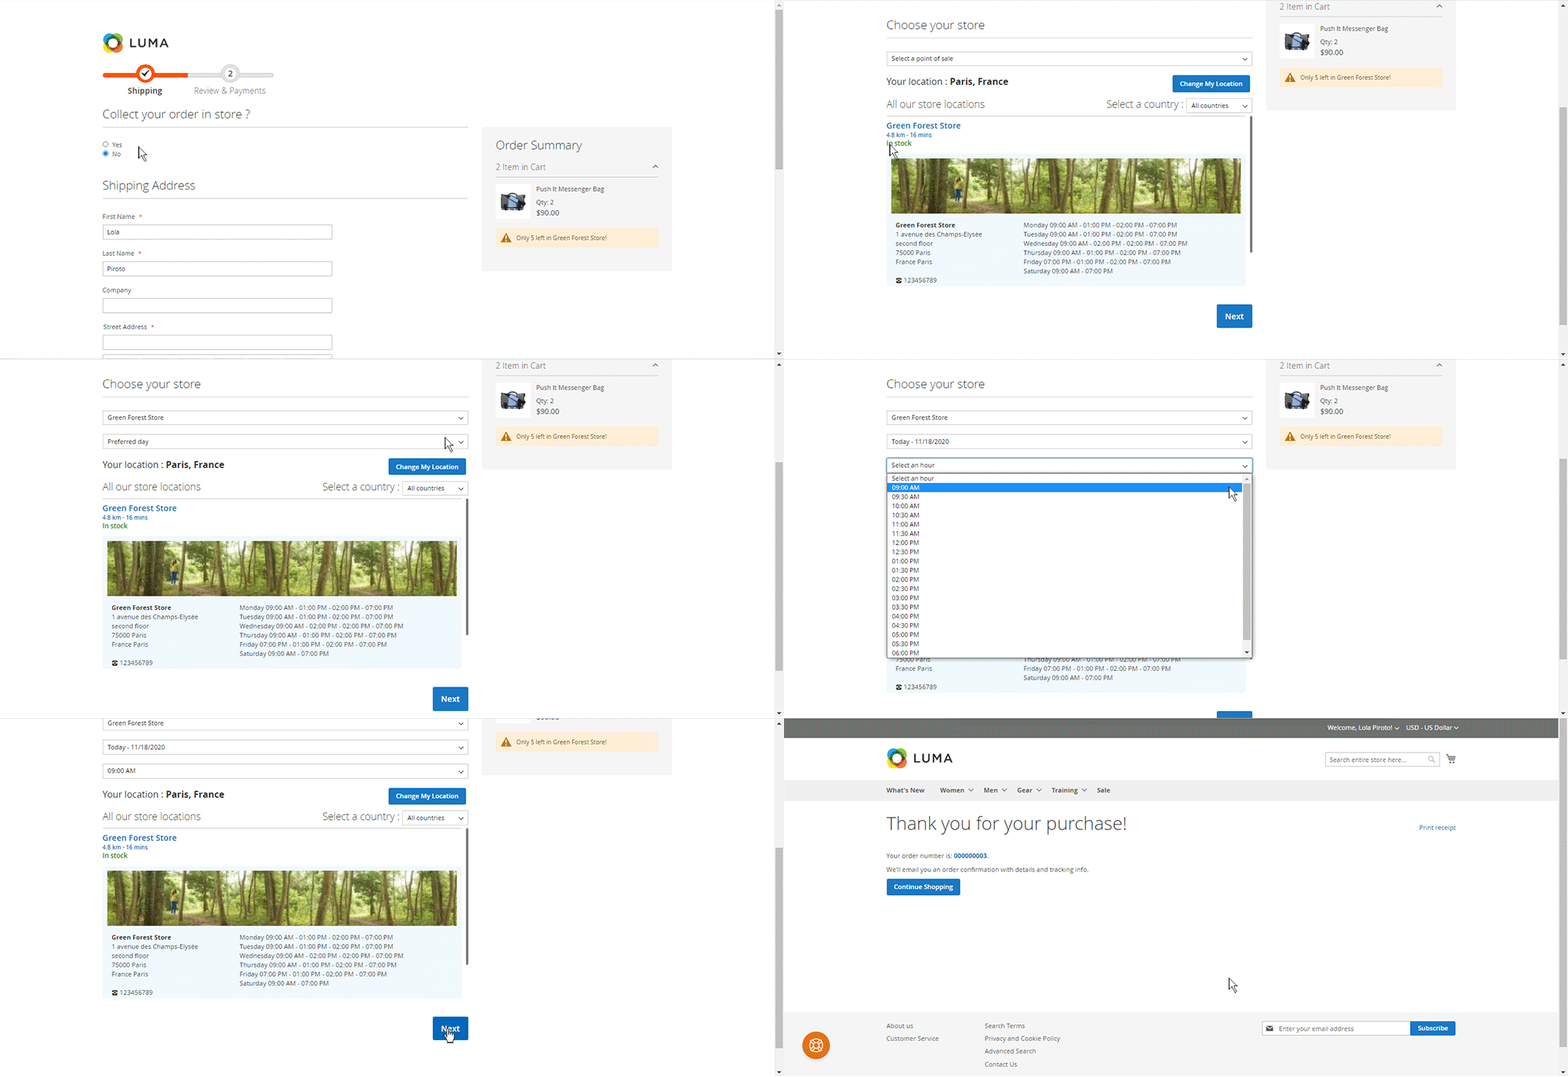
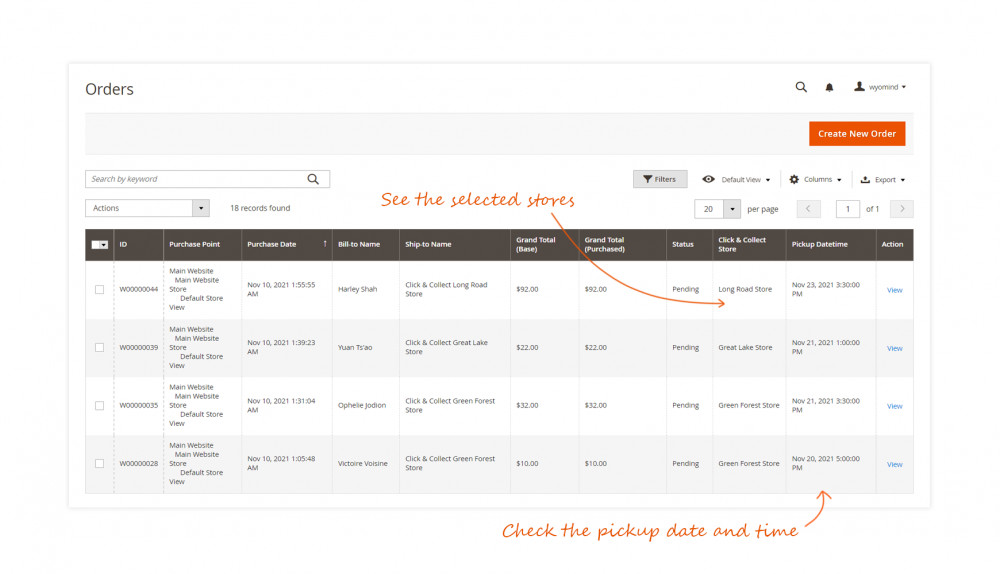
During checkout, customers will be able to choose the store where they want to collect their orders as well as the day and the hour.
That extension enhances the Multi Stock Inventory module from Magento 2 and is fully integrated with the suite by providing additional features.
Terminology
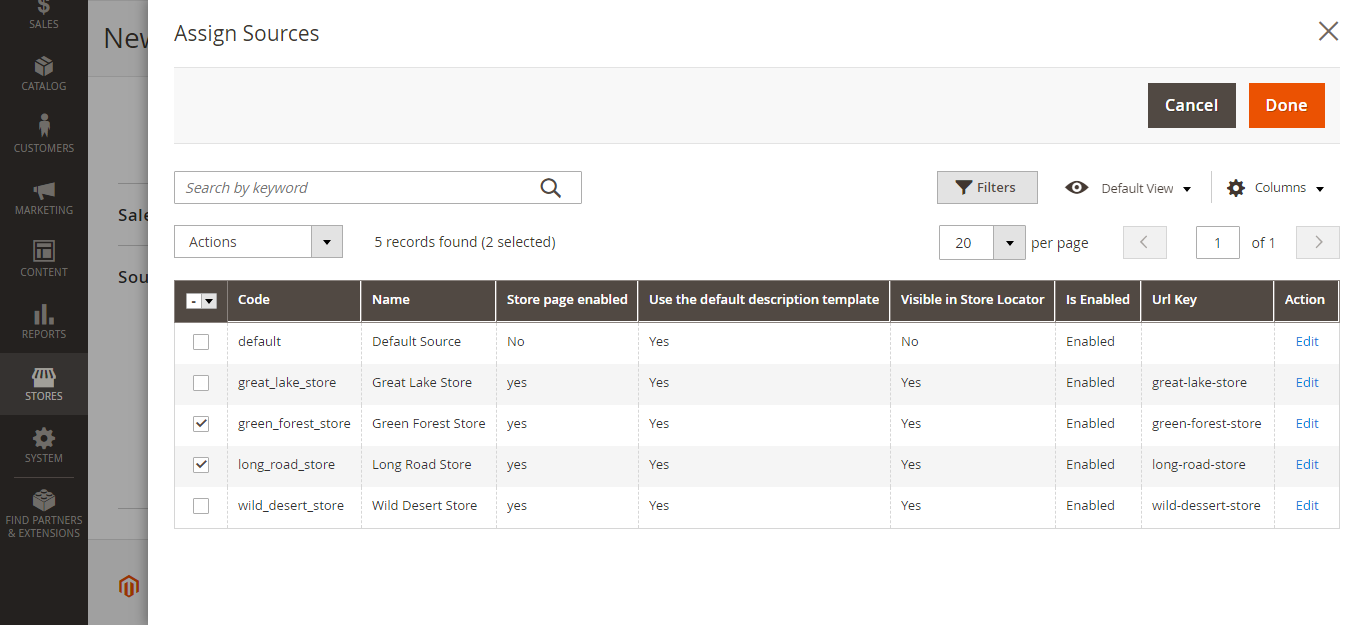
- Sources: represent physical sites where the available products are stocked and shipped from. It can be warehouses, stores, wholesalers...
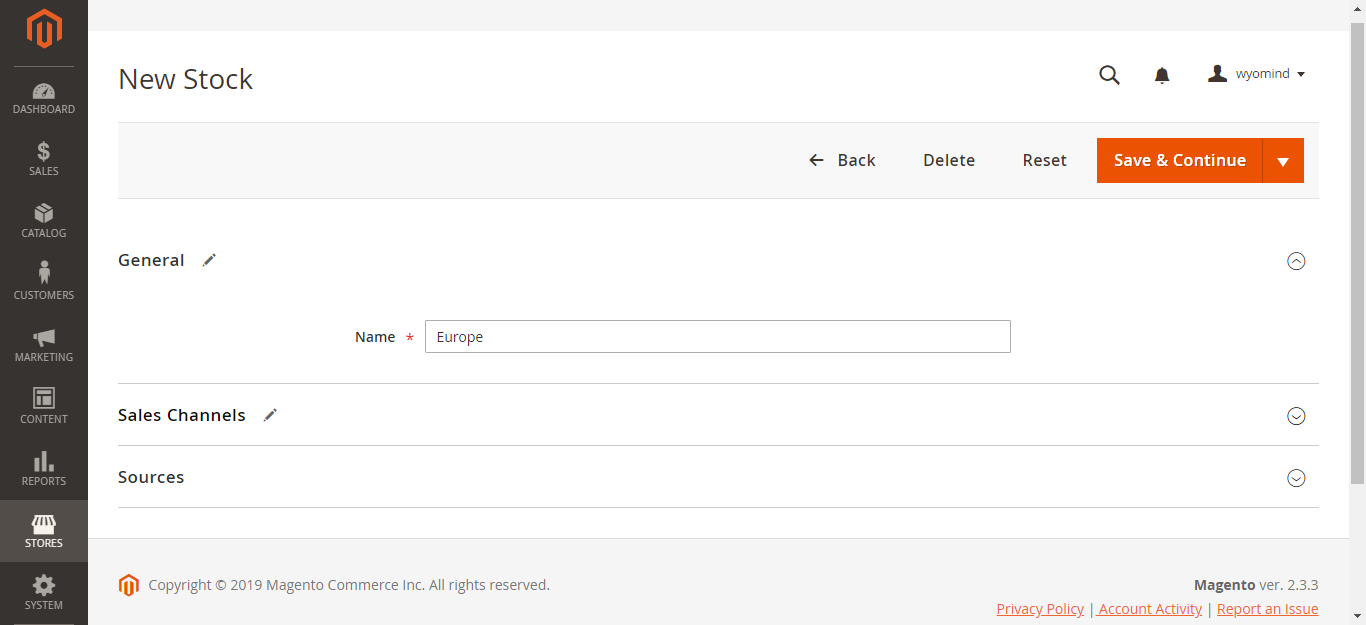
- Stocks: link Sales Channels to Sources. One stock can be linked to several Sales Channels.
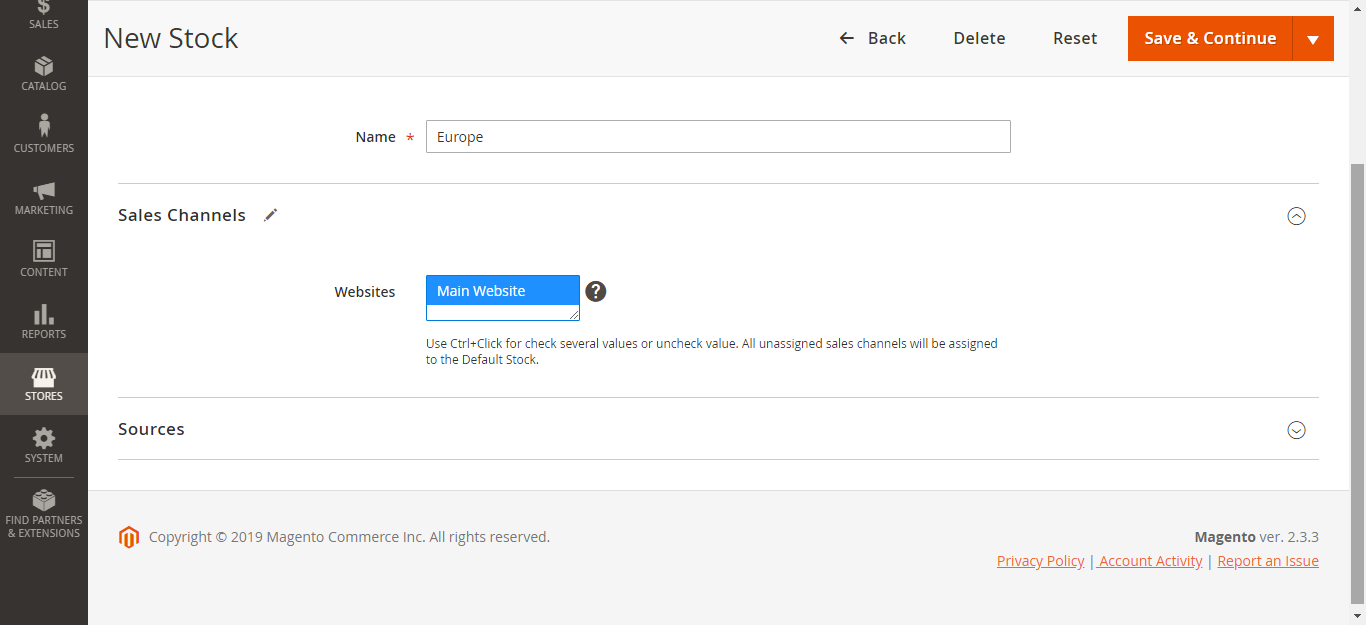
- Sales Channels: a Sales Channel can only be linked to one stock.
How to use Click & Collect for Magento 2
The Click & Collect extension only requires a few steps before being ready to use. Create your sources and enable the click & collect method in the shipping methods.
STEP 1: Manage your pickup locations
Create your pickup locations
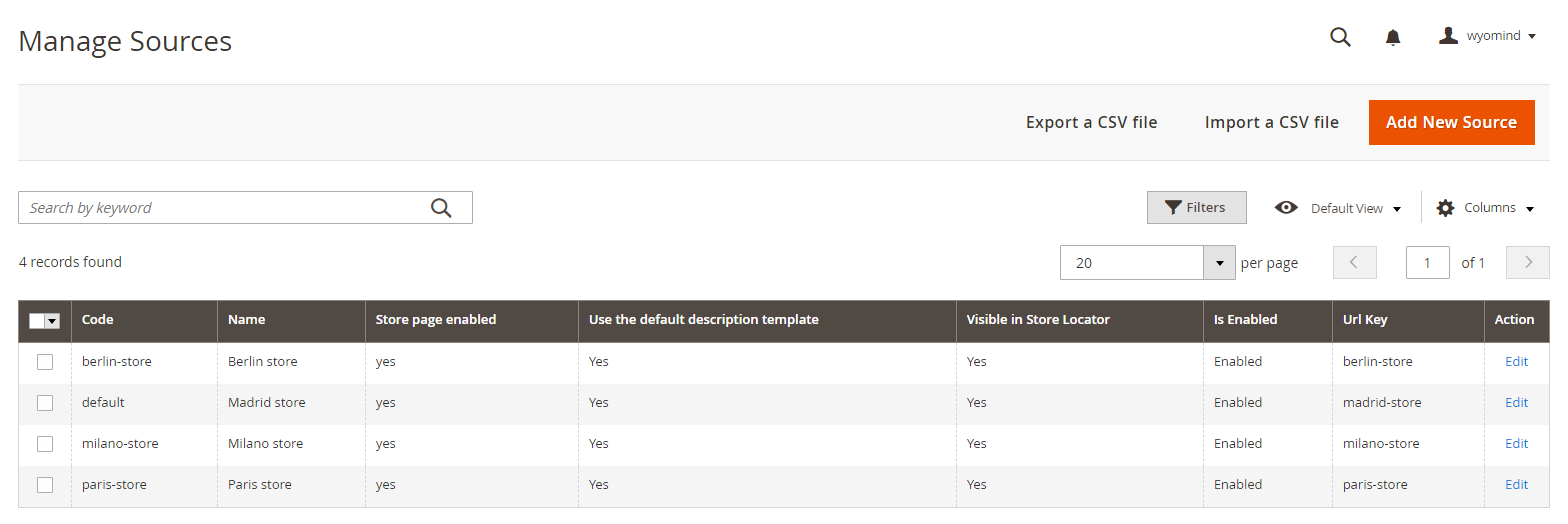
With Click & Collect that includes the Store Locator extension, you can manage as many sources as you want from the backend of Magento 2.
To add a new source, click on ADD NEW SOURCE.
 So that a source can be created, it must have:
- a name
- a code
- a store view
- a customer group
- longitude and latitude coordinates
- a URL key
- a country
- a postcode
Other information is additional, however, we recommend you to fill in a maximum of fields to be able to reuse them in the Google Map display.
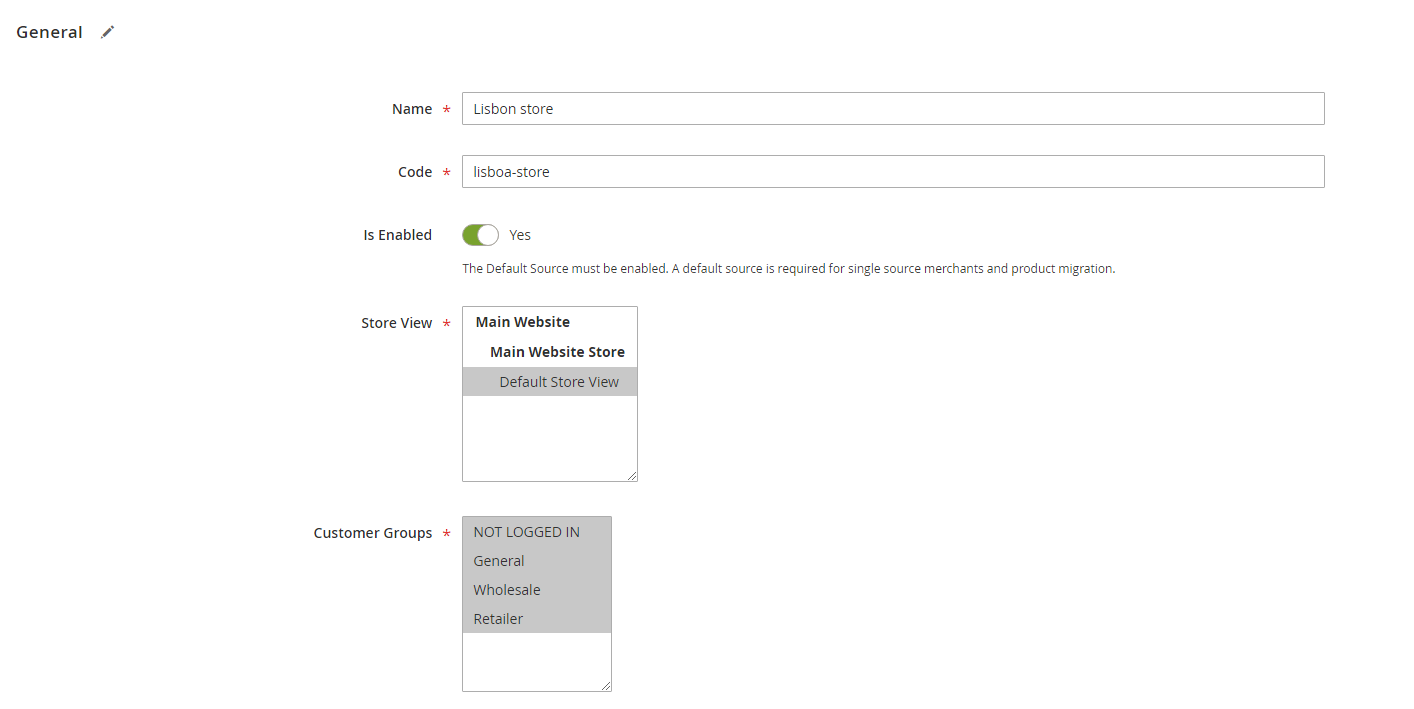
General
- Name
This is the name that appears on the front-office of your website in Google Maps.
It can be a shop sign or used help to localize the store.
USA Washington Store - Code (internal use)
This is a unique identification code used in the back-office of Magento 2 for each store.
This code is also used by Google Addresses to identify stores if data files are exported to a Google Places account. - Is enabled
The Default Source must be enabled.
A default source is required for single-source merchants and product migration.
- Store View
A source must be linked to at least one store view to be displayed for customers in Google Maps. - Customer Groups
You must then select the customer group(s) that will be able to see the store.
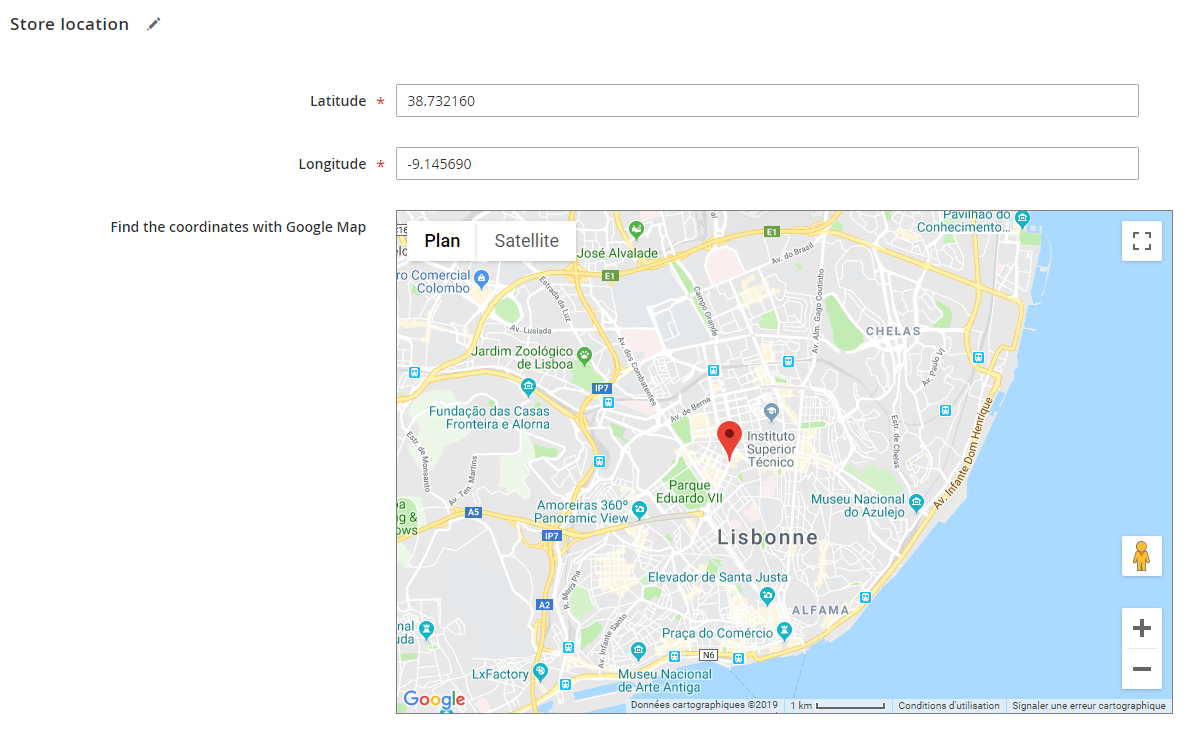
Store Location
- Latitude & Longitude
This information is essential to allow the store to be displayed in Google Maps. - Find the coordinates with Google Map
You can find this information with Google Maps directly by dragging the red cursor.
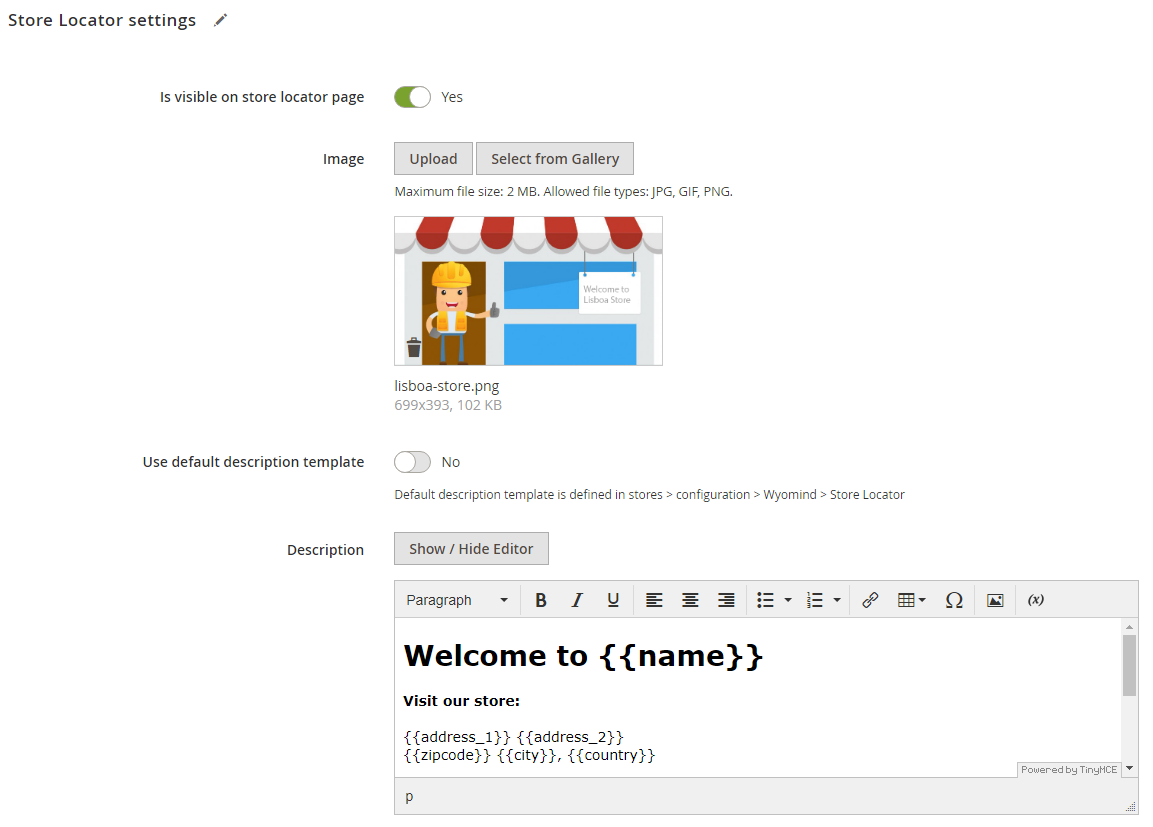
Store Locator settings
- Is visible on store locator page
If set to Yes, the store will be available on the store finder page:
http://www.yourshop.com/storelocator - Image
Browse/Drag the image for the store.
This is the image associated with a store such as a shop front, the logo etc...
The image appears in the information section when a customer selects this particular store.
The image can be a .jpeg, .gif or .jpg file. - Use default description template
The default description template is defined in:
StoresConfigurationWyomind Store Locator - Description
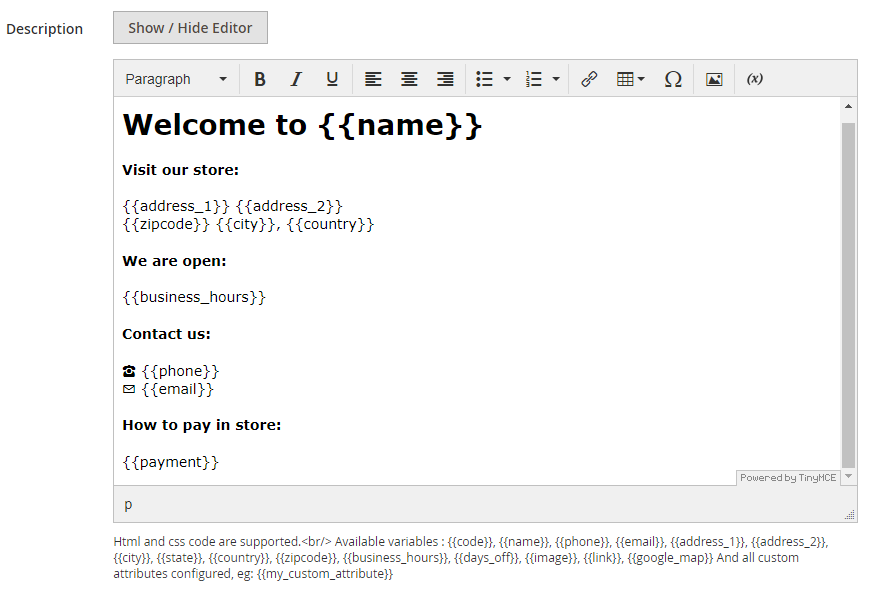
You can also define a description for that particular store. The description appears in the information section when a customer selects this particular store.
HTML and CSS code are supported.
See available variables
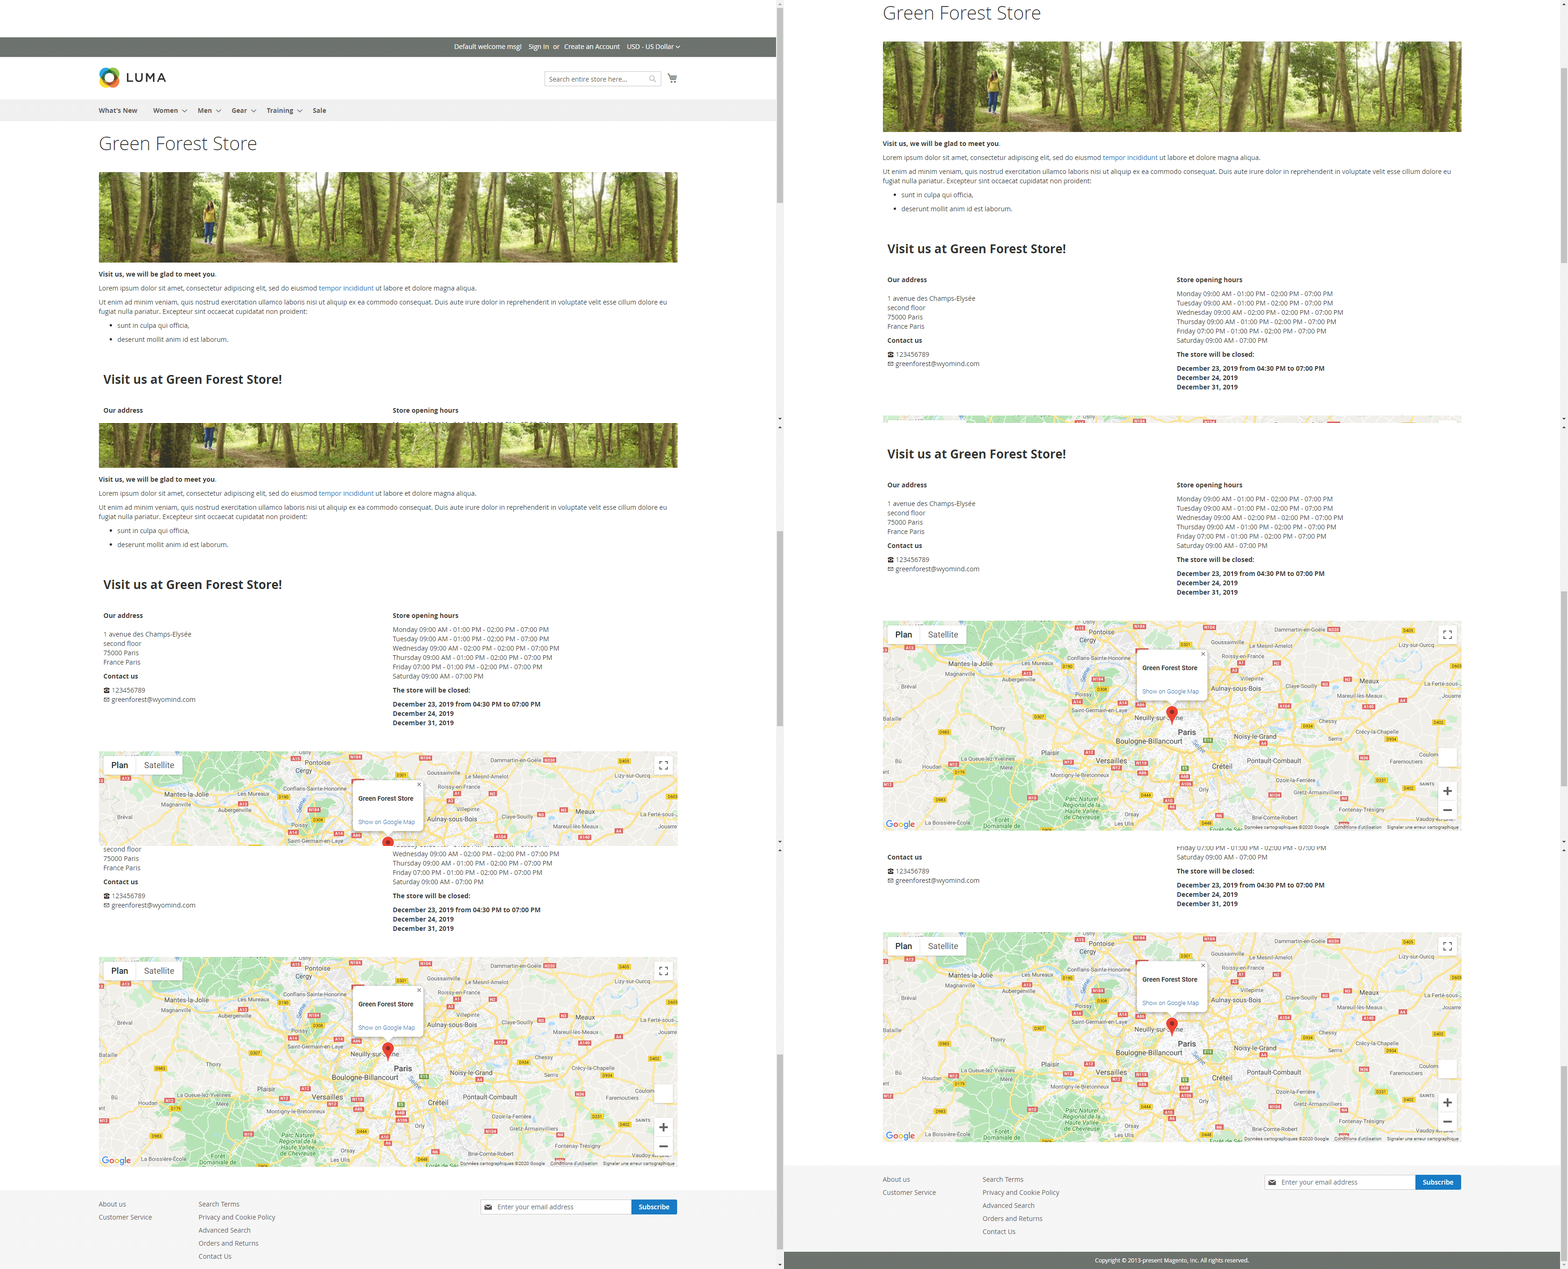
Variables available for the store descriptions
- {{code}}
The store code - {{name}}
The store name - {{phone}}
The store phone number - {{email}}
The store email address - {{address_1}}, {{address_2}}, {{city}}, {{state}}, {{country}}, {{zipcode}}
The store address - {{business_hours}}
The store opening hours - {{days_off}}
The store days off - {{image}}
The store image - {{link}}
Link to the store page - {{additional_attribute_code}}
All custom attributes that you have configured:
See how to configure your own attributes
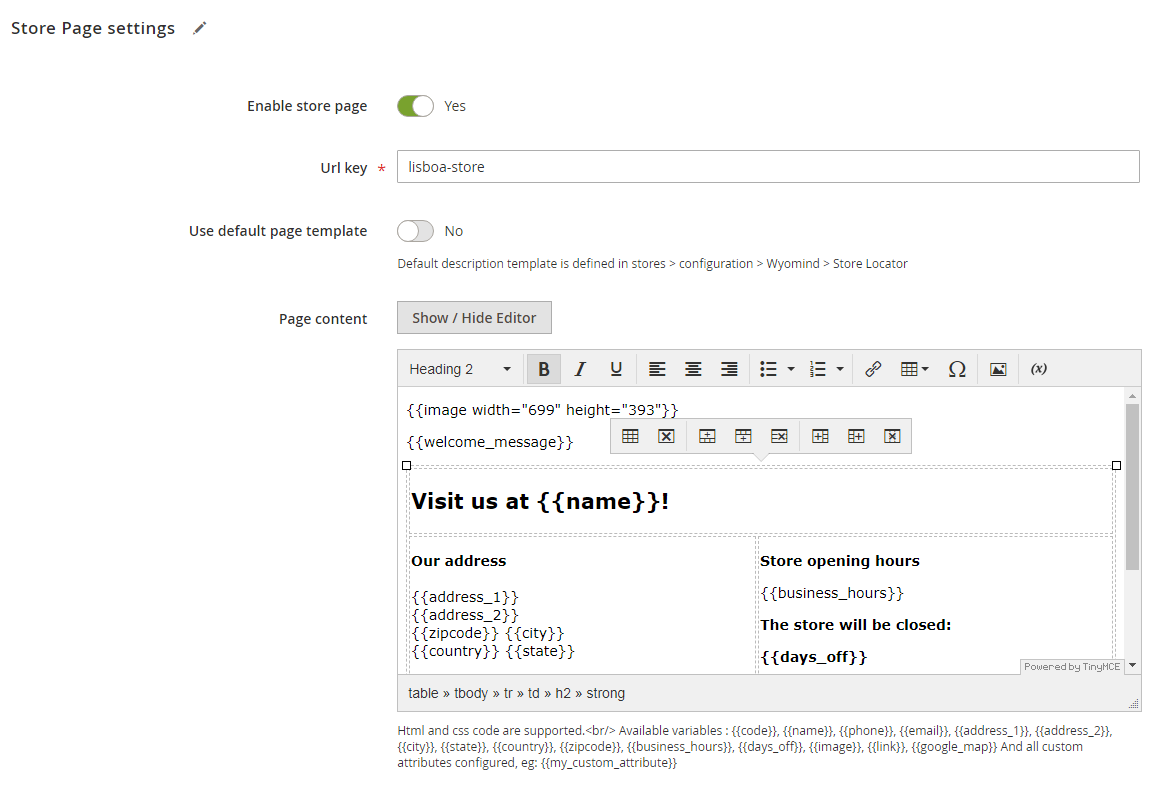
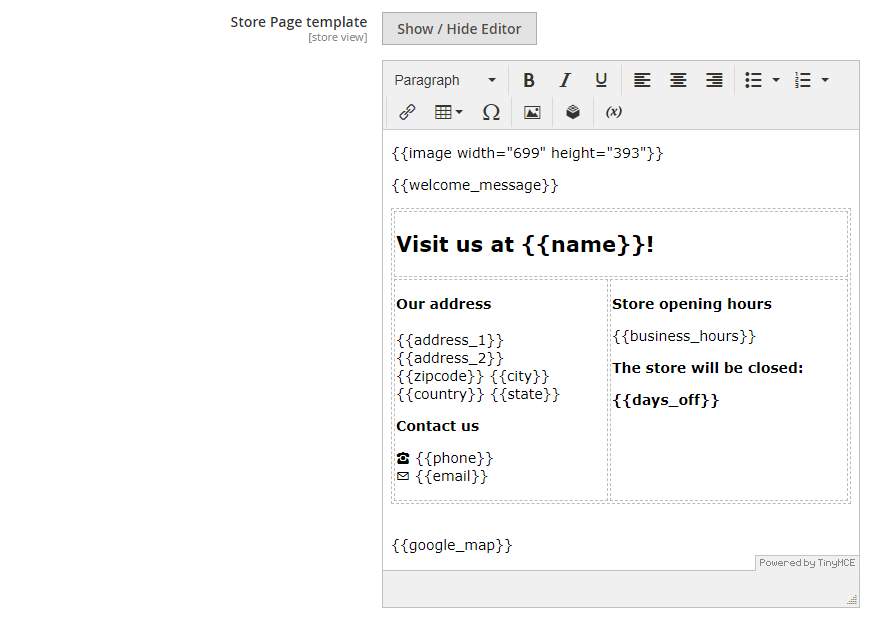
Store Page settings
- Enable store page
If set to Yes, the store will have a unique store page.
http://www.yourshop.com/green-forest-store - URL key
URL of the store page.
lisboa-storeYou'll be able to access the store page from: https://www.yourstore.com/lisboa-store - Use default Page template
The default page template is defined in:
StoresConfigurationWyomind Store Locator - Page Content
You can also define a page template for that particular store.
HTML and CSS code are supported.
See available variables
Variables available for the page content
- {{code}}
The store code - {{name}}
The store name - {{phone}}
The store phone number - {{email}}
The store email address - {{address_1}}, {{address_2}}, {{city}}, {{state}}, {{country}}, {{zipcode}}
The store address - {{business_hours}}
The store opening hours - {{days_off}}
The store days off - {{image}}
The store image - {{link}}
Link to the store page - {{google_map}}
The Google map with the targeted store - {{additional_attribute_code}}
All custom attributes that you have configured:
See how to configure your own attributes
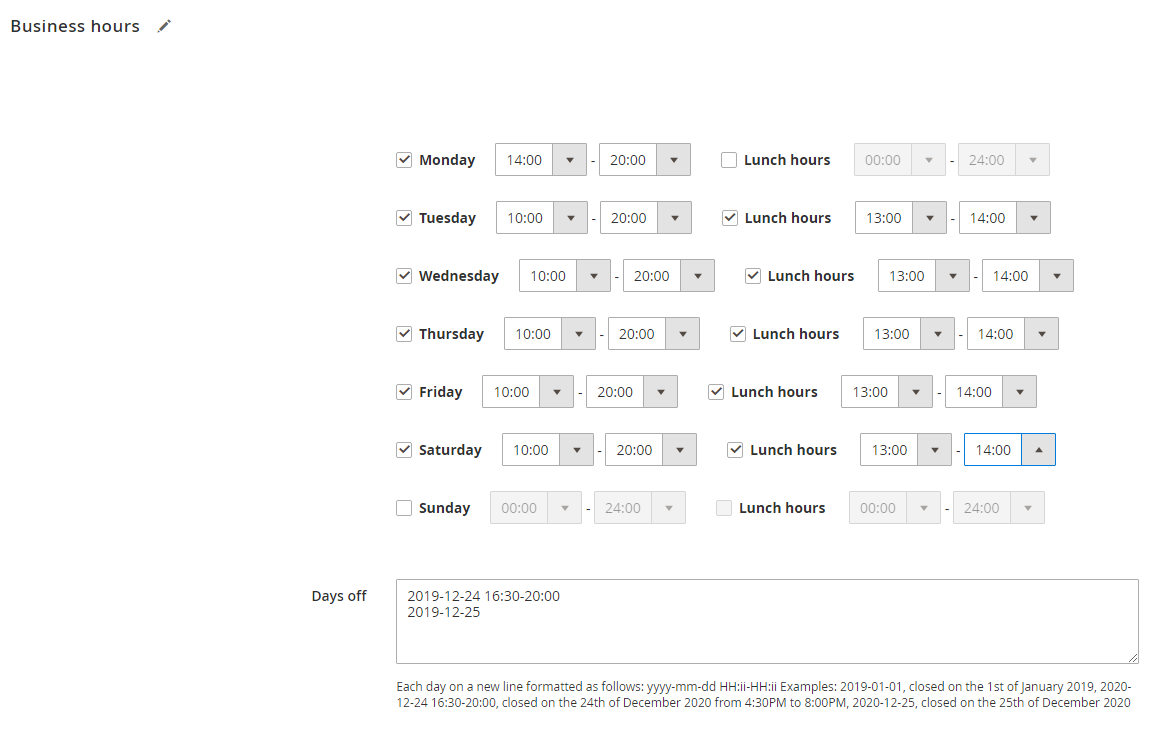
Business hours
- Hours
The opening hours can be shown for each store. You can set lunch hours as well. - Days off
You can list all the days off. Each date must be on a new line formatted as follows:
YYYY-MM-DDFor example, if the store is closed on the 1st of January 2019, you can write:
2019-01-01
Note that you can also add hours off. Each date and hour must be on a new line formatted as follows:
yyyy-mm-dd HH:ii-HH:ii For example, if the store is closed on the 24th of December 2020 from 4:30 PM to 8:00 PM, you can write:
2020-12-24 16:30-20:00
Contact Info
- Contact name
Name of the contact of the store. - Email
It is the email to contact the store. - Phone
Telephone number of the store. - Fax
Fax number of the store.
Address Data
All the details specified in Address Data appear in the information section when a customer selects a particular store. You must fill in:
- Country
The country allows customers to filter the store search results. - State/Province
The state code is essential if data files are exported to a Google Places account. - City
- Street
- Street (additional)
- Postcode
Additional Data
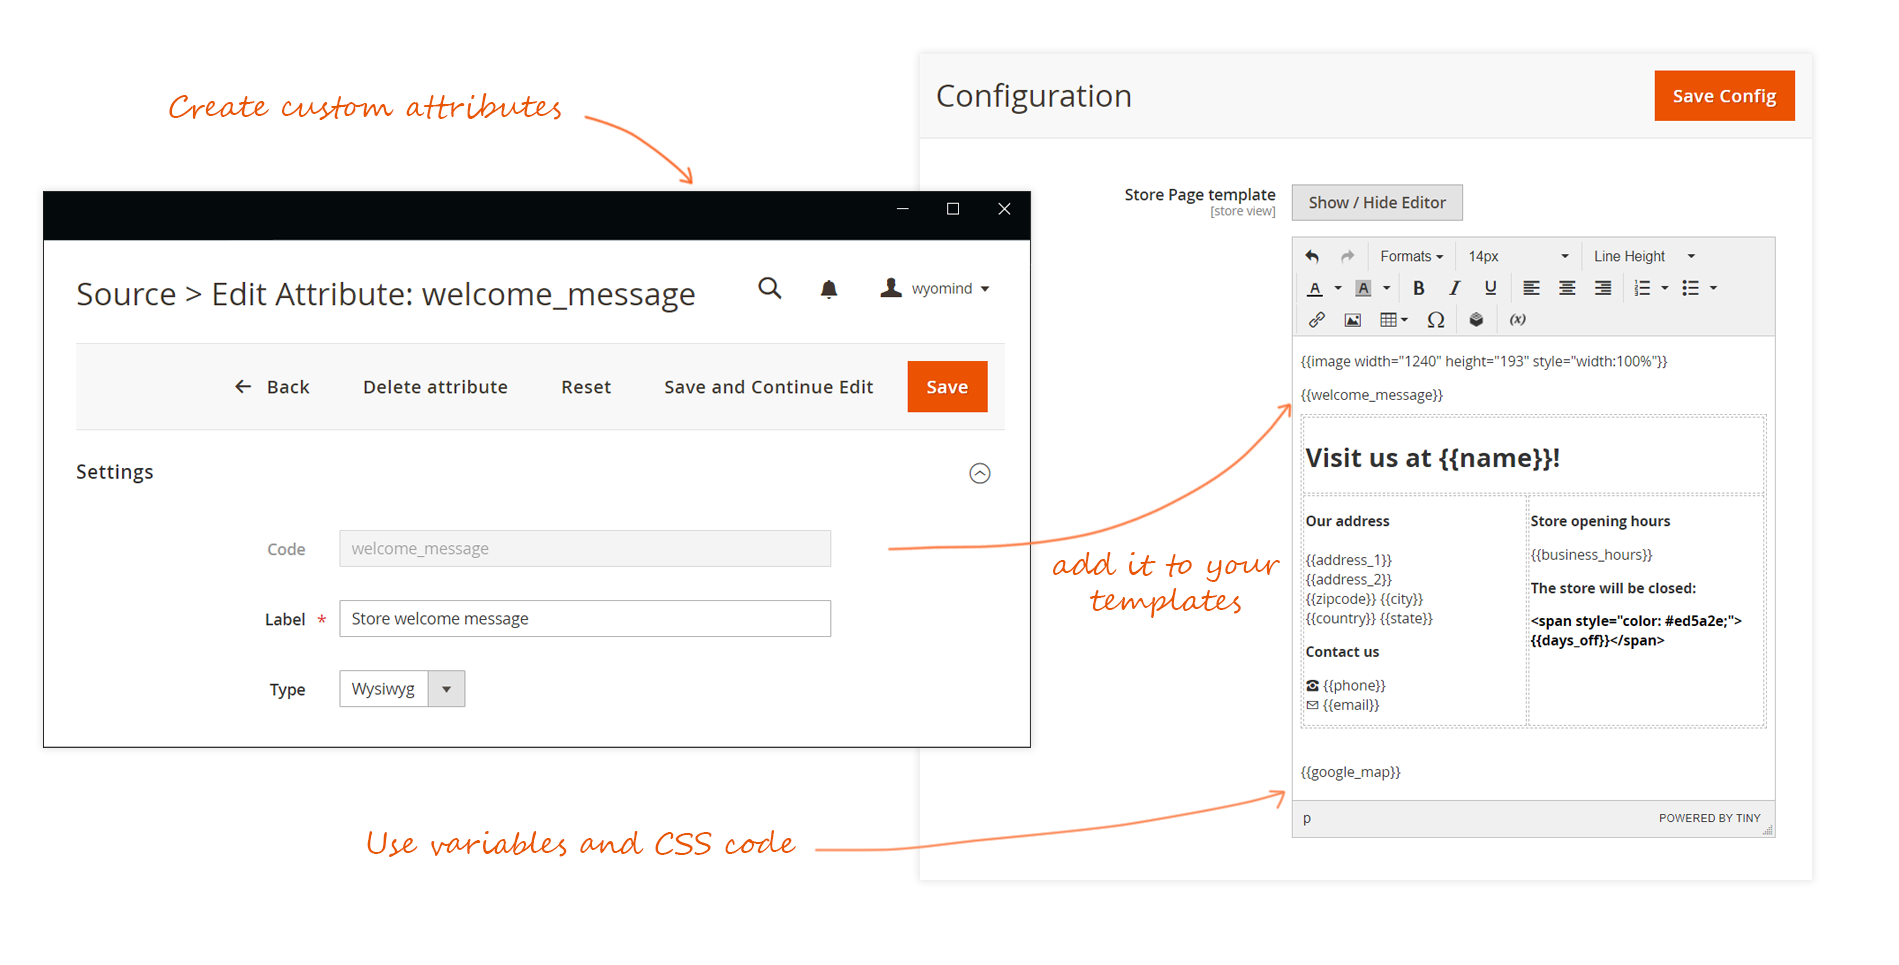
For each store, you can define your own attributes in order to customize the store page as you want.
For this, go to:
StoresInventorySource Attributes
Click on ADD A NEW ATTRIBUTE.
This works the same way as product attributes.
The attribute can be:
- text: simple input
- textarea: multi-line input
- wysiwyg: HTML input
 Once saved, a notification is displayed, and the attribute is listed in the grid.
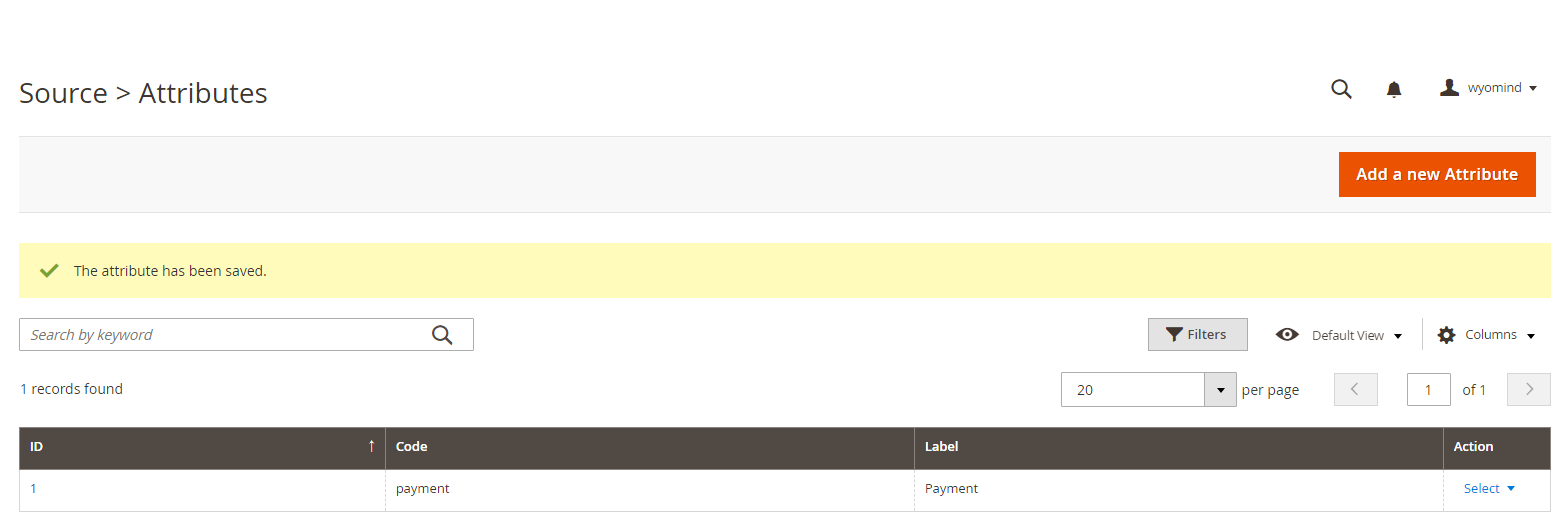 Once created, the attributes will be displayed in the Additional Data tab of each source.
 Then, they can be used in the description template for the store locator and in the template for the store page.
Click & Collect
Enable the source for the Click & Collect method and allow your customers to collect their orders in the store.
You have the possibility to define a Fallback strategy:
- Use source stock
This will use the stock of the source. - Use source stock, then source fallback stock
If the source does not have the necessary stock, this will use the stock of other sources.
If enabled you can select one or more Fallback sources.
For each source, you can use the global settings defined in the configuration or define specific settings:
- Handling fee amount
Define a specific handling fee for each source.
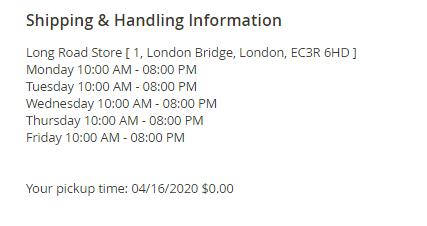
The handling fee will be displayed in the cart, in the checkout when selecting the point of sale, as well as in the total of the order.
Don't forget to enter the decimal point.
5.5 - Minimal delay for an order
Define a specific delay for the source.
Lead time between the moment when the order is placed and the first available pickup time.
Add the time in minutes.
1440 - Minimal delay for a backorder
Define a specific delay for the source.
Lead time between the moment when the order (backorder) is placed and the first available pickup time.
Add the time in minutes.
2880
You can also configure:
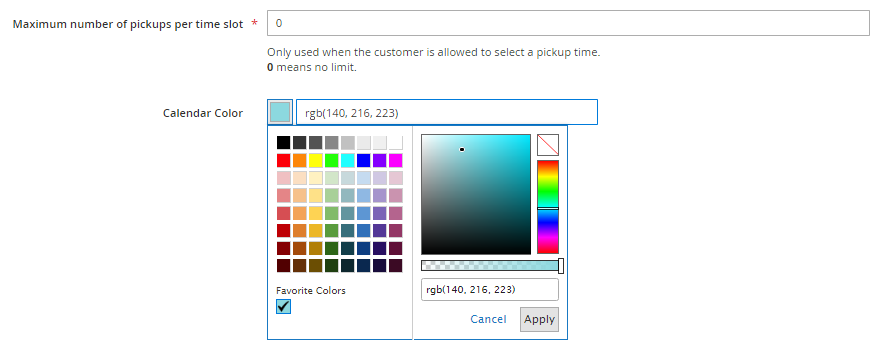
- Maximum number of pickups per time slot
This is only used when customers are allowed to select a pickup time. 0 means that there is no limit.
For example, to allow only 2 customers to select the same time slot:
2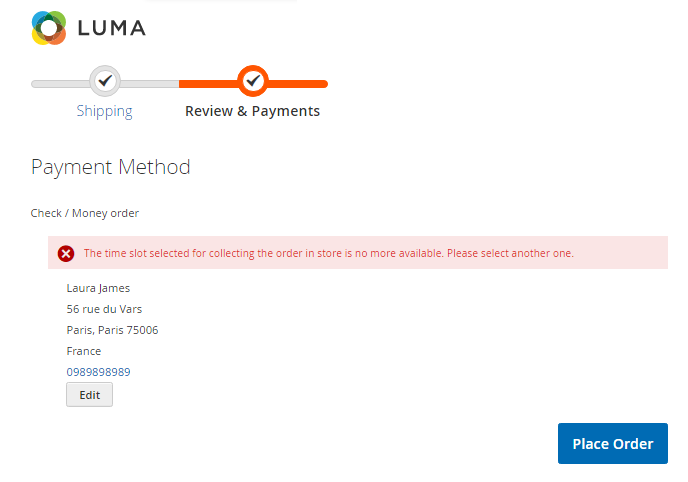
- Calendar Color
Select the color for that source in the calendar for reserved time slots.
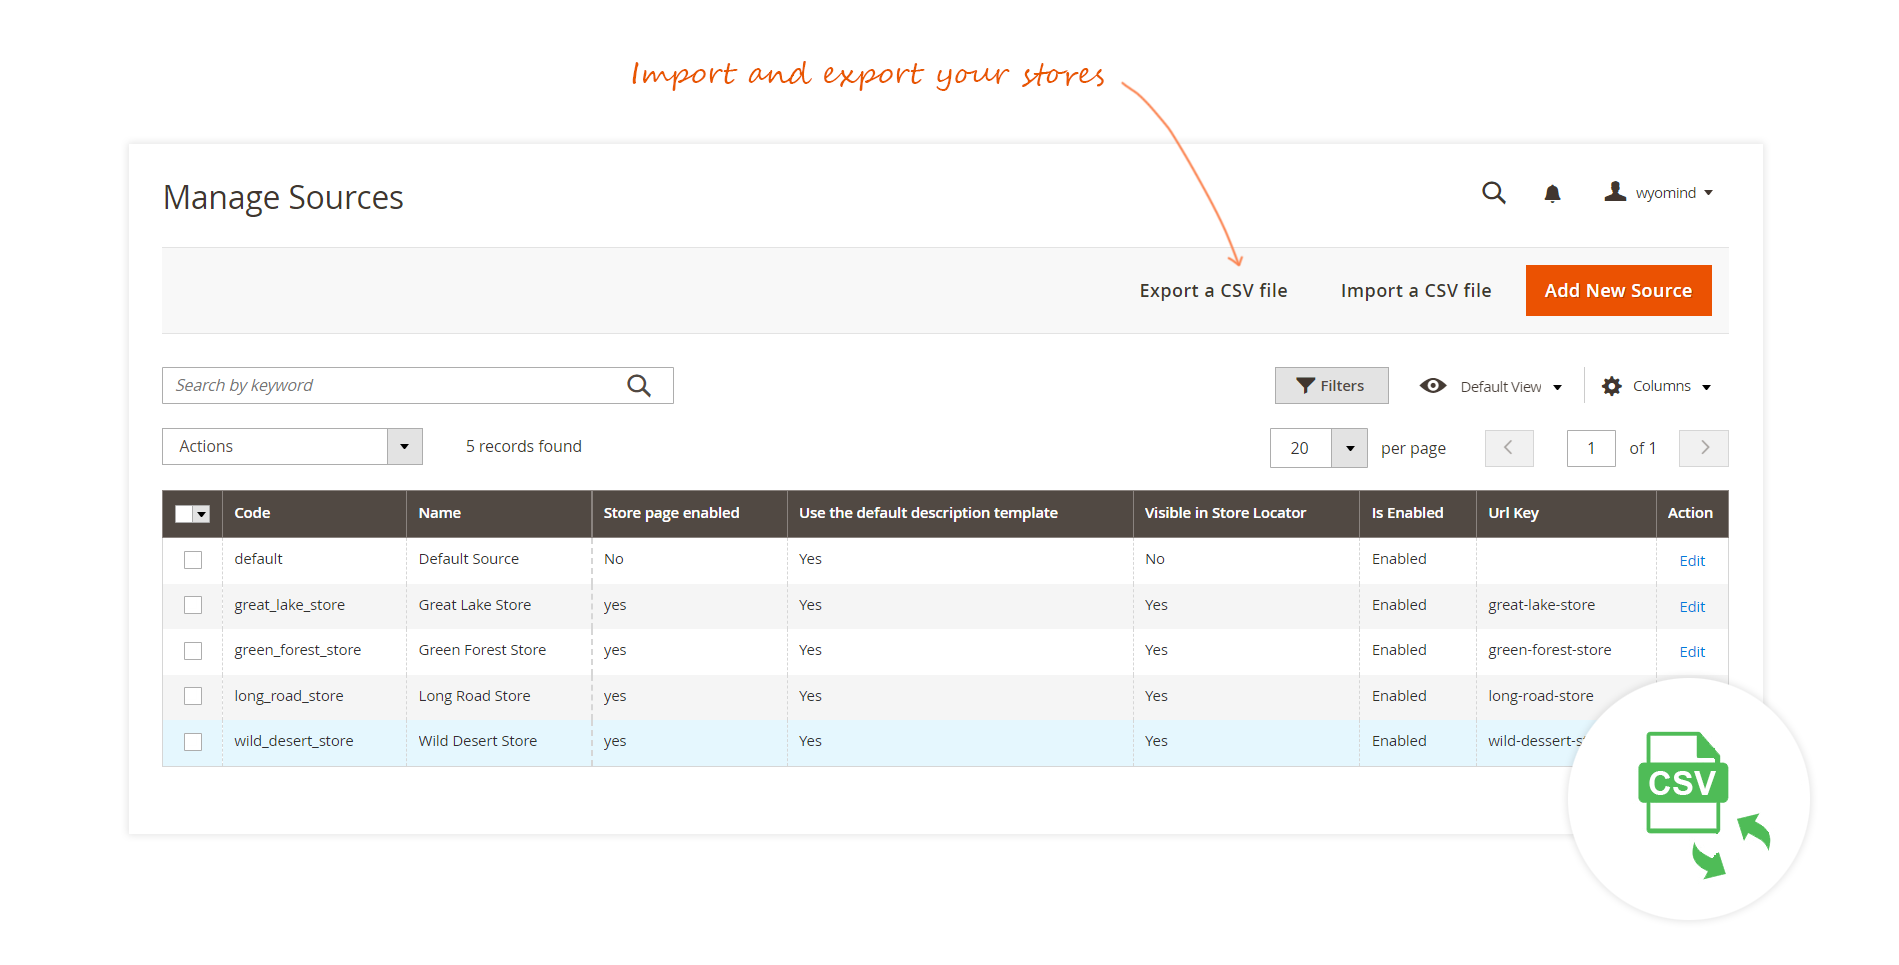
Import and export a CSV file
Import your pickup locations
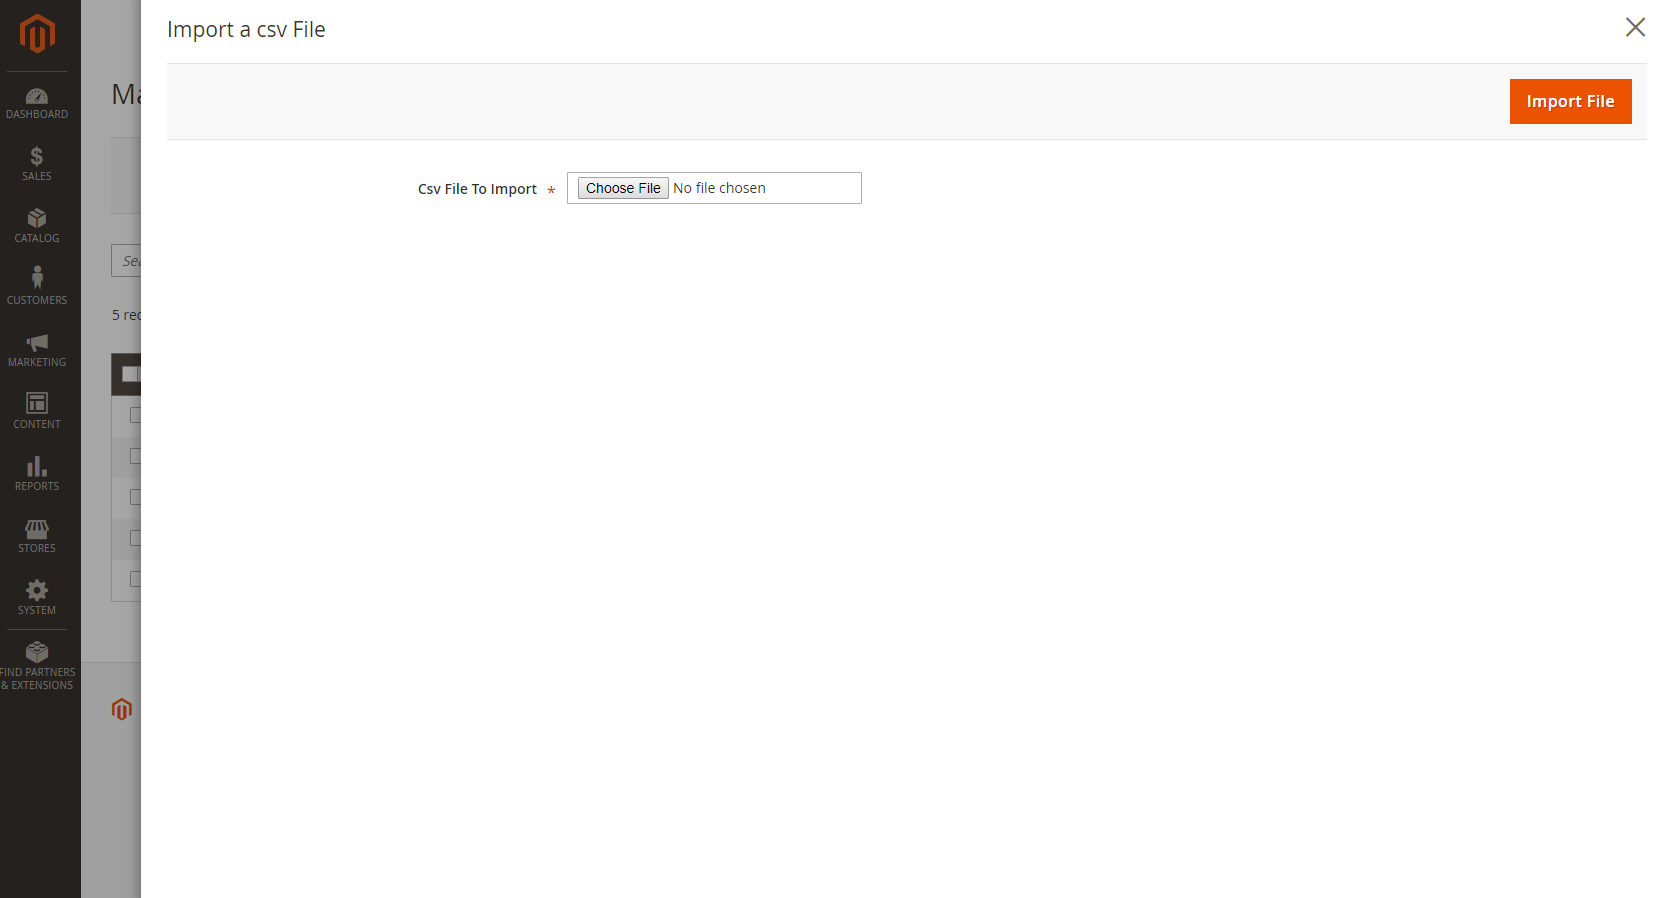
If you already have a file with all your pickup locations, you can easily import them with Click & Collect. Click on Import a csv File and import your file in Magento (it must be a CSV file). For example, below is a CSV sample file:
"source-code","name","enabled","latitude","longitude","country_id","city","street","postcode"
"great_lakestore","Great Lake Store","1","40.787109","-73.966329","US","New York","101 Street","1023"
Once you have chosen your file, click on IMPORT FILE.
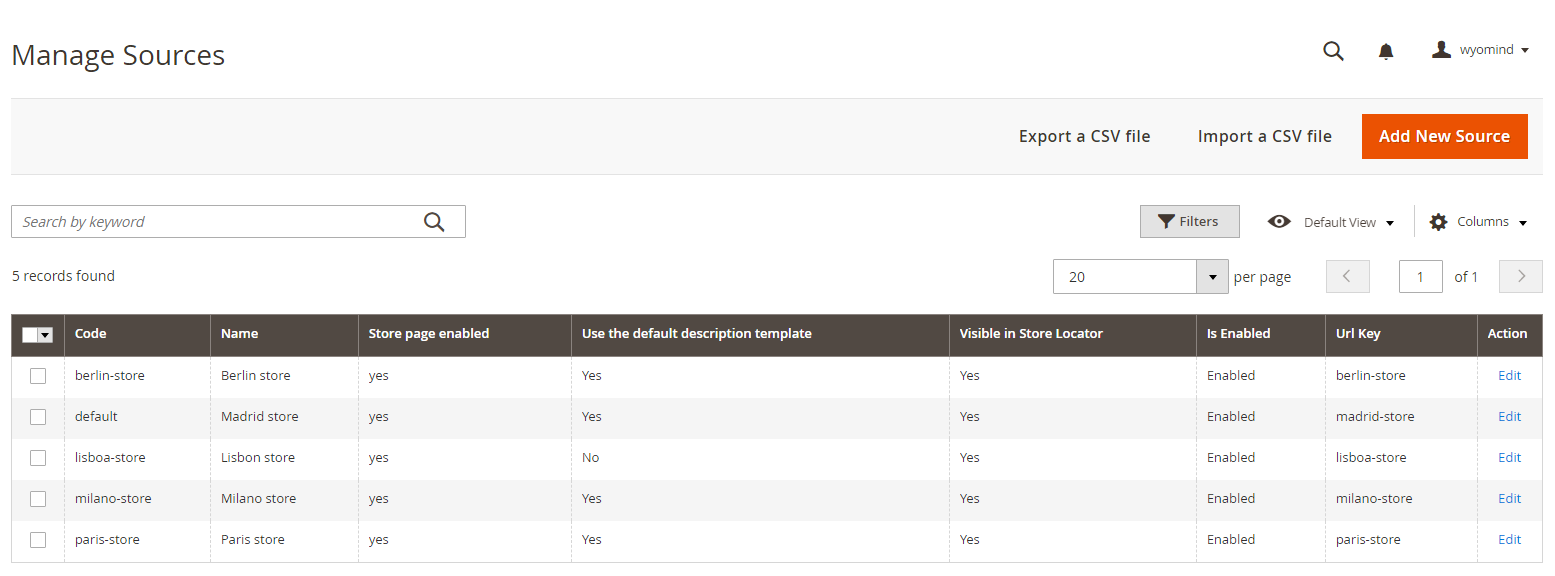
A message is displayed and notifies that the sources been imported in:
StoresInventorySources
![]()
Export your pickup locations
To export a CSV file, it is quite easy, you need to click on Export a csv File. You will then be able to download a CSV file that includes all the data of your sources.
Configure the display of your sources
In order to edit the display of your sources in the Google map, go to:
StoresSettingsConfiguration Wyomind Store Locator
To see your stores on the map, go to:
http://www.yourwebsite.com/storelocator
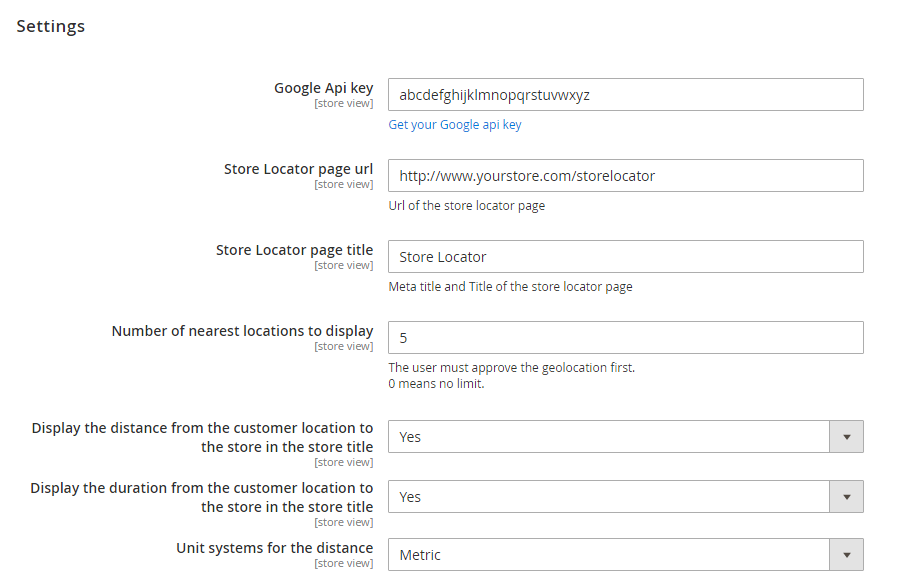
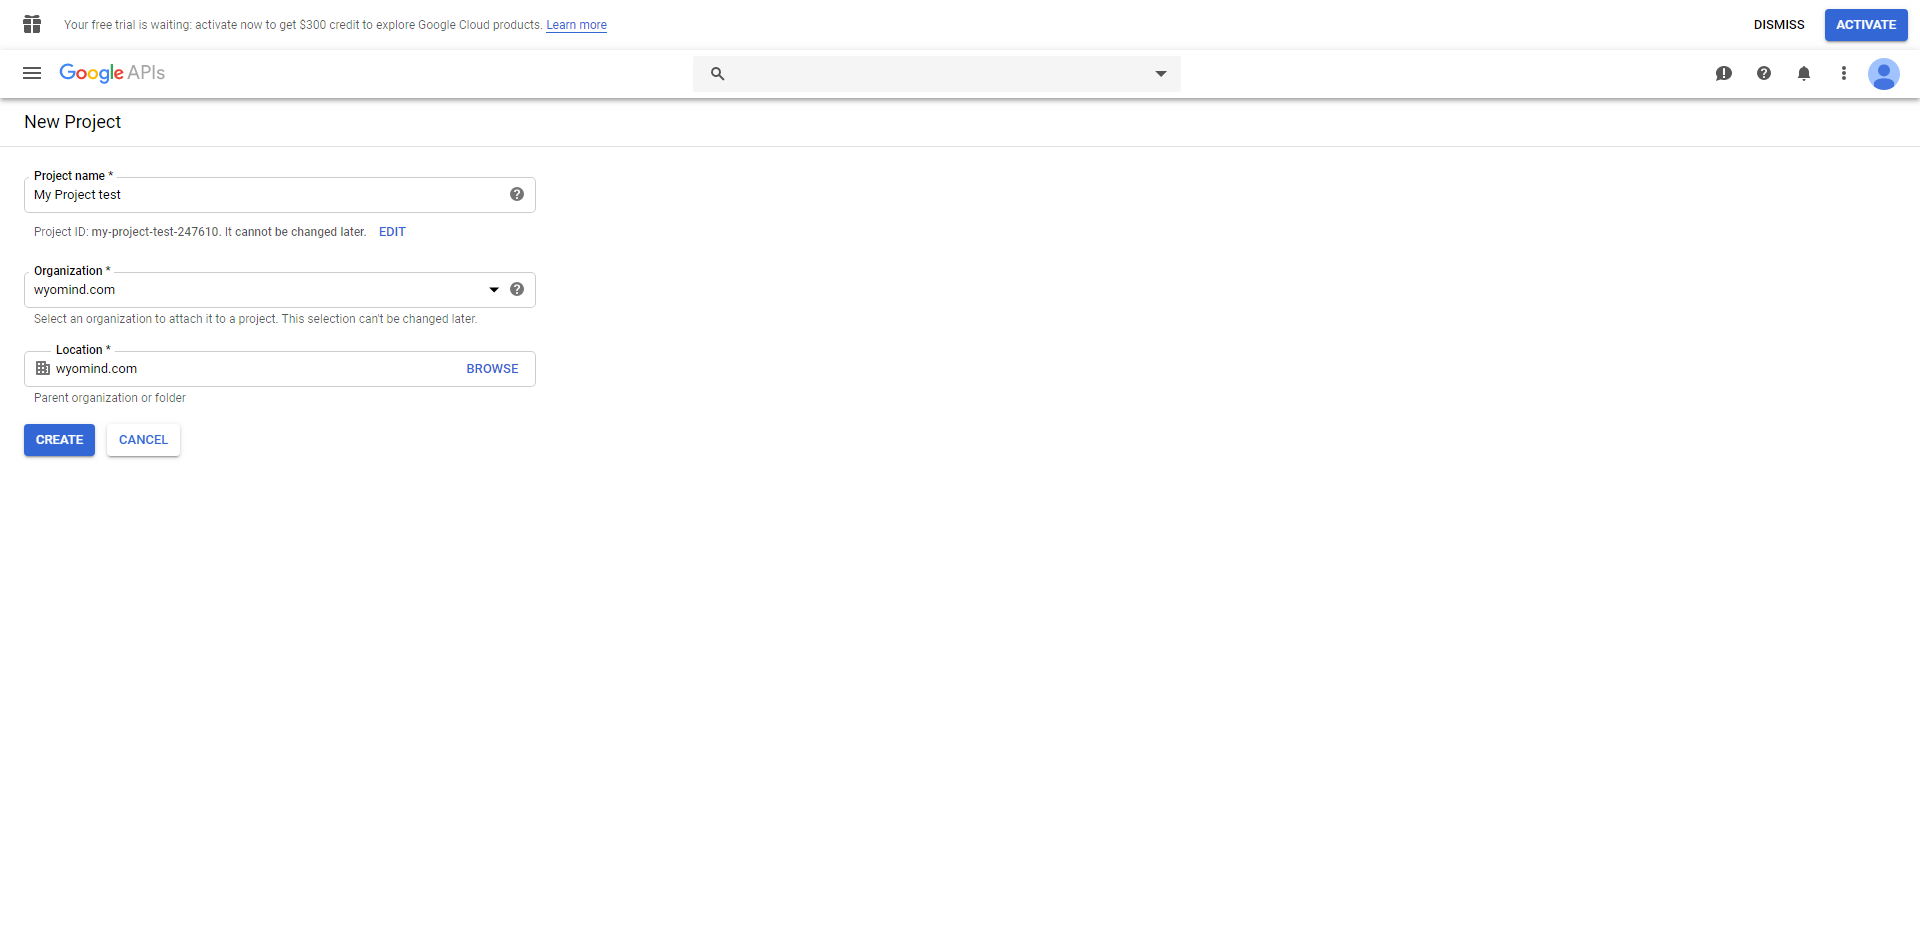
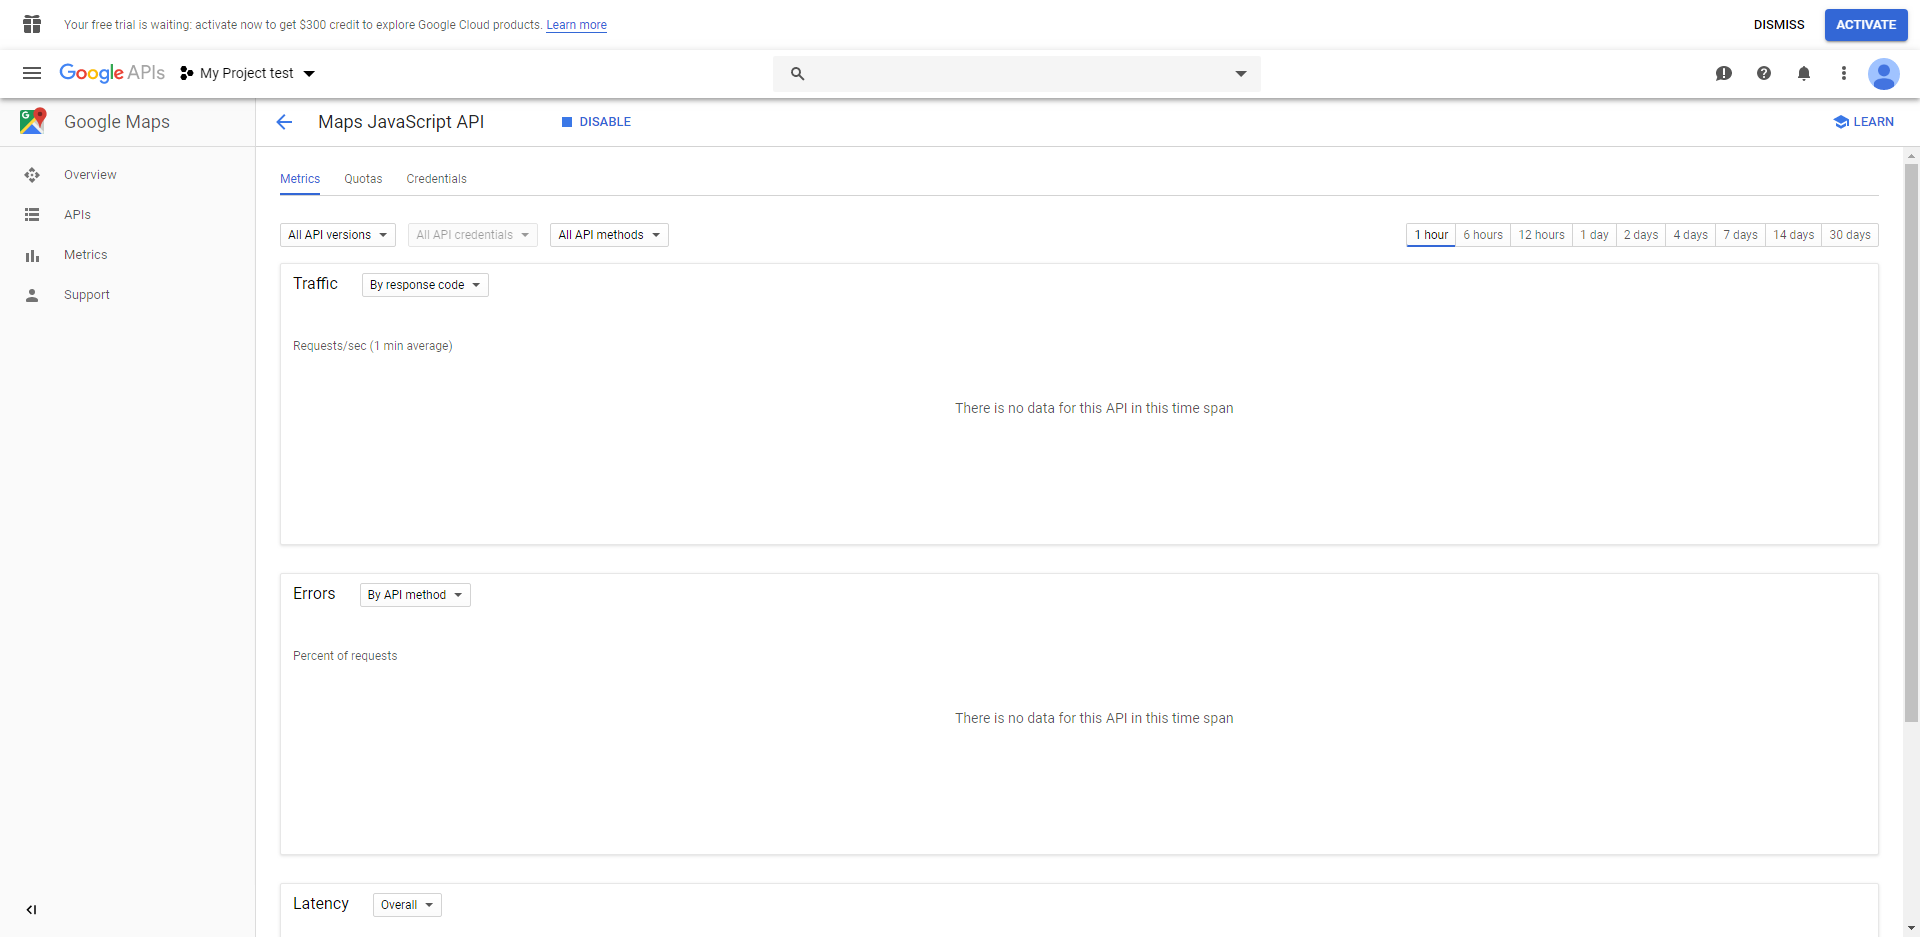
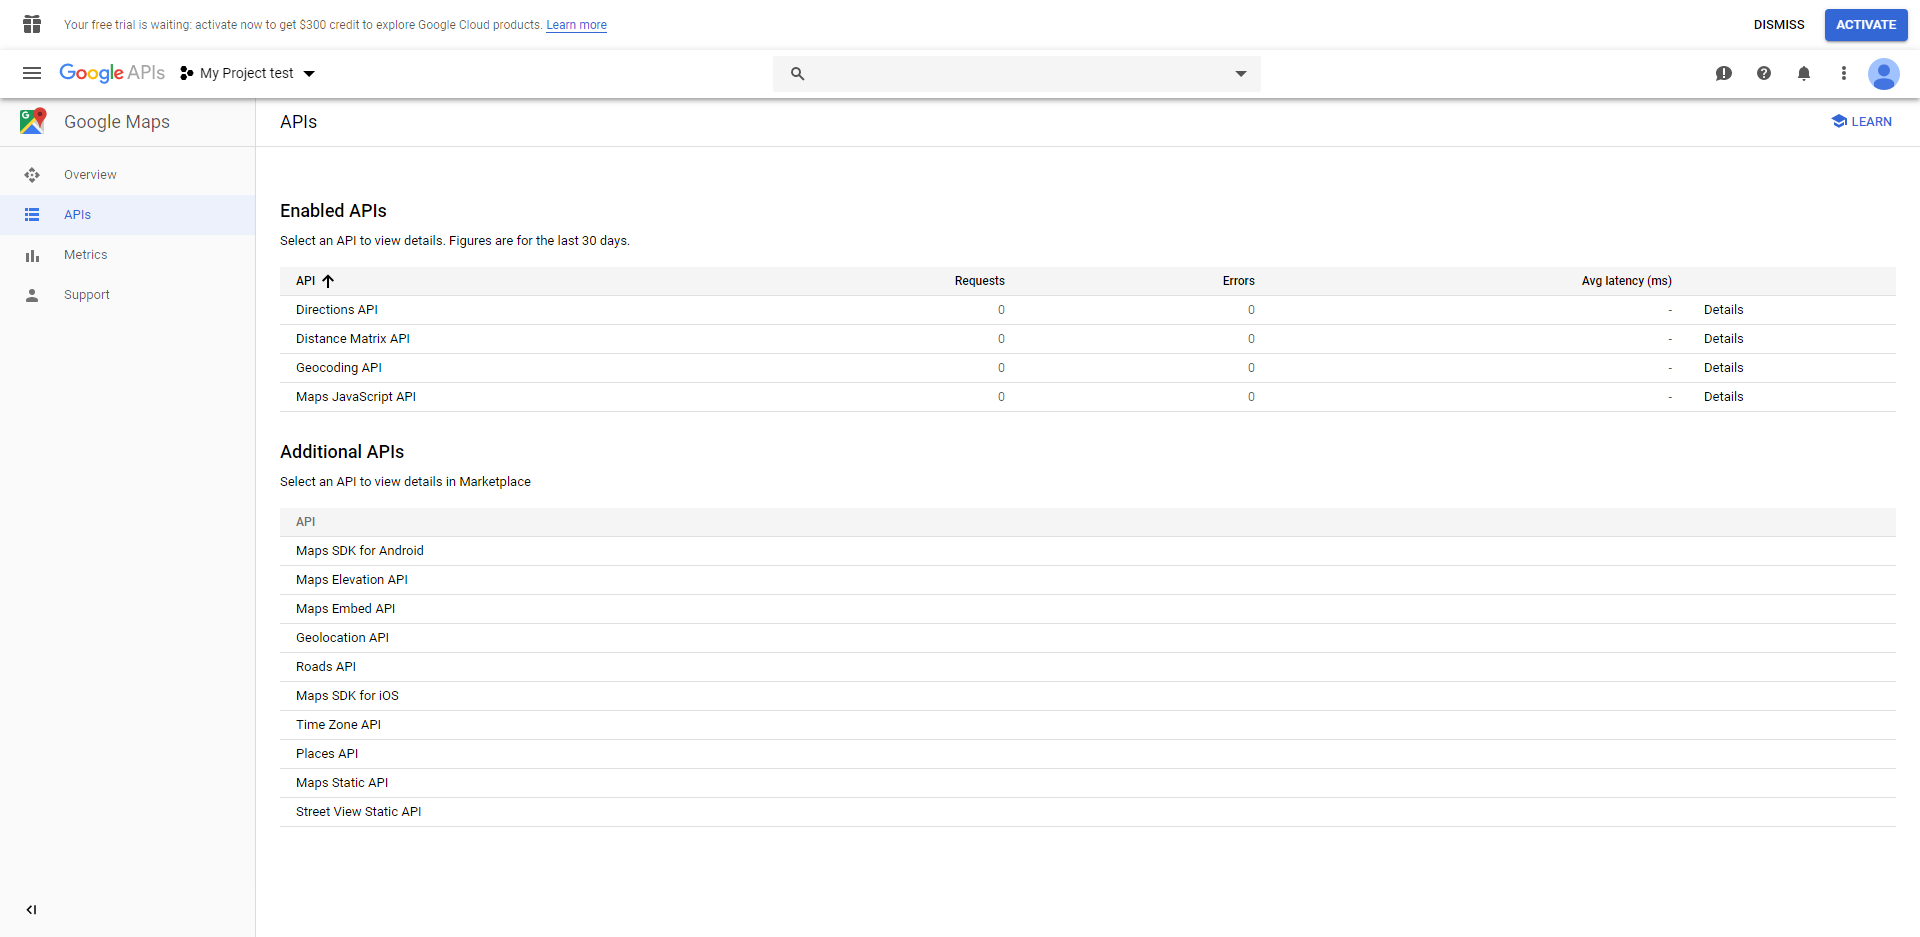
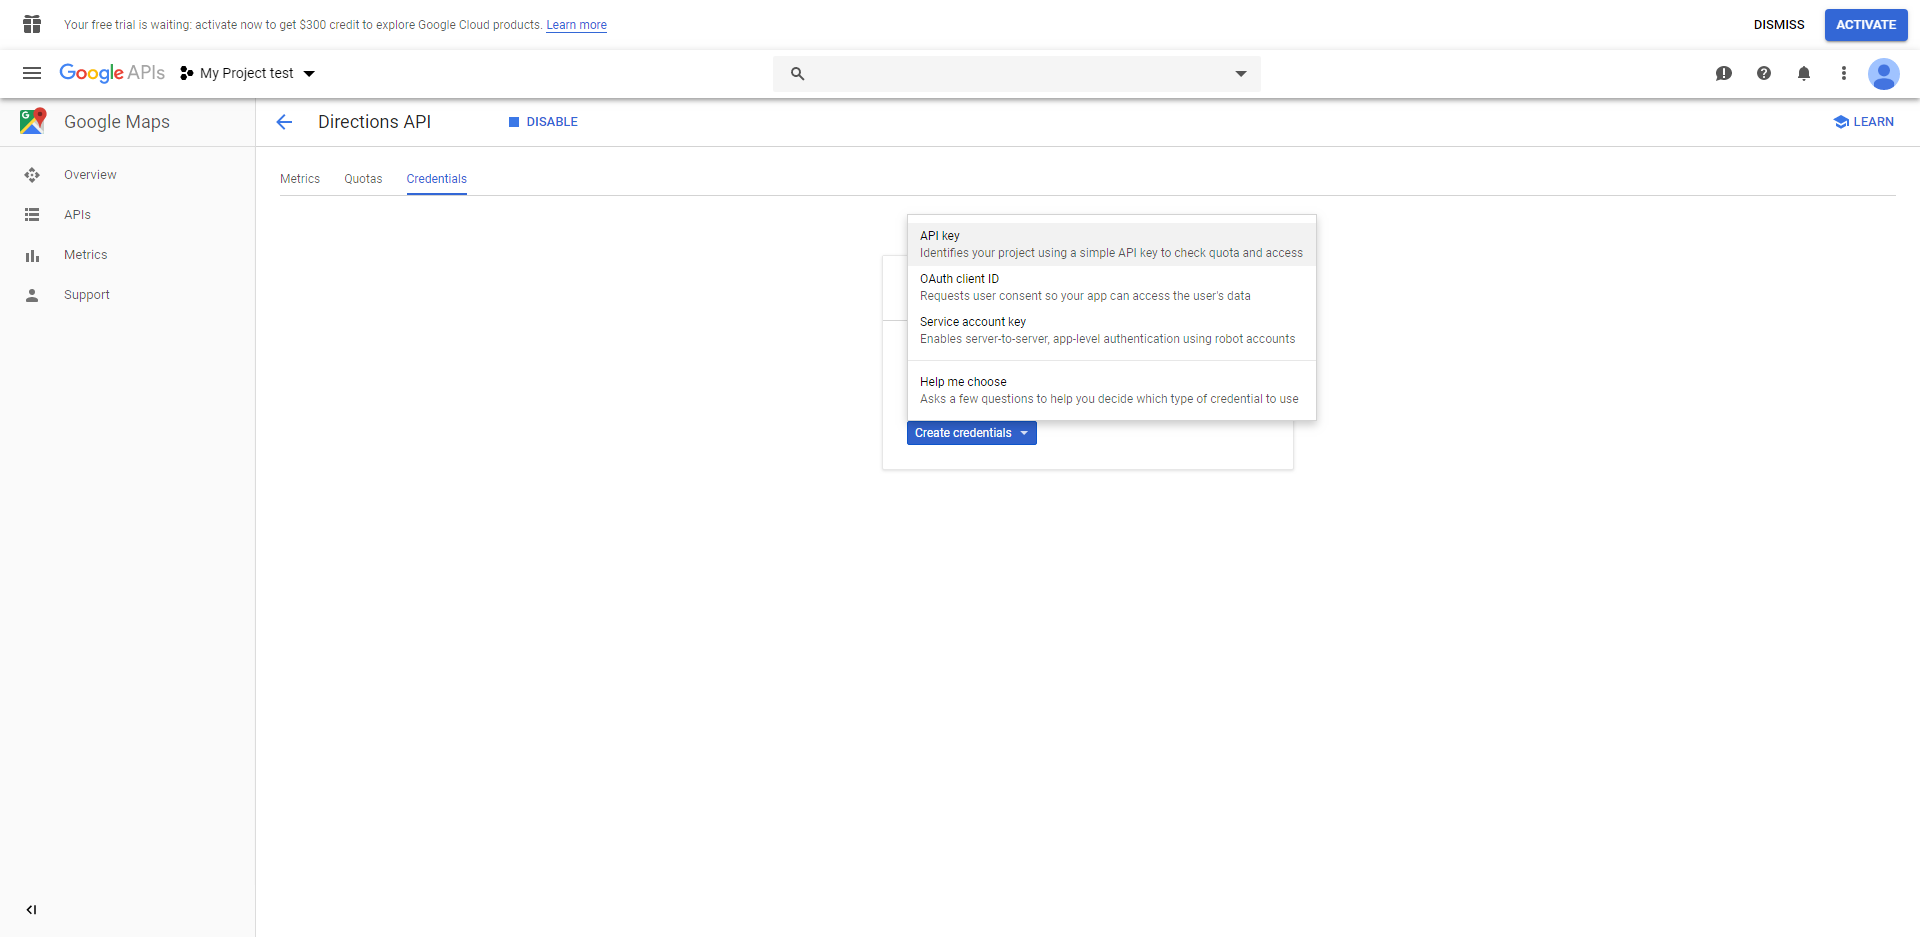
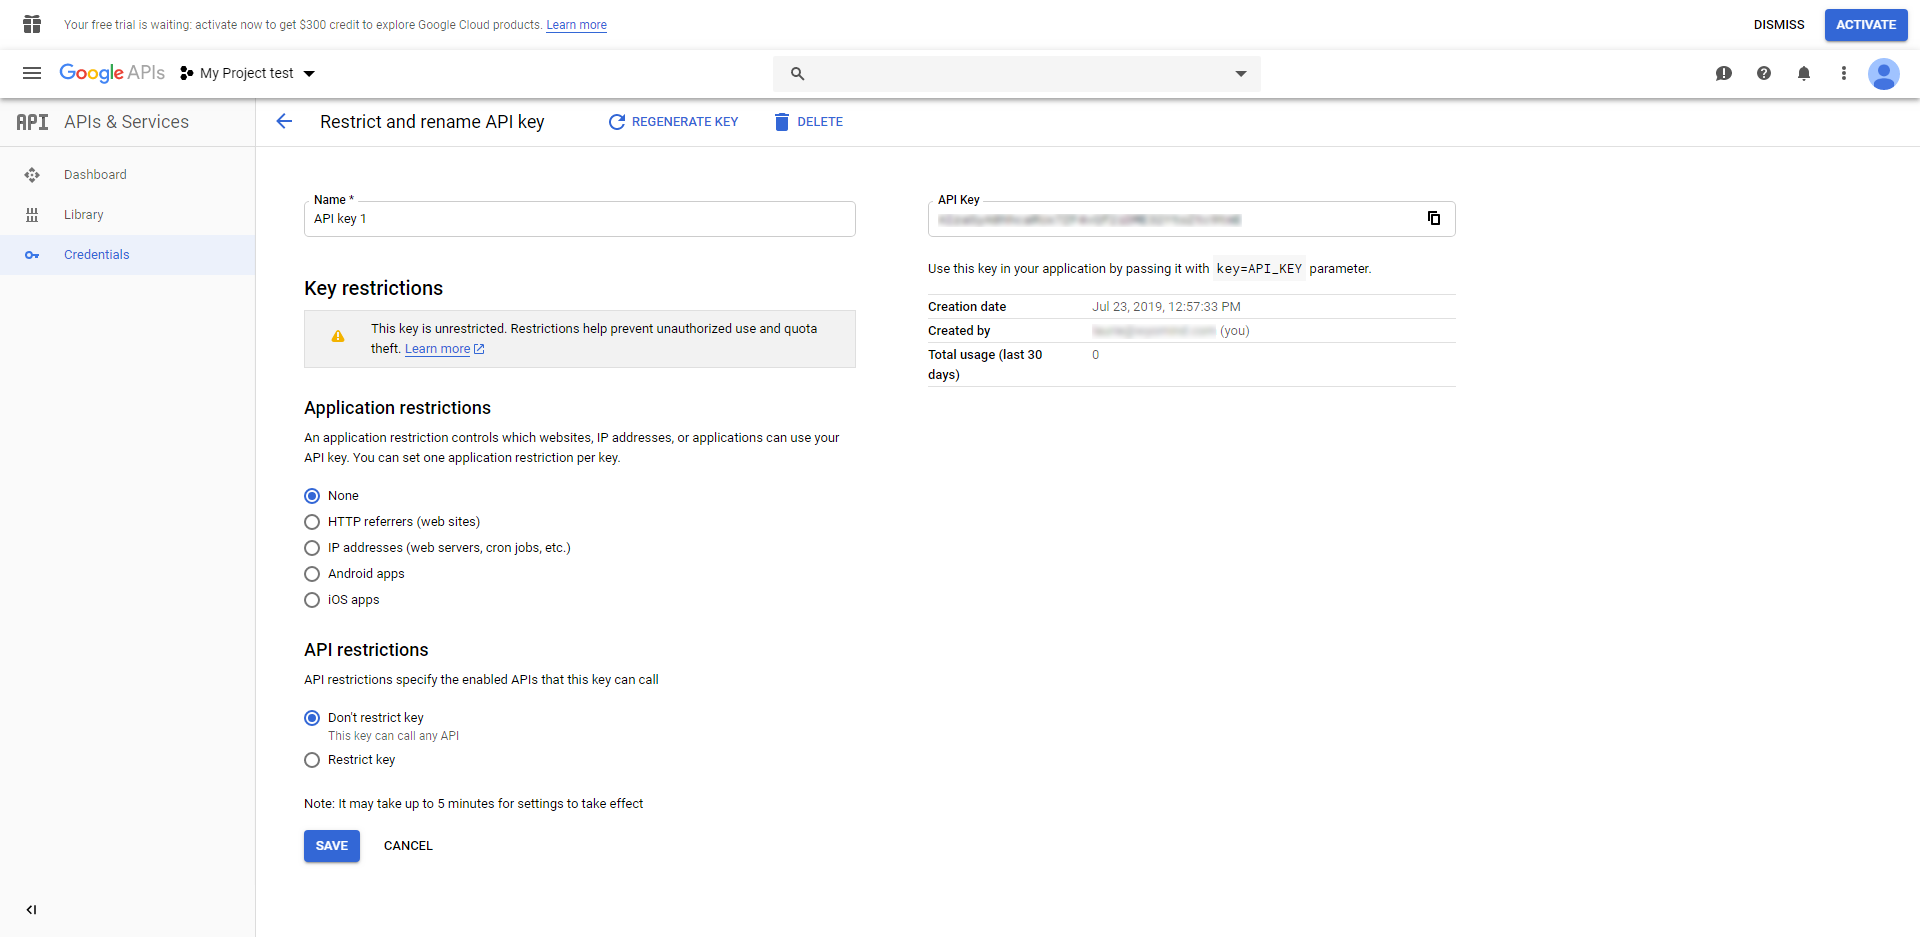
Add your Google API key
There you will be able to add your API key in the Google API key field.
Indeed, Google is now asking for an API key to display the Google map.
If you don't have an API key yet, check our faq to know how to get your own key.
Edit the store locator configuration
You can totally configure the location:
- Store Locator page URL
It is the URL of the store locator page. - Store Locator page title
It is the title of the store locator page. - Number of nearest locations to display
Note that 0 means unlimited. - Display the distance from the customer location to the store in the store title
You can add the distance to the store from the customer location. - Display the duration from the customer location to the store in the store title
You can add the time it takes from the customer location to go to the store. - Unit systems for the distance
Choose between Metric or Imperial.
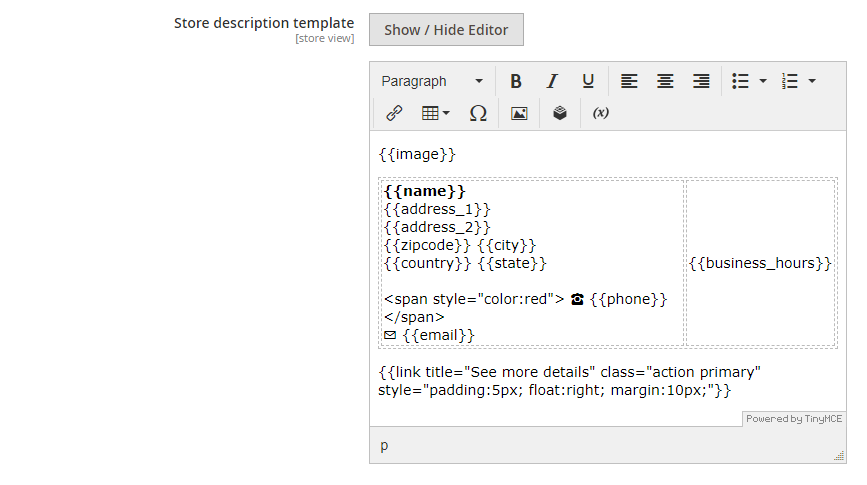
Edit the store description template
You can change the display of your stores and even add some code.
For example, let's say you want to display the phone number in red. You'll just need to add in the Store description template field:
<span style="color:red"> {{phone}} </span>Edit the store page template
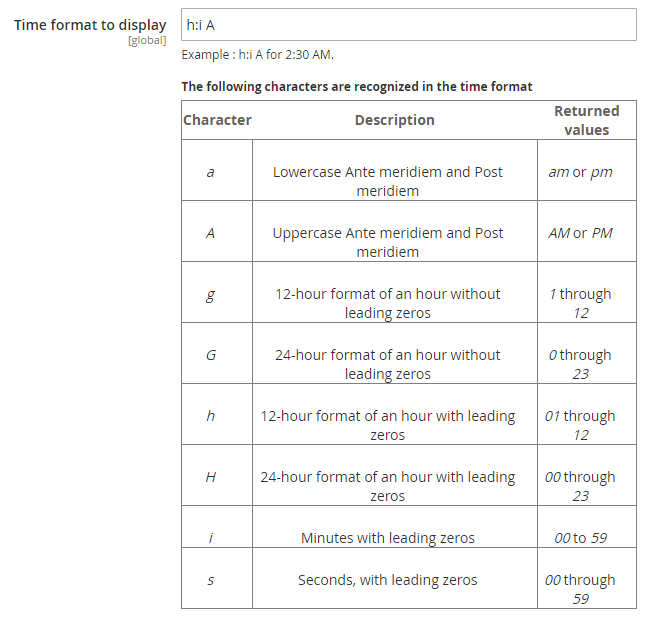
Edit the time format
You have the possibility to change the format of the date.
For example, for 2:30 AM, use:
h:i A
For more details, you can refer to the below table:
STEP 2: Enable the Click & Collect method in the Shipping methods
So that you can use the Click & Collect extension, you need to enable the Click & Collect method.
Enable the Click & Collect method
Click & Collect
Start with enabling the Click & Collect method, from:
STORESSETTINGS Configuration Sales Shipping Methods
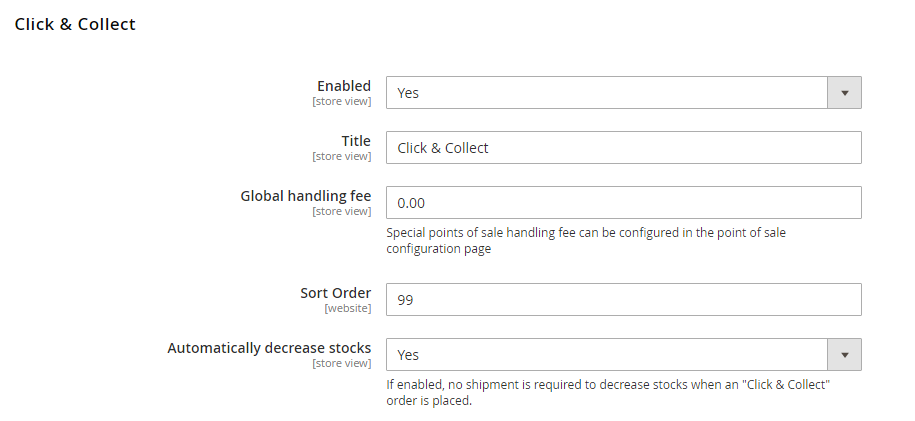
There, you will be able to configure the Click & Collect extension according to your needs:
- Enabled
You can at any time disable that option. - Title
Change the title of the method if you desire.
This will be displayed in the checkout when your customers will choose the shipping method. - Global handling fee
The handling fee will be charged during the order, if you define one, don't forget to enter the decimal point.
Note that you can define the handling fee for each store locator in their configuration. - Sort order
Define where you want that shipping method to appear. - Automatically decrease stocks
When enabled, no shipment is required to decrease stocks when an order is placed via Click & collect.
Frontend
If enabled, your customers will be able to choose the Click & Collect method when going to checkout.
Your sources must be linked to a stock and have inventory to be displayed in the checkout.
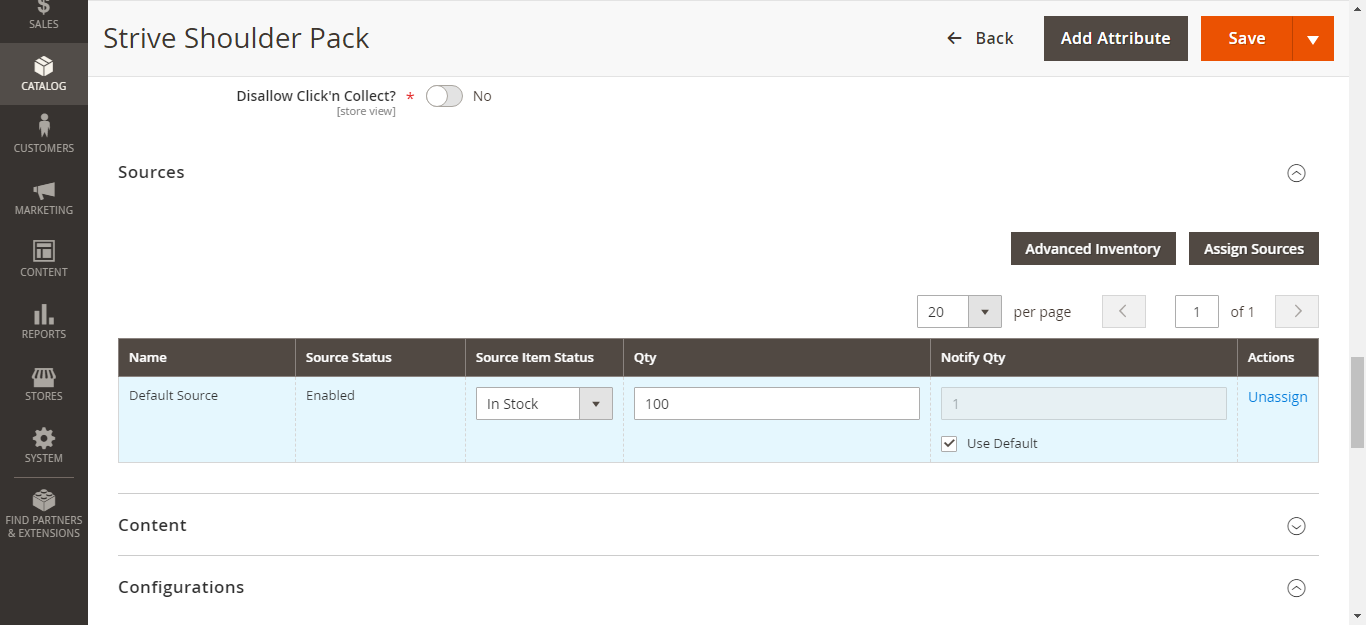
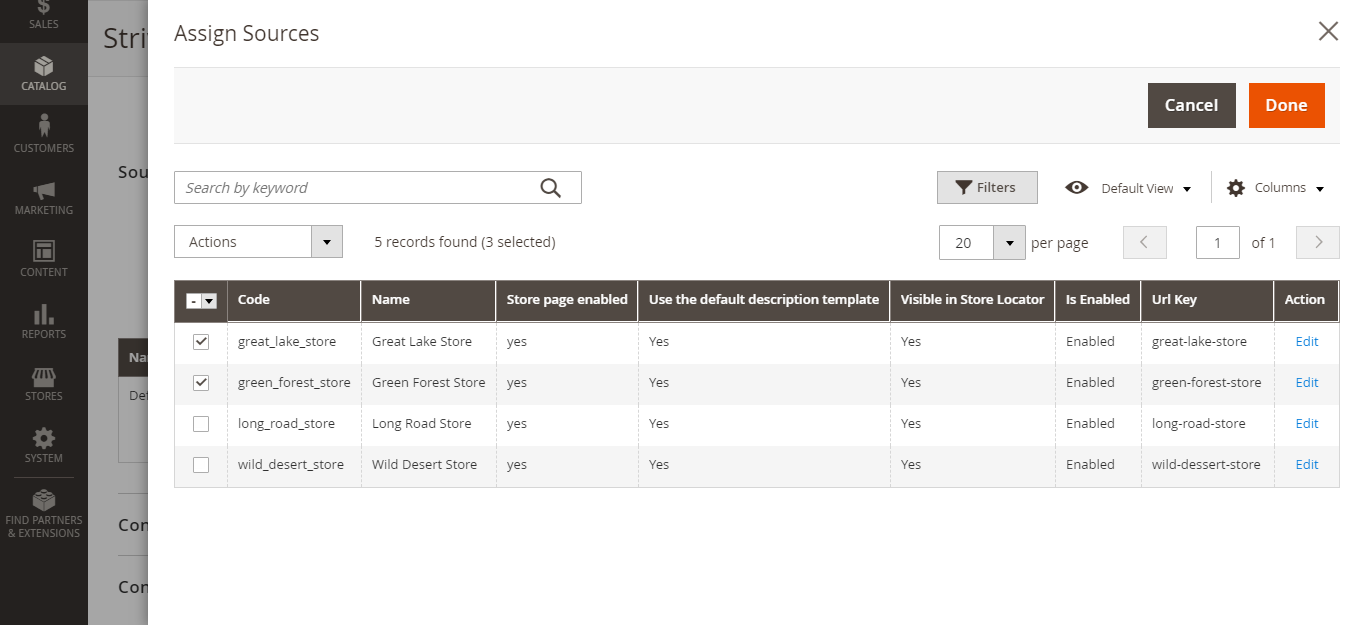
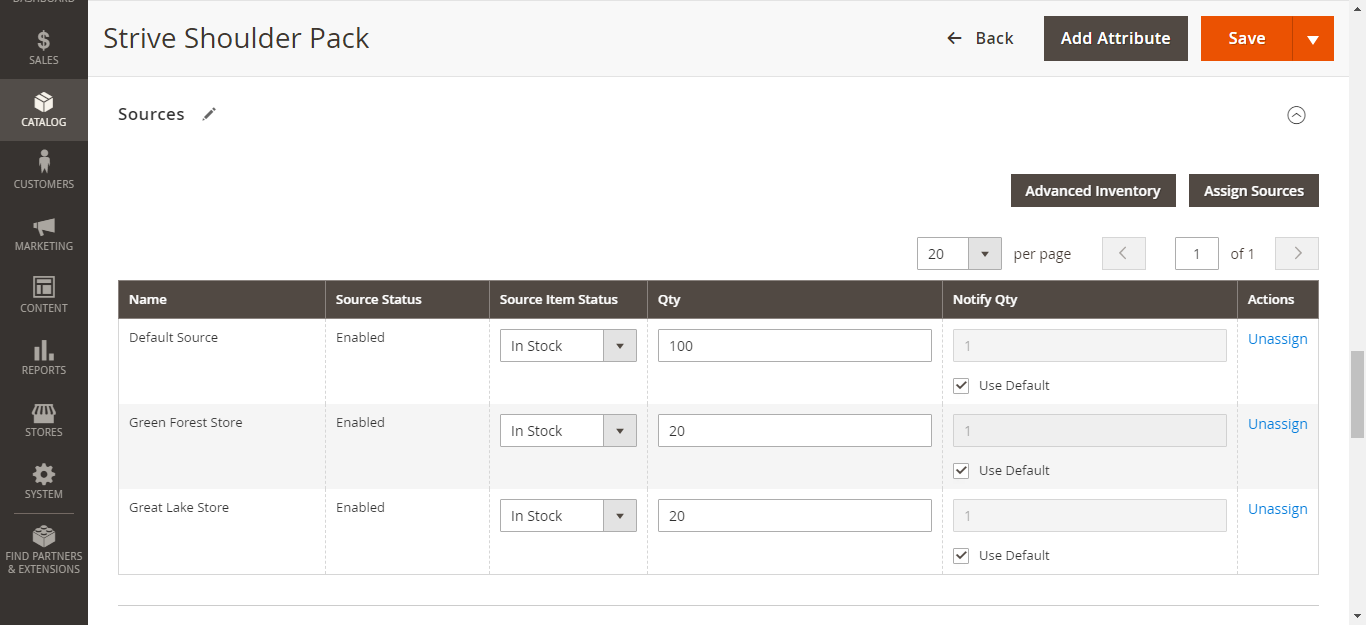
See how to assign sources to your stocks and assign quantities per source.
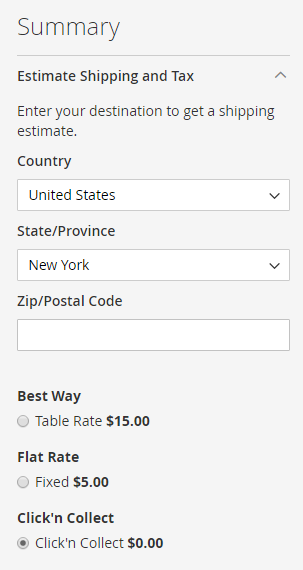
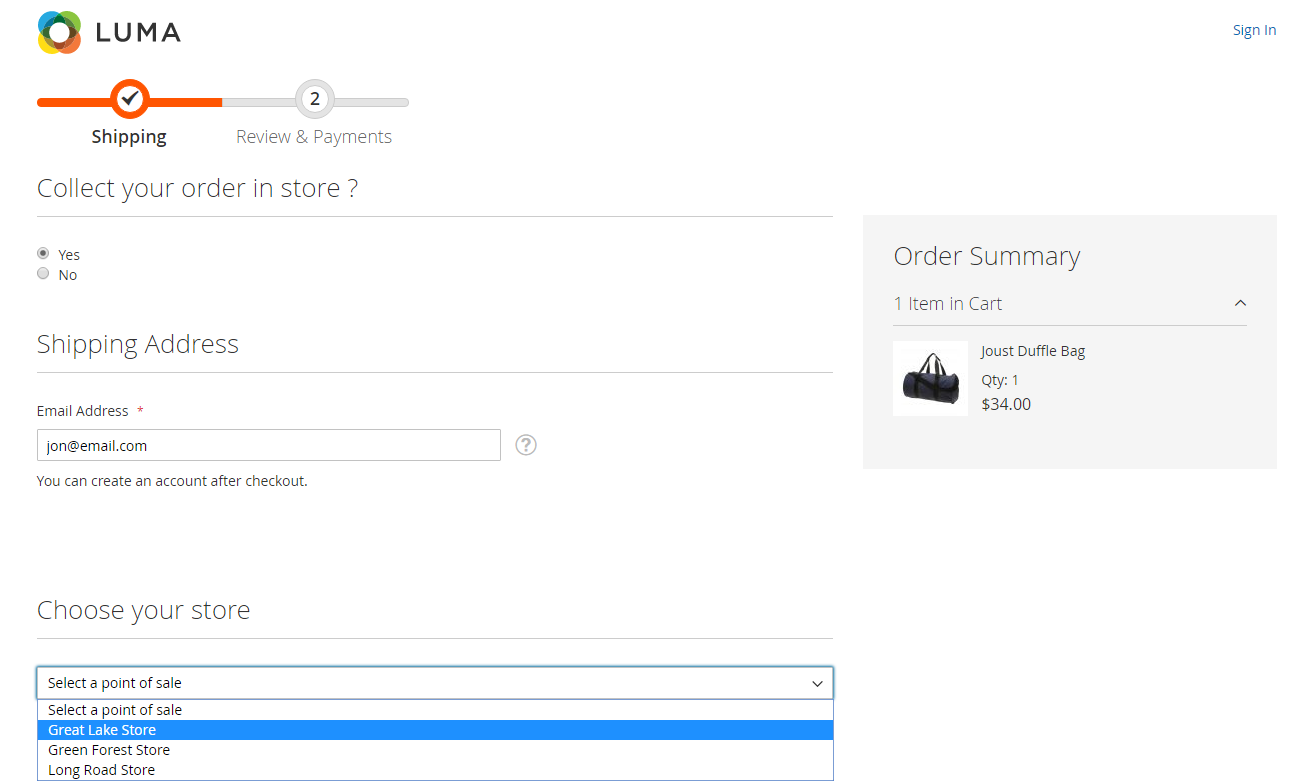 The Click & Collect method will also be displayed in the Estimate Shipping and Tax section from the order Summary as below.
Configure the Magento backend settings
You can configure the Magento backend settings from:
STORESSETTINGSConfiguration Sales Shipping MethodSCLICK & COLLECT
Order page
You have the possibility to display only the title in the shipping description of the order page from:
SalesOperationsOrders
When the option is enabled, only the title will be displayed.
 When the option is disabled, the full description will be displayed.
Configure the email settings
You can customize the emails from:
STORESSETTINGSConfiguration Sales Shipping MethodSCLICK & COLLECT
Order confirmation email
Guest order confirmation email
Copy of the confirmation email
You can send a copy of the confirmation email to the source selected for collecting the order. 
Configure the display settings
Click & Collect can be totally customized from:
STORESSETTINGSConfiguration Sales Shipping MethodSCLICK & COLLECT
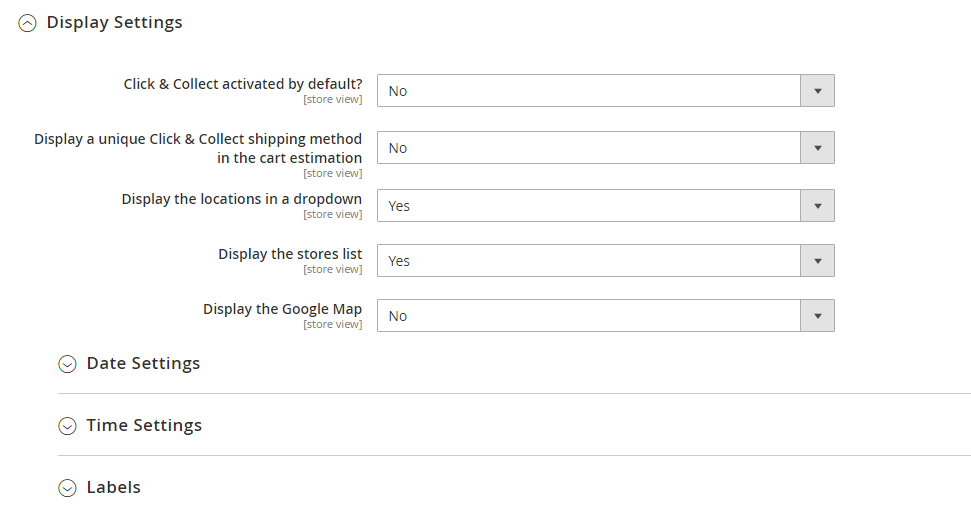 Here define the display of the Click & Collect:
- Click & Collect activated by default?
Automatically activate the Click & Collect method. - Display a unique Click & Collect shipping method in the cart estimation
If you select Yes, only one "Click & Collect" radio button will be displayed in the cart. - Display the locations in a dropdown
Choose to display the locations in a dropdown, or in a simple list with radio buttons.
If you choose to display the locations in a dropdown, you have the choice to:
- Display the stores list
Choose to display or not the list of the stores in the frontend. - Display the Google Map
Choose to display or not the Google Map in the frontend.

In the case where you don't want to display the location in a dropdown, your stores will be listed. You have the possibility to:
- Display the description of the locations
You can add the description of each store.
Date Settings
- Allow the customer to choose the day to pick up the order
Give the possibility to your customers to choose the day when to collect their orders. - Allow pickup method ahead
Choose how much time in advance the Click & Collect method can be planned. For example, allow the pickup method ahead 15 days. - Date format to display
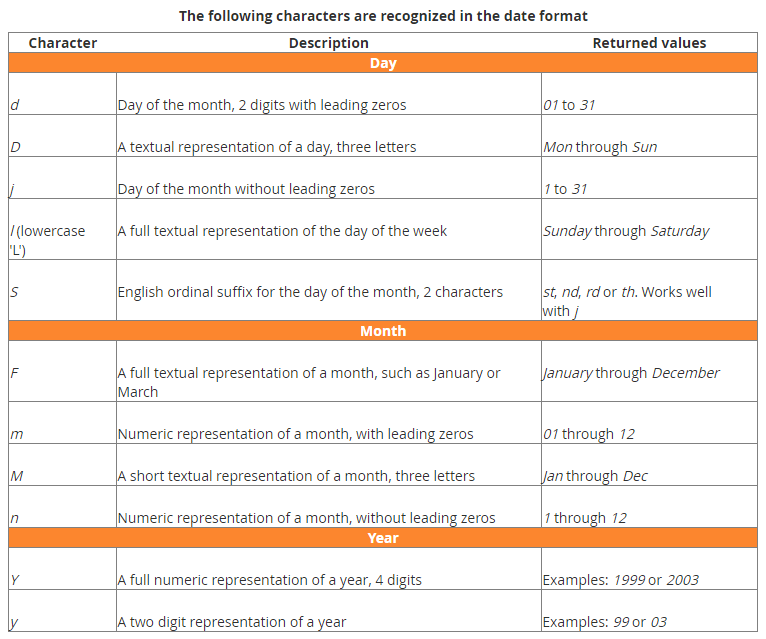
Choose how you want the date to be displayed in the frontend. A table should help you to configure the date format as you want it to appear.
For example, to write Wednesday 14th April, you should write:
m/d/Y
 Below, you will find the characters recognized in the date format.
Time Settings
- Allow the customer to choose the time to pick up the order
Give the possibility to your customers to choose the time when to collect their order. - Pickup time range
Define a Pickup time range. You need to be aware that this range shouldn't exceed 60 minutes. - Minimum time required to handle an order
Define the minimum time required to handle an order. In the case where you need one day to prepare the order, you can enter:
60See how to define a specific time to handle orders for a source. - Minimum time required to handle a backorder
Define the minimum time required to handle a backorder. In the case where you need 2 days to prepare the order, you can enter:
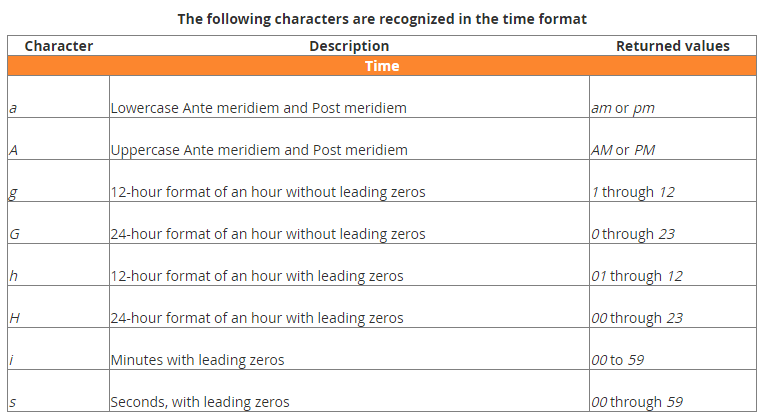
120See how to define a specific time to handle backorders for a source. - Time format to display
Choose how you want the time to be displayed in the frontend.
For example, to display 11:30 am, you should write:
h:i A
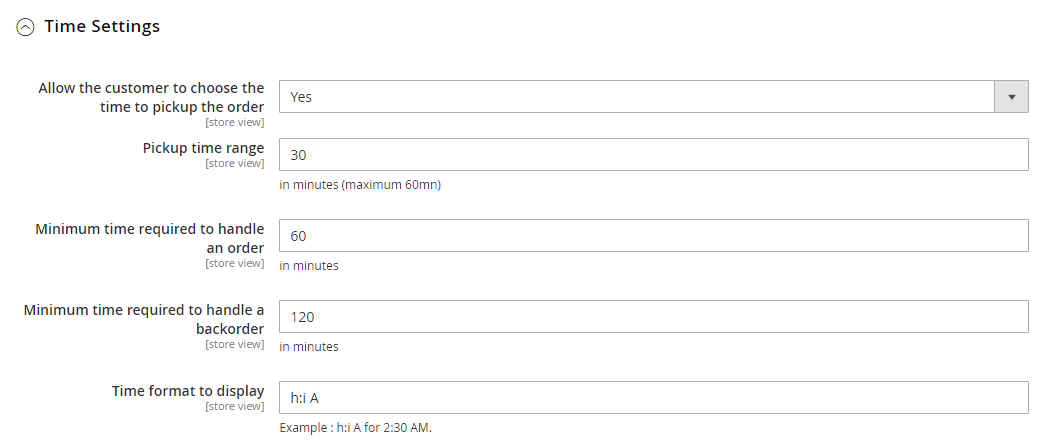 Below, you will find the characters recognized in the time format.
Labels
In that section, you can define labels for the below titles:
- Click & Collect activation title
Define the title when activating Click & Collect method.
It is displayed in the Shipping section of the checkout. - Shipping address title
Define your title for the Shipping address.
It is displayed in the Shipping section of the checkout. - Store choice title
Define your title when selecting the store.
It is displayed in the Shipping section of the checkout. - Ship to title
Define your title for the place to ship.
It is displayed in the Review & Payment section of the checkout.
Add a Store Locator to your page
You have the possibility to add the Store Locator widget to all your frontend pages.
Add the widget
You have the possibility to add a widget to let your customers see all your stores.
For that, go to:
ContentElementsWidgets
Click on Add Widget .
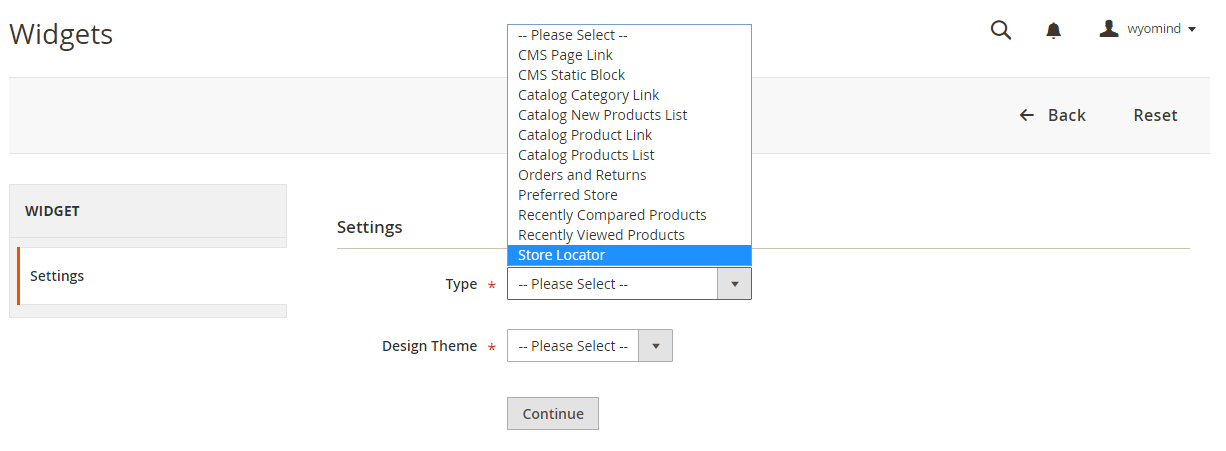
Select Store Locator as the type and choose your theme. Click on Continue.
Configure the Storefront Properties according to your needs and Add Layout Updates as in the example below.
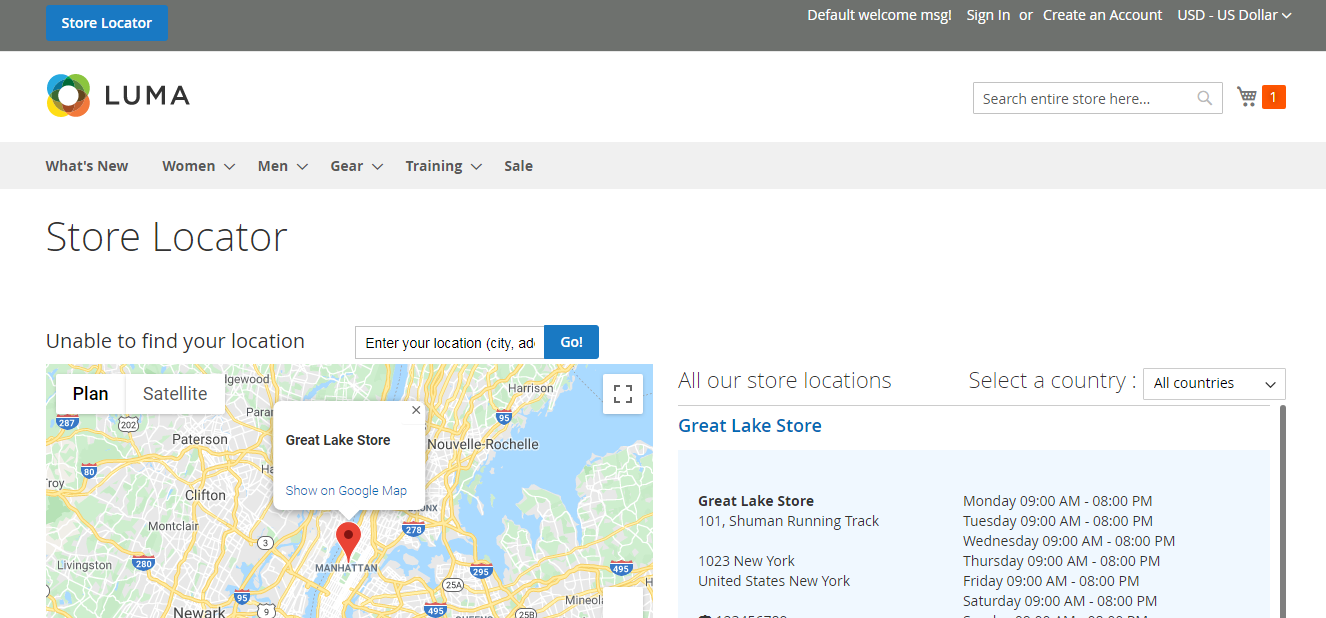
From the frontend, you should have the Store Locator widget displayed in your Page Header Panel.
STEP 3: Enable the Preferred store option
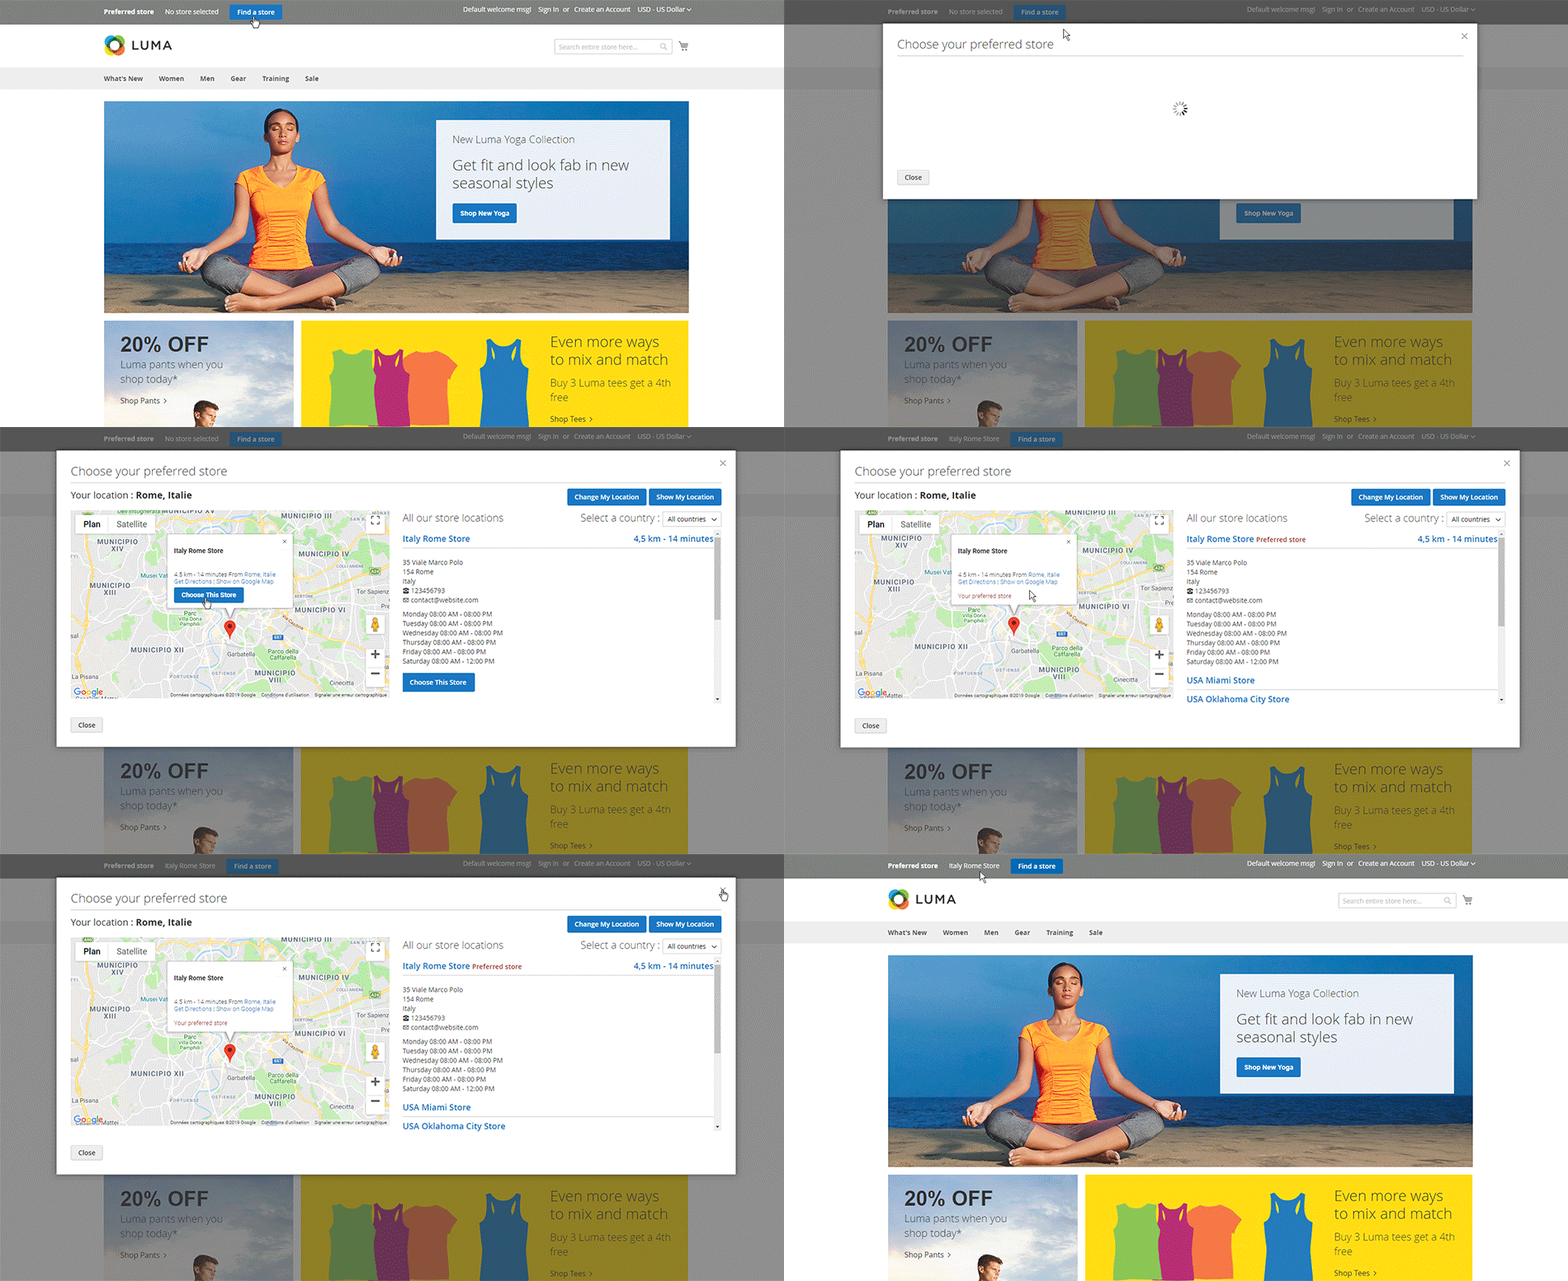
Your customers have the possibility to select their preferred store so that they don't have to worry anymore about having to choose a store during checkout.
You first have to add the widget to your website.
Add the widget
You have the possibility to add a widget to let your customers select their preferred store.
For that, go to:
ContentElementsWidgets
Click on Add Widget.
Select Preferred Store as the type and choose your theme. Click on Continue.
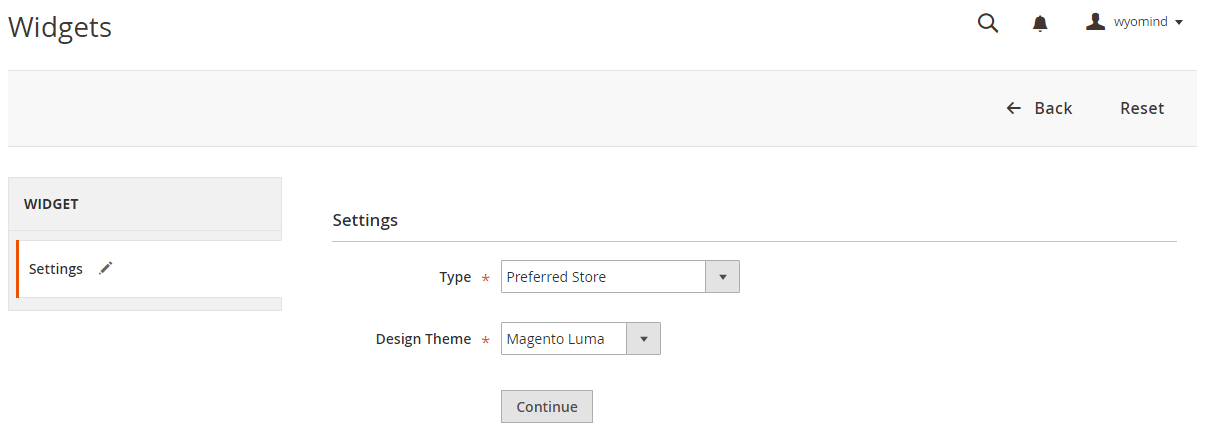 Configure the Storefront Properties according to your needs and Add Layout Updates as in the example below.
Finally, choose the widget options. You have the choice between:
You can also choose to automatically select the nearest store if the customer doesn't have selected a preferred store.
Select the preferred store
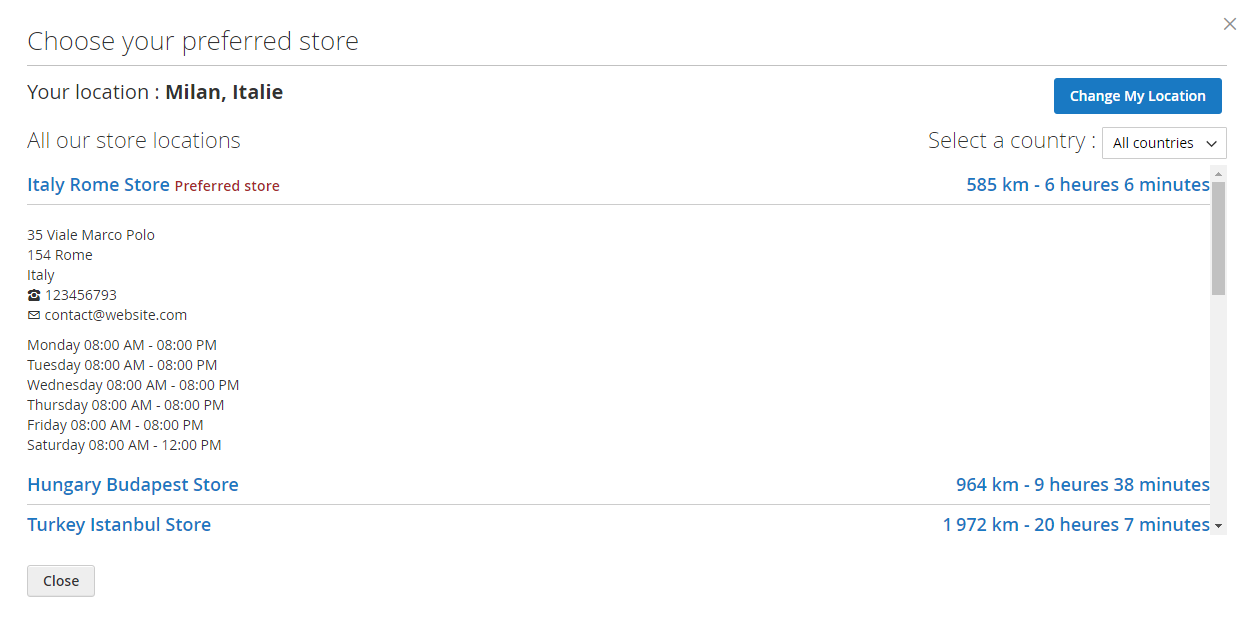
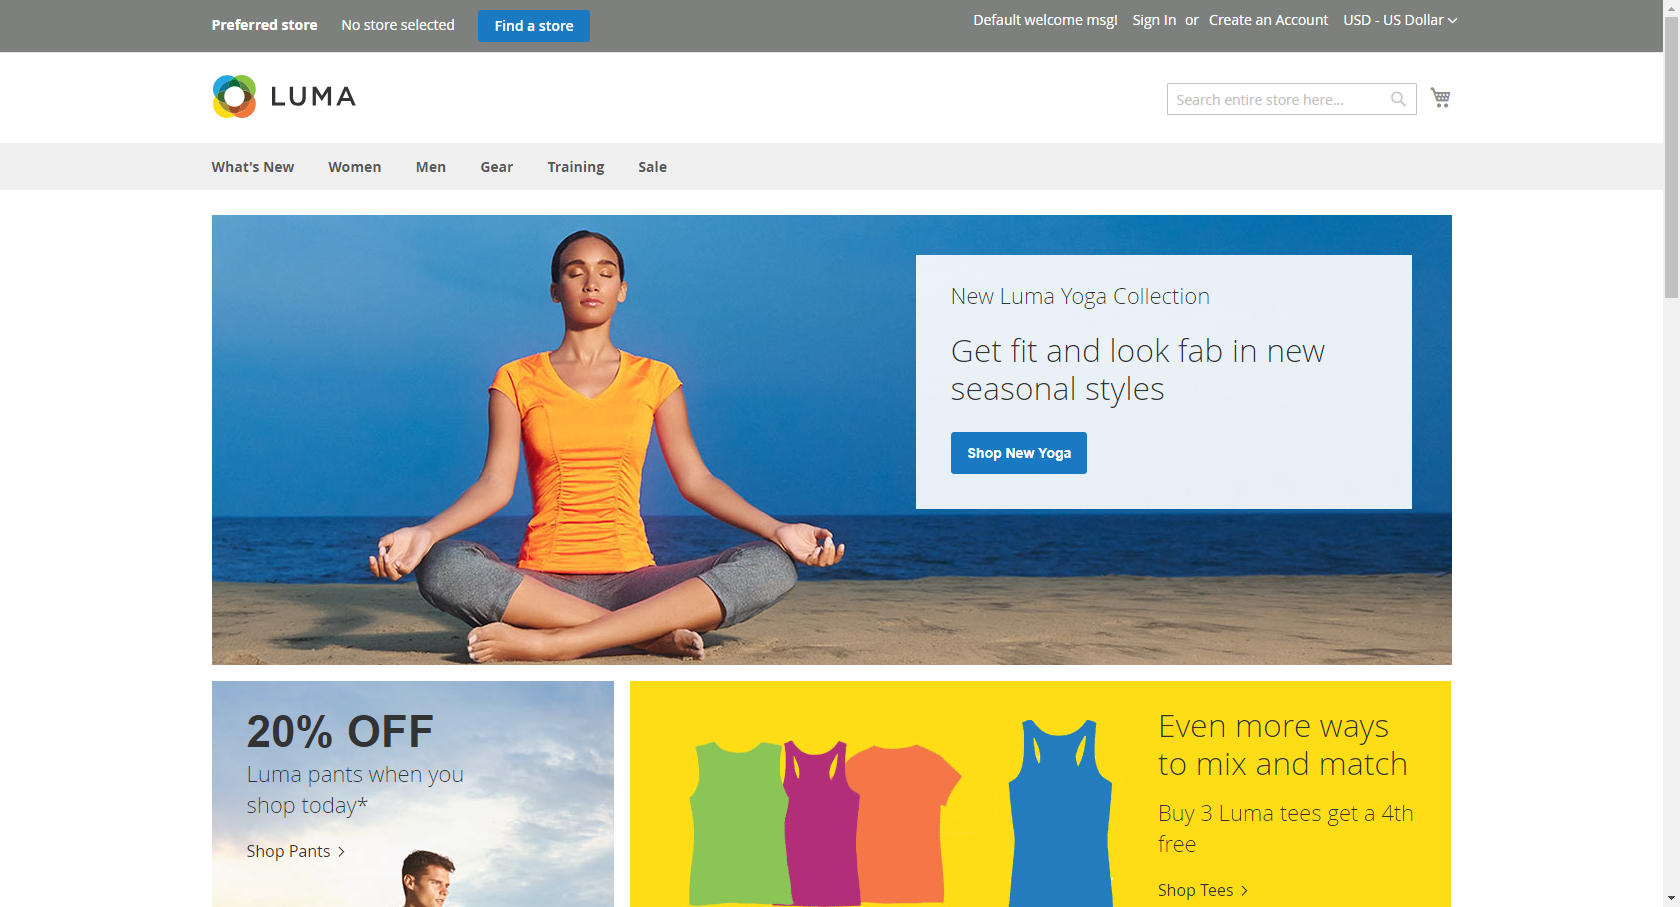
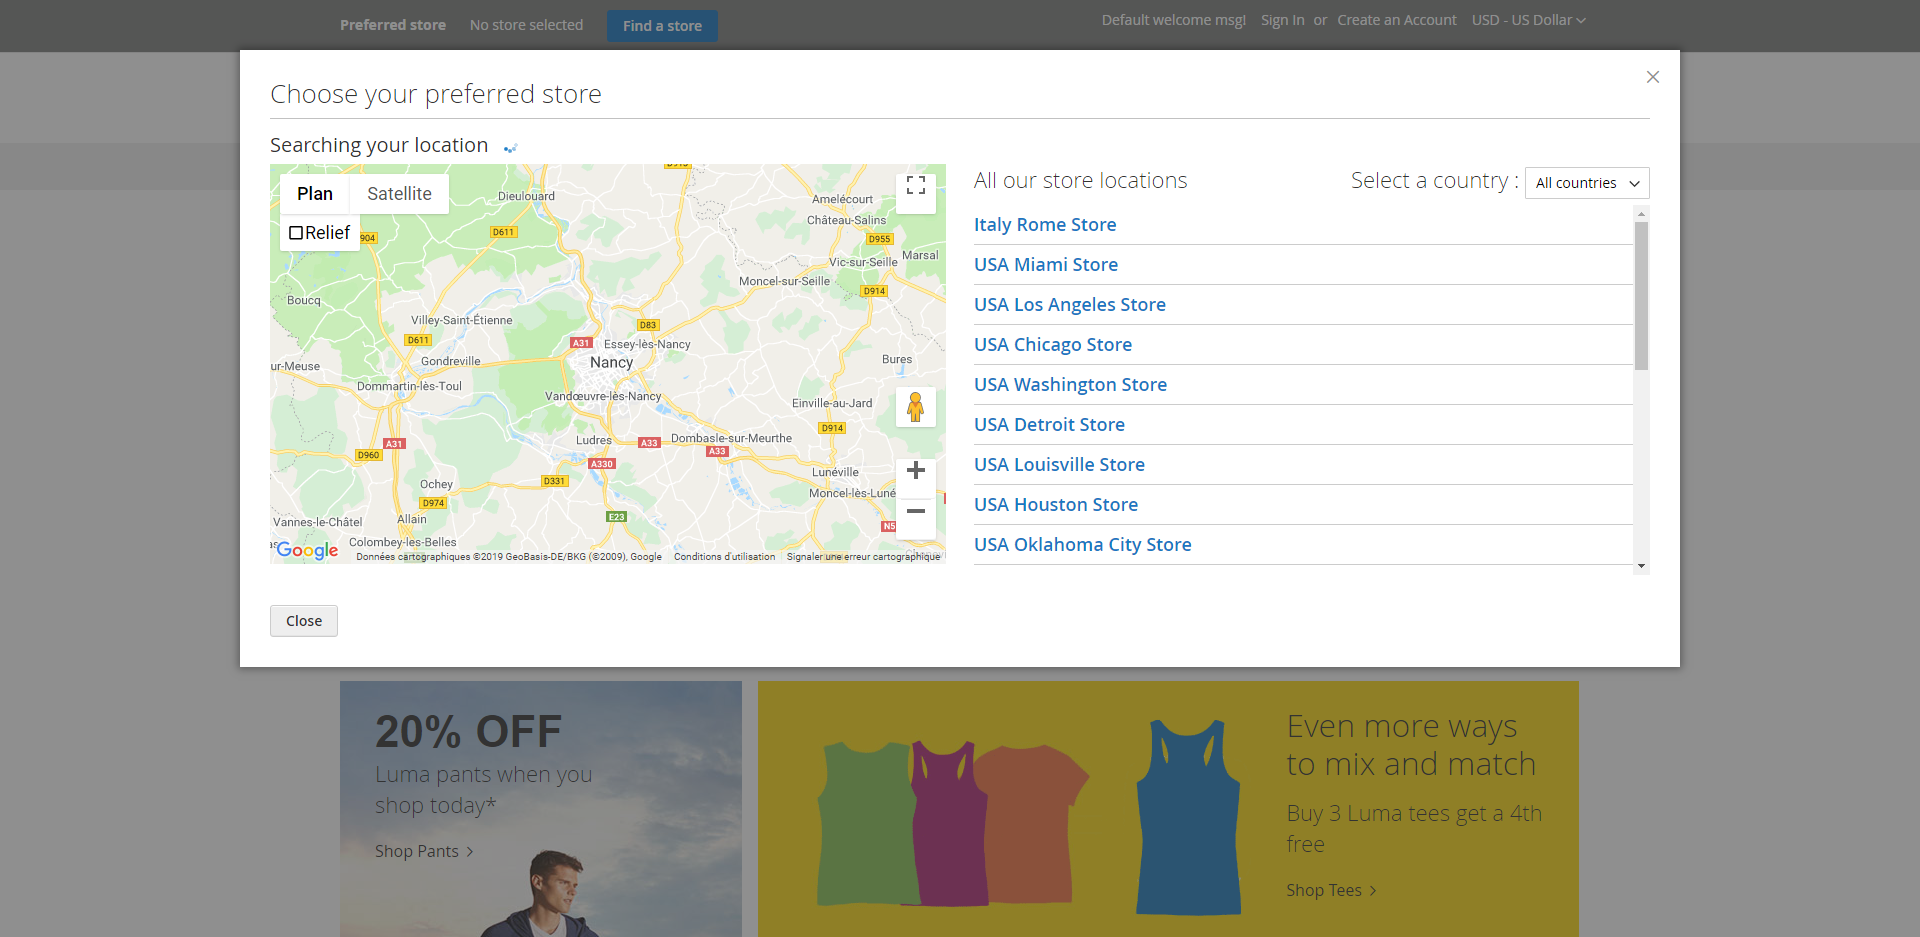
When the widget is added, your customers will then have the possibility to choose their preferred store by clicking on Find a store from the top bar.
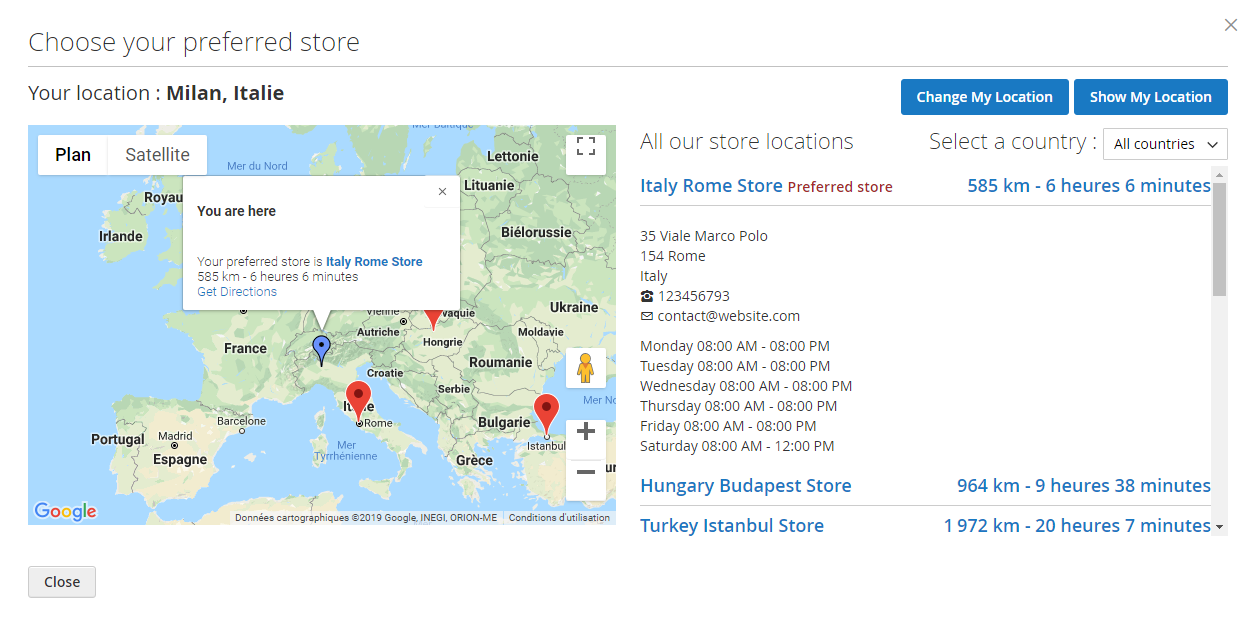
A popup should be displayed and list all available stores.
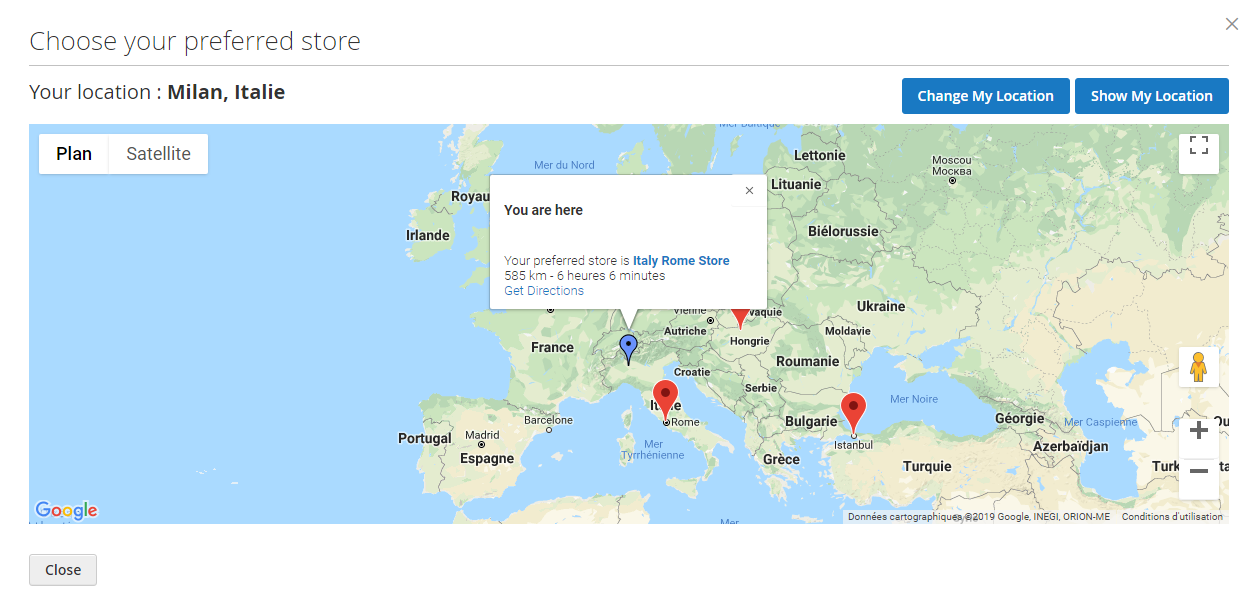
If enabled, geolocation can be used to propose the closest store and customers can also select their preferred store by clicking on Choose this store.
Once the store is selected, this will be displayed in the top bar.
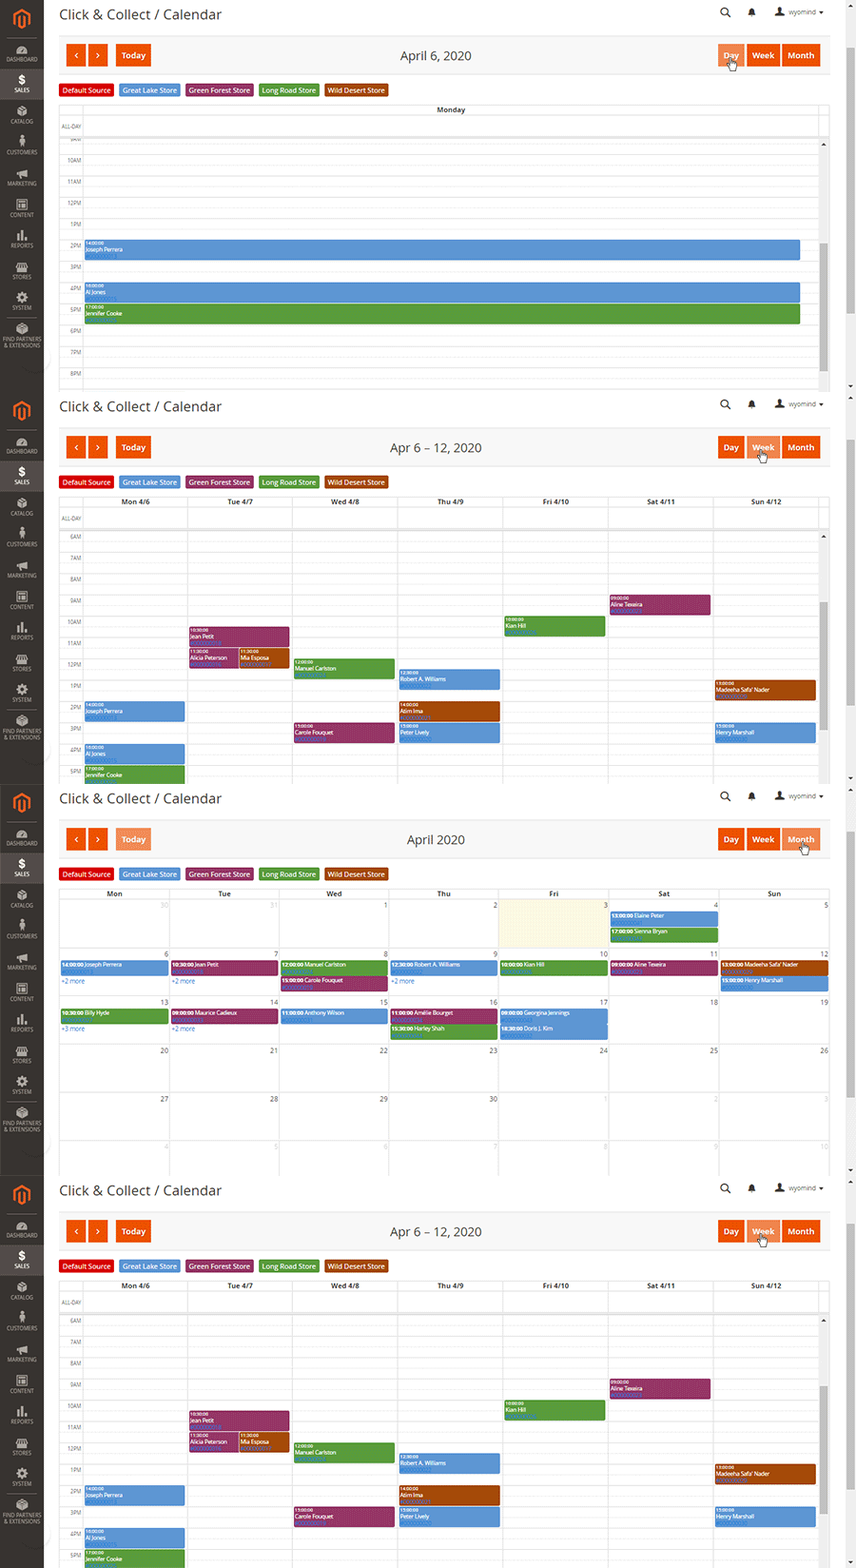
STEP 4: Check the calendar
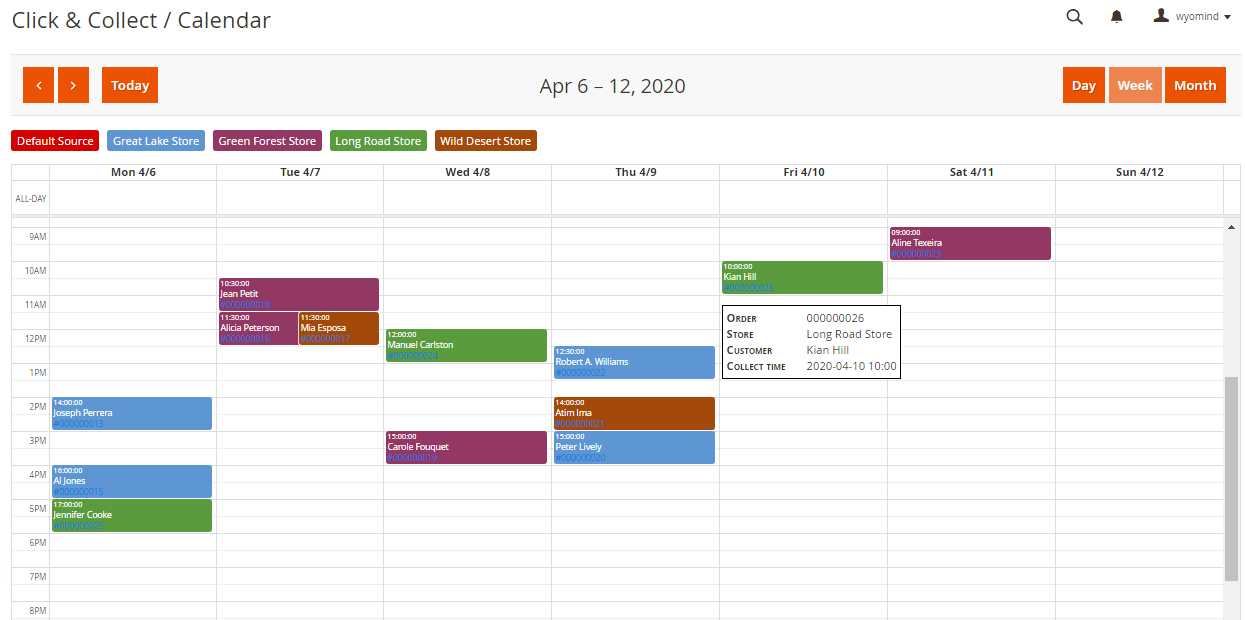
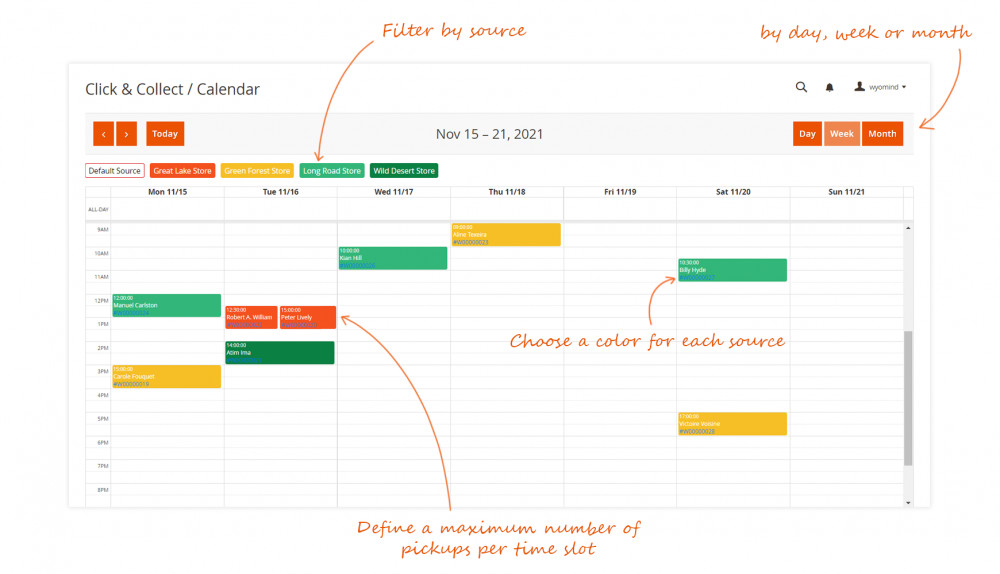
You can check all reserved time slots for each source from:
SalesClick & CollectCalendar
In the calendar, all reserved time slots are displayed and show the below information:
- Hour of pickup
The hour reserved by the customers to collect their orders is displayed. - Customer name
The full name of the customer is displayed - Oder id
Click on the order id to be redirected to the order's back-end page
When moving the mouse over the time slots, the above information will be displayed as well as the name of the pickup store.
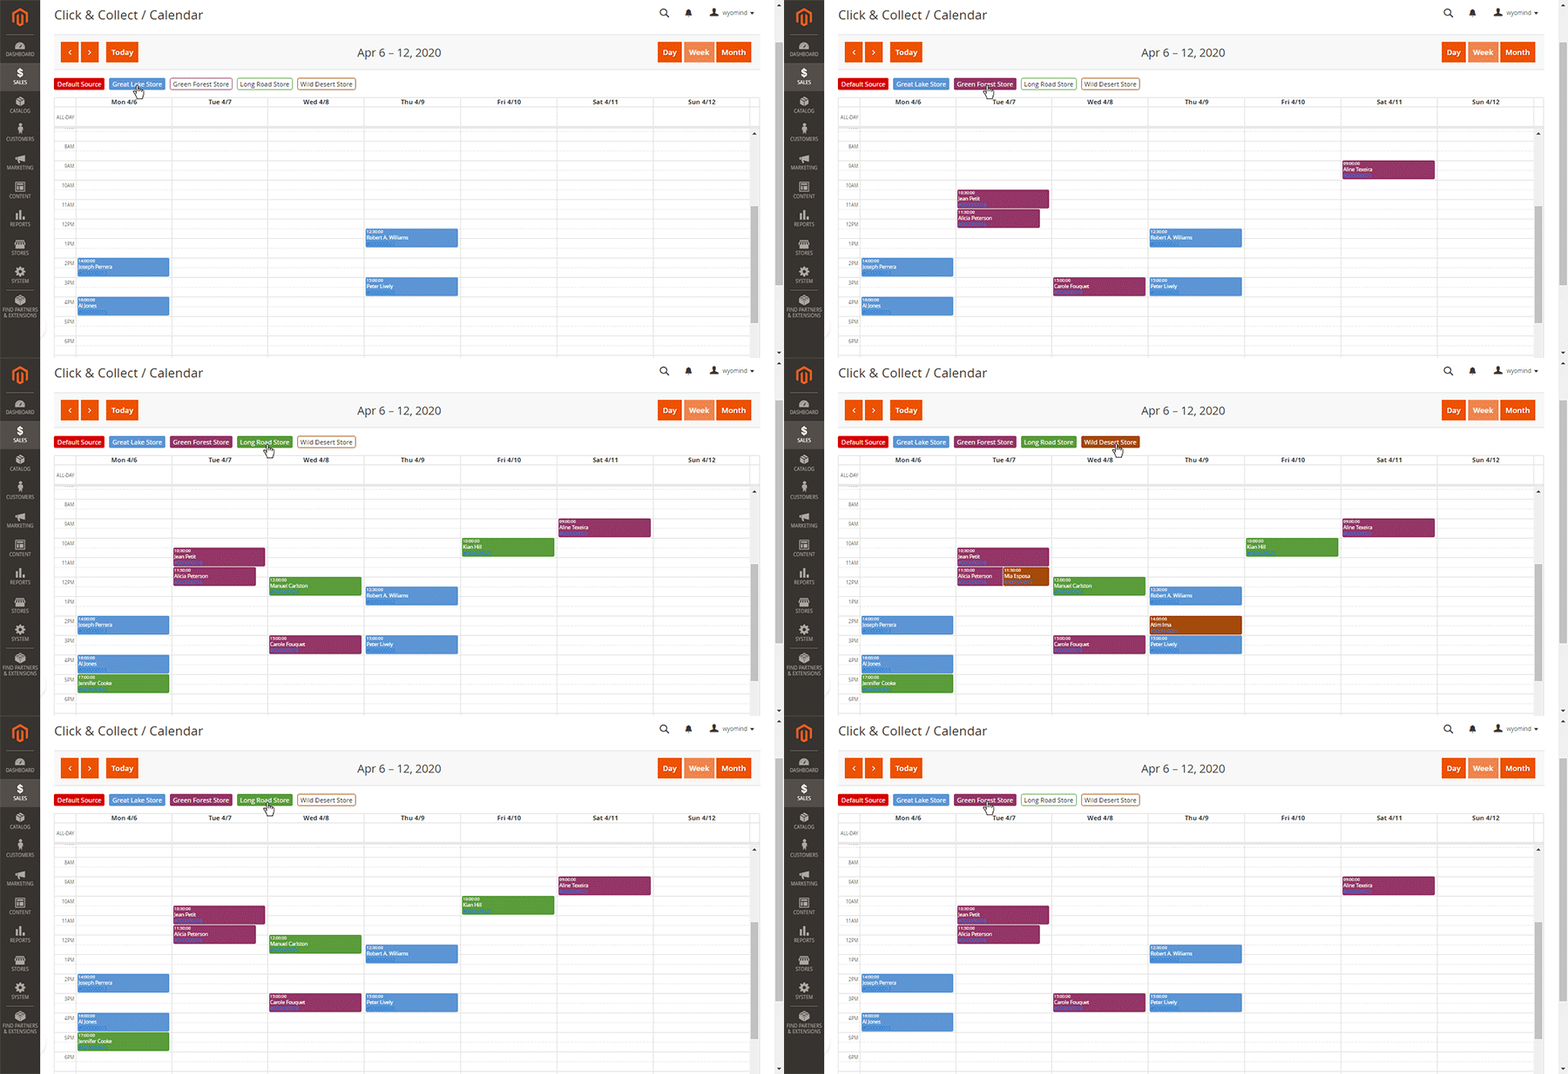
You have several possibilities to filter your time slots.
Time filter
Sources filter
Click & Collect allows you to filter all reserved time slots by source.
You can define a specific color for each source from:
StoresInventorySources


 Magento 2


























 After lots of research, I landed on selecting the Click & Collect extension from Wyomind. I haven't regretted this at all. I have managed to setup my stores and customised the store finder. I have integrated the click and collect into my store seamlessly
 I was looking for click&collect extension since native functionality into magento 2.4 does not work properly. After cheking the posibilities, wyomind click&collect seems to be the right one, and finally this is. But the most important is support team. The team is amazing, fast and professional, it is very nice to work with them.